newline Review
newline
www.newline.co
newline.co Review Guide: Everything You Need To Know + FAQ
Stuck jumping between random tutorials and still not shipping real projects? If you’ve been trying to learn modern web or crypto dev and keep hitting walls—outdated lessons, “Hello World” fatigue, and zero momentum—this is for you.
I spent real time with newline.co to see if it actually helps you build production-style apps, sharpen TypeScript, and level up for the kinds of roles and projects that matter right now—including web3 dashboards, analytics tools, and developer tooling.
Quick context: Active learning beats passive videos. Research in STEM shows hands-on learning improves outcomes and reduces failure rates compared to lectures (Freeman et al., PNAS). The question is: does newline deliver that kind of practical, project-first experience—without wasting your time?
What’s broken with most coding platforms
There’s no shortage of courses. The problem is signal.
- Outdated stacks that leave you rewriting code when you hit Next.js app router or new React features.
- Shallow projects that stop before auth, tests, data fetching, or deploys—aka the parts you actually need for real work.
- No feedback loop: you get stuck, can’t ask questions, lose momentum, and never ship.
- No TypeScript focus even though it’s everywhere in serious teams. TS ranks among the most-used languages in the latest Stack Overflow survey and GitHub’s Octoverse trends.
- Fluff pricing: paying for hours of video that never translate into a portfolio repo you can show in an interview.
If you’re targeting high-demand frontend or web3-adjacent roles—React/Next.js, TypeScript, Node, testing, and modern tooling—you need courses that feel like building a real app, not a demo toy.
What I’m promising you here
I cut through the noise and show you what newline actually does well, where it falls short, what you’ll build, how much it costs, and whether it fits a web3-focused learning path. No fluff—just the takeaways you need to decide fast.
Who should keep reading
- Frontend devs who want hands-on React/Next.js + TypeScript projects you can ship.
- Builders in crypto who need strong UI and dashboard skills for dapps, analytics, or bots.
- Backend-curious devs who learn best by coding real features: auth, state, testing, deploys.
- Self-taught learners who are done collecting tutorials and want portfolio-grade repos.
How I evaluated it
- Course quality & structure: pacing, clarity, and whether it matches modern patterns.
- Real-world projects: does it go past “Hello World” into auth, routing, state, tests, CI/CD?
- Instructor support/community: ways to get unstuck without losing days.
- Update cadence: signs of maintenance when frameworks change.
- Pricing & value: cost vs. project scope and practical outcomes.
- Web3 overlap: how well the skills translate to dapps, APIs, dashboards, and tooling.
Quick verdict (teaser)
- Strengths: Modern JS/TS stacks, clear explanations, and project-based courses that push you into “ship it” territory. Great for building dashboards, admin tools, and production-like frontends that pair well with web3 backends.
- Gaps: Web3-specific content (Solidity/Rust, protocol-deep dives) is lighter than ideal. You’ll likely combine newline with chain docs or contract courses.
- Bottom line: If you want to level up React/Next.js + TypeScript and build real apps you can show, this is a strong pick. If you want smart contract engineering, you’ll need a second resource.
So… what exactly is newline, who’s behind it, and how does the learning flow actually work day-to-day? Let’s break that down next.
What is newline.co and how it works
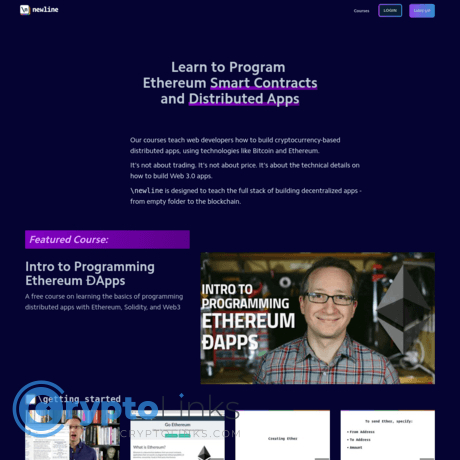
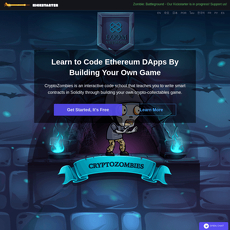
newline.co is a project-first learning platform for modern web development. It’s built around a simple idea: you learn fastest by shipping real apps. Instead of endless theory, you purchase a single course (or a bundle), and jump straight into step-by-step lessons with working code, repos, and clear milestones.
Here’s how the experience typically flows:
- Pick a course that matches your goal (React, TypeScript, Node, testing, deployment, etc.).
- Start with a guided setup — starter templates, clear requirements, and a roadmap of what you’ll build.
- Code-along videos + written explanations — you follow an instructor while also getting crisp text notes so you can move at your own pace.
- Build a production-like app — routing, state, API calls, auth, testing, and a real deploy. You end up with a portfolio-ready repo.
- Checkpoint your progress — modules are broken into logical milestones so you always know what’s next.
“The best way to learn to code is by coding something you actually want to use.”
I like that courses don’t bury you in jargon. You see patterns that map to real jobs: feature planning, component boundaries, TypeScript ergonomics, and how to keep dependencies from spiraling out of control. It feels like sitting next to a senior dev who shows you what matters and what to ignore.
Who’s behind it and credibility
newline is led by a tight-knit team that cut its teeth publishing practical dev content and then formalized that into full courses with a project-first philosophy. Instructors are practitioners — the kind who ship, teach, and maintain code in the open. What I look for when I judge credibility:
- Active repos per course — most courses link to GitHub starter and final projects, with issue threads and version bumps you can verify.
- Recent updates — course pages typically show “last updated” notes when frameworks shift (React/Next.js releases, TypeScript changes, Node LTS updates).
- Community signals — comments/Q&A under lessons and public chatter that the material helped someone ship a real feature or land an interview.
That mix of visible maintenance and public code is a trust signal for me. If I can audit the repo structure and commit history, I know I’m not walking into an outdated tutorial.
Course formats and learning flow
The format is intentionally straightforward so you can focus on building:
- Video lessons with tight edits — no rambling, just the steps you need.
- Written guides and snippets — perfect for skimming and copy-paste when you’re reviewing.
- Starter templates + final source — hop in fast, compare your code against the instructor’s, and refactor with confidence.
- Milestones/checkpoints — feature-by-feature progression (e.g., auth, data fetching, testing, deploy).
- Practical exercises — short challenges to lock in a concept right after you learn it.
That blend supports different learning styles. If you like to watch once, then rebuild from scratch with the written notes open, it works. If you prefer to pause the video every minute and code along, it works too.
Topics you can expect
newline’s catalog leans into the stacks that show up in real product teams and web3 frontends:
- JavaScript and TypeScript — modern syntax, typing patterns, and refactors that keep code safe as projects grow. For context, TypeScript sits near the top of language adoption and “most loved” rankings in the Stack Overflow Developer Survey, which tracks with what I see on hiring boards.
- React and Next.js — component patterns, routing, data fetching, server components, and real-world state management.
- Node.js fundamentals — building APIs, integrating third-party services, background jobs, and environment config.
- Testing — unit and integration testing with popular tools so you stop shipping regressions.
- Deployment — CI/CD basics, environment variables, and hosting providers common to modern teams.
These topics are especially relevant if you’re building crypto dashboards, analytics tools, or dev tooling where TypeScript reliability + React UX are non-negotiable. The State of JS trends echo this: modern teams standardize on React/TS for speed and maintainability.
Who it’s best for
If you want to build real apps and not just pass quizzes, this aligns:
- Beginners-to-intermediate developers who learn best by shipping features, not memorizing trivia.
- Frontend-focused devs leveling up with React, Next.js, and TypeScript to meet current hiring demands.
- Backend-curious builders who want to wire up Node APIs, auth, and testing without drowning in theory.
- Web3/crypto folks who need strong UI foundations for wallets, dashboards, and analytics — the parts users touch every day.
I’ve seen this profile succeed: start with a TS + React course, ship a small dashboard, then iterate toward auth, testing, and deploy. That sequence maps directly to the kind of tooling crypto teams need but rarely have time to teach from scratch.
Want to know which features actually make or break your learning speed here — things like project scope, code clarity, and update cadence? That’s exactly what I’m unpacking next.
Key features that matter (especially if you build in crypto)
When you’re shipping dashboards, bots, or dev tooling in crypto, you don’t have time for fluffy courses. You need patterns that survive production, not just “it runs on my machine.” That’s exactly where newline.co stands out: practical builds, clean code, and habits that translate directly to dapp frontends and analytics apps.
“Clarity scales. Hacks don’t.”
And because I care about outcomes, not hype, I look for signals that the work you do in a course will hold up in the real world—especially when wallets, rates, and on-chain data start flowing.
Project-based learning you can ship
This isn’t “watch a video, forget it tomorrow.” You build real apps end-to-end, with all the parts that usually break in production. That matters, because active, project-based learning consistently beats passive learning in skill retention and performance (see the PNAS meta‑analysis on active learning in STEM by Freeman et al., 2014).
- Production-like setups: routing, auth, state, tests, env handling, error boundaries, logging, and deploys. The things recruiters and teammates expect to see.
- Crypto-ready patterns: even if the course isn’t chain-specific, the stack maps cleanly to dapp frontends and ops tools:
- Testing in context: component tests with Vitest/Jest, integration with Testing Library, and E2E with Playwright—so your wallet connect modal and charts don’t silently break after a dependency bump.
- Deployment you’ll actually use: Vercel/Netlify flows, CI basics, environment secrets, and performance budgets. Ship a live URL and show it in your portfolio.
If you’re thinking, “Will this help me build a token analytics dashboard or a validator ops panel?”—yes. Swap in your API and you’re most of the way there.
Code quality and clarity
Readable, modern code is the fastest path to reliable releases. The courses lean on TypeScript-first setups, clear file structure, and predictable state/data patterns—exactly what you want when integrating wallets, RPCs, and third‑party APIs.
- TypeScript by default: safer API calls, explicit models for on-chain data, fewer “undefined at runtime” surprises. TypeScript is consistently among the most loved and wanted languages (Stack Overflow Developer Survey 2024) and one of GitHub’s top languages by contributors (Octoverse).
- Modern data fetching: TanStack Query/React Query for caching and revalidation; App Router patterns in Next.js for streaming and server actions where appropriate.
- Validation where it counts: schema validation with Zod or similar before data hits your UI—great for messy third-party endpoints and rate-limited RPCs.
- Clean architecture touches: separation between UI, services, and adapters; reusable hooks; and feature-based folders that keep teams aligned as the app grows.
Result: fewer regressions, faster reviews, and code you’re not embarrassed to share.
Instructor support and community feel
Good courses are more than videos—they’re a feedback loop. You’ll typically find Q&A threads, comments, or community spaces to ask questions and compare approaches. Expect practical help like “why your auth callback fails on serverless” or “how to normalize incoming token metadata.”
- Q&A threads: targeted answers pinned under lessons, so you learn from past roadblocks.
- Community touchpoints: discussion boards or group channels for reviewing code snippets and swapping deployment tips.
- Realistic expectations: response times vary by course and instructor; popular tracks tend to get faster replies.
It’s the safety net that keeps you moving when you’re 90% done and blocked by one annoying bug.
Updates and maintenance
Frontend changes fast. I look for simple, reliable signs that courses aren’t abandoned:
- Version bumps in repos: React 18+, Next.js App Router usage, Vite upgrades, Node LTS targets.
- Change logs and notes: short migration guides when APIs shift (for example, Next.js route handlers or server actions changes).
- Refreshed clips for breaking changes: quick re-records instead of leaving you with outdated patterns.
These maintenance habits matter. They save you hours when a provider updates SDKs or when your build breaks the night before a demo.
Certificates, downloads, and extras
You’ll finish with proof you’ve done the work and assets you can reuse on the next build.
- Completion certificates: simple signals for clients and hiring managers—paired with a live URL and GitHub repo, they’re more than a badge.
- Downloadable resources: starter kits, checklists (testing, accessibility, perf), and reference snippets you can paste into new projects.
- Reusable templates: auth flows, dashboard shells, and data fetching patterns that become your personal boilerplate.
Studies show that spaced recall and reference materials improve long-term retention. Having concise checklists and templates makes you faster on the next sprint—especially when deadlines get real.
Quick data points if you care about future-proof skills:
- Active learning in STEM boosts exam scores and lowers failure rates compared to lectures (PNAS, 2014)
- TypeScript remains among the most loved and desired languages (Stack Overflow 2024
- GitHub Octoverse highlights TypeScript as a top language by contributors, signaling strong industry adoption
Now, here’s the practical question everyone asks right before they commit: how much does this cost, and when does a bundle actually save you money? Keep reading—I’ll break down pricing, guarantees, and where the best value sits for builders who plan to ship multiple real apps.
Pricing, plans, and value for money
If you’re trying to budget your learning, newline keeps things simple: courses are sold as one-time purchases, and you can often grab themed bundles if you want to build multiple projects. No subscription treadmill, no endless upsells—just pick what you want to ship and buy it outright.
Quick feel for pricing: most single courses I’ve seen are typically under the $200 mark, while bundles land in the low-to-mid hundreds depending on what’s inside. Pricing can change, so always check the product page before you buy.
“The most expensive course is the one that doesn’t help you ship.”
Buying single courses vs. bundles
Here’s how I decide what to buy based on my goal and time window:
- Go single-course if you have one clear target (e.g., “Build a production-ready Next.js dashboard with TypeScript”). You get a focused codebase and you’ll ship faster without spreading yourself thin.
- Go bundle if you plan to build 2–3 related projects over the next 1–3 months. Bundles usually include complementary topics (UI + testing + deploy, or React + Node + auth), which compounds learning and typically costs less than buying each one separately.
Real-world example of how I’ve used this: when I needed a fresh React/TypeScript repo for an on-chain analytics panel, I bought one flagship React course first to validate the teaching style and scaffolding. Two weeks later, I grabbed a bundle that included testing and deployment so I could harden the dashboard and push it live. Single purchase to test, bundle to scale—clean and cost effective.
Refunds, trials, and guarantees
Risk matters. I always look for a clear refund window on the checkout page. newline typically presents a straightforward guarantee per course—sometimes stated as a money-back period or a “try it without risk” note. The exact terms can vary by product, so read the course page closely. Also check whether the purchase includes long-term access and updates; when it does, that’s a huge plus if frameworks change (they always do).
- Before you buy: look for a refund/guarantee badge on the course page.
- Right after purchase: skim the first few lessons in the same session—if it doesn’t click, use the guarantee window.
Discounts and promos
If you’re patient, you can often save. Here’s what I watch:
- Seasonal sales: Black Friday/Cyber Monday, New Year, and back-to-school are common windows for price drops.
- Newsletter codes: subscribe on newline.co; I’ve seen limited-time coupons sent to email.
- Student/education perks: some course providers offer student-friendly pricing if you reach out. If that applies to you, it’s worth asking.
Smart move: if you’re set on a bundle but not in a rush, add it to your notes and wait a week or two for a promo. If your build has a deadline, pay full price and buy back time—you’ll forget the $20–$50 savings long before you forget a delayed launch.
Value vs. alternatives
Different platforms deliver value in different ways. Here’s how I stack newline up against the usual suspects when your goal is to build production-like projects you can ship:
- Udemy: lowest prices and huge selection. Great for quick hits or a narrow topic. Quality varies; many courses aren’t set up as end-to-end, production-like builds. You’ll often need to stitch multiple courses together to ship a full app.
- Frontend Masters: subscription-based and highly curated. Fantastic instructors and deep workshops. Less “follow this repo to a finished product,” more “master the concepts and patterns.” If you love workshops and theory-to-practice, it’s a win. If you want a single cohesive project, you may need to assemble your own path.
- egghead: short, focused lessons. Ideal for solving one problem fast or learning a micro-skill. Not usually structured as full, end-to-end builds.
- Coursera: academic and structured with assessments. Good for theoretical grounding and credentials. Slower pace, and less likely to give you a ready-to-ship repository at the end.
- YouTube + docs: free and surprisingly powerful, but the time cost is real. You’ll spend hours curating, context switching, and reconciling different approaches. Great for exploration; risky for deadlines.
Where newline shines is the middle ground: a practical, project-first build with clear structure and modern stacks—without sinking you into a subscription. If you value a “press play, code along, and ship” experience, the price makes sense. A single completed project repo that you can show to a client, recruiter, or your own team can pay for itself in a week.
One more way I look at value: cost per hour of progress. If a course takes 10–15 hours and gets you from blank folder to a deployed, tested app with TypeScript and sane architecture, the effective cost per productive hour is often far better than bouncing across five cheaper-but-incomplete resources.
Still wondering whether that spend makes sense if your goal is crypto-focused work? In the next section, I’ll break down exactly how this translates to building dapps, dashboards, bots, and analytics tools—and what you might still need to add. Want the blunt answer on whether it’s worth it for web3 builders?
Is newline good for web3 and crypto-focused developers?
If you’ve ever watched a wallet connect spinner freeze during a live demo, you know the pain. Web3 success lives or dies on solid frontend, TypeScript, and predictable deploys. That’s exactly where newline pulls its weight: it trains the “boring but critical” parts that make your on-chain magic feel effortless for users.
“Build boring, then add magic — the boring part keeps users, the magic gets them talking.”
Relevant skills for web3 work
When I’m shipping dashboards, bots, or analytics overlays, I don’t want surprises in production. newline’s strengths map cleanly to that need:
- React/Next.js for dapp UIs and dashboards: routing, SSR/ISR for fast data pages, dynamic routes for addresses/txs, and error boundaries so a flaky RPC doesn’t crash the whole app.
- TypeScript everywhere: typed API clients, typed state, and safer SDK integration. TS cuts entire classes of bugs. It’s not just my preference — JavaScript and TypeScript consistently rank among the most-used and loved technologies in recent industry surveys (Stack Overflow 2024, GitHub Octoverse).
- Node for scripts and APIs: cron-like jobs to index events, cache token metadata, queue webhook processing; REST/GraphQL for bridging on-chain and off-chain data.
- Testing that mirrors reality: component tests for wallet states (connected, locked, wrong chain), API tests for rate limits and RPC fallbacks, and e2e flows with Playwright or Cypress.
- Deploys that just work: CI/CD to Vercel/Netlify, environment variable hygiene, and staged rollouts so a bad ABI or RPC outage doesn’t nuke your app.
These fundamentals align with how most crypto teams actually ship. The latest developer reports continue to show strong JavaScript/TypeScript usage across crypto tooling and frontends (Electric Capital Developer Report). Translation: if you want to move fast in web3, getting these pieces tight is non-negotiable.
Concrete examples of what you can realistically build with newline’s skill set (plus the right web3 SDKs):
- Wallet-aware portfolio dashboard: Next.js + TS UI with account pages, wallet connect, and charts that pull token balances via viem or ethers.js, cached on the server for speed.
- NFT gallery with activity feed: Server-rendered listings, image optimization, and infinite scroll; background Node worker to refresh metadata and floor prices.
- Analytics panel for on-chain events: A typed API that aggregates logs, a clean UI to filter by address/contract, and e2e tests covering chain switches and RPC fallbacks.
- Bot and alerting tooling: Node job that watches for events and pushes alerts to Slack/Telegram; robust retries and typed payloads so it doesn’t spam false positives.
What’s missing or light
Where you’ll likely need outside help:
- Smart contracts: Deep Solidity/Rust patterns, testing with Foundry/Hardhat, gas optimization, or protocol design are not the platform’s core. Pair with:
- Foundry Book, Hardhat
- Alchemy University for Ethereum foundations
- scaffold-eth 2 for a great full-stack starter
- Protocol specifics: Chain security models, L2 nuances, MEV-aware UX, cross-chain bridging patterns, or indexing at scale (e.g., The Graph subgraphs) will require protocol docs and specialized courses.
- Wallet UX patterns: You’ll implement them fine with React/TS, but templates for complex wallet flows (multi-chain, multi-sig, session keys) are better sourced from tools like wagmi, RainbowKit, and WalletConnect.
In short: newline nails the app shell, not the chain internals. That’s okay. Most teams split those concerns anyway — and it keeps your learning path focused instead of chaotic.
Suggested learning paths
If I were planning a tight, outcome-driven sprint, I’d pick one of these:
- Path A: JS/TS essentials → React/Next → Testing → Deploy
- Outcome: wallet-ready dashboard with robust state, error boundaries, and e2e tests.
- Add-ons: connect via wagmi/viem, push to Vercel, monitor logs.
- Path B: Node APIs → Auth → Data fetching → Caching/perf
- Outcome: typed API that proxies RPC calls, rate-limits, and caches hot queries.
- Add-ons: Sign-In with Ethereum (SIWE), fallback RPC providers (e.g., Infura/Alchemy), stale-while-revalidate caching.
- Path C: UI frameworks → State management → Charts → Realtime
- Outcome: analytics UI with live price/volume, contract event streams, and clean charts.
- Add-ons: web sockets for mempool or event feeds, charting libs, optimistic UI updates.
How I’d use it alongside web3 learning
Here’s a practical way to blend newline with chain-specific work and ship faster:
- Week 1: Build a Next.js + TS dashboard skeleton. Add auth (email or SIWE), layout, routing, and basic testing.
- Week 2: Wire a typed API in Node to aggregate on-chain reads (via viem/ethers) and off-chain data (pricing, metadata). Add caching, loading states, and error fallbacks.
- Finish: Connect a simple contract flow from a focused Solidity course (mint, swap, or claim). Use RainbowKit + wagmi for wallet UX, deploy to Vercel, add e2e tests, and share the live URL.
Prefer analytics? Replace the contract flow with a subgraph from The Graph. Prefer low-code speed? Try thirdweb for contract deployment and permissions while keeping your TypeScript rigor on the frontend.
I’ve seen this combo work again and again: let newline harden your UI, TypeScript, and deployment muscle, then plug in chain-specific pieces from the right ecosystem docs. It’s the fastest path I know from “idea” to “people can click it.”
Want the straight answers on update cadence, difficulty level, certificates, and how it stacks up against alternatives? I’ll tackle those next — what’s the one thing you absolutely want to know before you pull the trigger?
FAQ: Real questions people ask about newline.co
People also ask (from Google and the community)
- Is newline.co legit and worth the money?
- Are the courses updated for the latest React/Next.js/TypeScript?
- Is newline good for beginners or only intermediate devs?
- How long does it take to finish a course?
- Do I get a certificate of completion?
- What kind of support do I get if I’m stuck?
- Does newline teach web3 or blockchain directly?
- How does newline compare to Udemy, Frontend Masters, or Coursera?
- Can I put these projects in my portfolio?
- What’s the refund policy or guarantee?
- Do courses include full source code and repos?
Quick answers from my testing
Is newline.co legit and worth it?
Yes—legit and focused on project-based learning. It’s not the cheapest option, but you’re paying for structured builds with production-like setups rather than scattered tutorials.
Are courses kept up to date?
Generally yes. I saw version bump notes, updated starter repos, and callouts when APIs changed. Still, always check the course page’s “last updated” and repo activity before buying.
Beginner-friendly?
Beginner-to-intermediate friendly. If you’ve done a JS crash course or basic React, you’ll be fine. Total beginners can start here, but expect to pause and rewatch—project-first teaching assumes you learn by doing.
Time to finish?
Plan a focused weekend for smaller builds and 1–2 weeks (30–60 minutes a day) for flagship projects. Double your video time estimate to account for coding, debugging, and deploying.
Certificates?
Some courses provide completion certificates or proof of completion. If it’s critical for you (e.g., LinkedIn), confirm on the course page or contact support. Either way, the best “credential” is your live app and GitHub history.
Support when stuck?
You’ll typically get Q&A threads and email, sometimes community channels. Response times vary by instructor/course. I recommend posting clear screenshots, logs, and repo links to get faster help.
Web3-specific content?
Light. You won’t find deep Solidity/Rust tracks here. The strength is frontend, TypeScript, and Node—exactly what you need for dapp UIs, dashboards, bots, and developer tools. Pair it with chain-specific courses for on-chain logic.
How does it compare to Udemy/Frontend Masters/Coursera?
- Versus Udemy: fewer courses, higher quality control, more cohesive projects; pricier than discount-marketplace deals.
- Versus Frontend Masters: similar quality; newline leans more on full apps and deploys, while FEM shines with topic-deep workshops.
- Versus Coursera: more practical and less academic; faster to portfolio results.
Portfolio-ready projects?
Yes. That’s the point. You’ll build deployable apps with auth, routing, data fetching, tests, and CI/CD in some courses. Rename the repo, polish the README, and ship to a live URL.
Refunds or guarantees?
There’s typically a satisfaction guarantee/refund window, but terms can vary by product and timing. Always read the specific refund policy on the checkout page before you buy.
Source code included?
Yes—starter templates and full source are standard. You’ll code along and compare to the final repo when needed (huge for debugging and learning patterns).
“I took a Next.js + TypeScript dashboard course and shipped a live analytics page in 9 days. I reused the form patterns and auth flow on a DeFi dashboard the week after.”
Pros and cons at a glance
- Pros: Project-based builds, current stacks (React/Next.js/TypeScript/Node), clean code, deploys and testing, strong fit for web3 frontends and tooling.
- Cons: Limited chain-specific content (Solidity/Rust), instructor response times can vary by course, pricing is higher than budget marketplaces.
Extra resources worth checking
- Official course pages for “last updated” dates and syllabi
- Public GitHub repos for starter and final code
- Framework release notes (React, Next.js, TypeScript) to track breaking changes
- Testing tool docs (Jest, Playwright, Vitest) for up-to-date patterns
- Deployment docs (Vercel, Netlify, Render) to mirror your production setup
Want a simple, no-fluff plan to pick the right course and actually finish it without burning out? I’ve got a step-by-step game plan next that you can start tonight—even if you only have 30 minutes. Ready to make your first build shippable this week?
How to get started and make the most of newline
Here’s a simple, no-fluff way to test the platform, pick the right course, and actually finish. I’ve used this exact approach to ship dashboards, bots, and data tools without getting stuck in tutorial limbo.
Step-by-step starter plan
- Pick one very specific goal
Examples:- Build a Next.js + TypeScript dashboard that tracks token prices and gas fees
- Create a Node + TS API that aggregates wallet data from a public endpoint
- Set up a testing suite for a React app you already have
- Choose a course that directly maps to that goal
Look for project-based courses that ship a real app shell (routing, state, testing, deploy). Watch the free preview, skim the repo, and check when it was last updated. If the stack versions are current and the instructor shows test coverage and a deployment step, you’re on the right track. - Time-box 30–60 minutes per day for 10 days
Put it on your calendar, same time daily. Research on the spacing effect and retrieval practice shows short, consistent sessions beat marathon cramming. Keep your phone in another room; context switching kills momentum. - Set up your repo and workflow on day 1
- GitHub repo with a clear README, a simple project board (Backlog → In Progress → Done)
- ESLint + Prettier + TypeScript strict mode
- Pre-commit checks with husky and lint-staged
- Env secrets ready for deploy (
NEXT_PUBLIC_*, API keys)
- Code along, but take “active” notes
After each section, write a 3–5 line summary in your own words and a tiny snippet you can reuse. This is retrieval practice—you’ll keep far more than by passively watching. - Commit small, commit often
One feature = one commit. Use messages like “feat: add watchlist state with URL sync” or “test: add component tests for ChartCard.” You’ll thank yourself when debugging. - Ship to a live URL before you’re “ready”
Deploy early on Vercel or Netlify. For Node APIs, try Railway or Render. Real deployments uncover missing envs, build step issues, and routing gotchas that local dev hides. - Add one stretch feature that’s relevant to crypto
Examples:- Integrate CoinGecko for token prices, cache results client-side, then move to a server endpoint
- Use wagmi + viem to show wallet balance and recent transfers
- Pull gas data via Alchemy or Infura, add a simple alert if gas < X
- Share it
Post the live URL, a 60-second Loom demo, and your GitHub repo. A short “what I built + what I learned + next step” post on X/LinkedIn or a dev forum can land feedback and accountability.
Finish one small app fast, then extend it. Shipped beats perfect—especially when your goal is a portfolio that proves you can build.
7-day example plan: Next.js + TS Token Watchlist
- Day 1: Repo, tooling, Next.js + TS scaffold, deploy to Vercel
- Day 2: Layout, routes, basic state (watchlist), save to localStorage
- Day 3: Fetch token prices from CoinGecko, error states, loading skeletons
- Day 4: Add charts (Recharts or Chart.js), tidy TypeScript types
- Day 5: Tests with React Testing Library + Vitest/Jest; add one e2e test with Playwright
- Day 6: Stretch feature: wallet connect via wagmi, show ERC-20 balances
- Day 7: Polish UI, write README, record a quick demo, share
Smart tips to save time and money
- Start small to test fit
Pick a shorter course first. If the pacing and code quality match your style, then look at a bundle for more projects. - Watch for promos
Check seasonal sales and newsletter codes. If you’re a student or using a team budget, ask about discounts—it’s often available if you reach out. - Set a refund reminder
If there’s a guarantee window, put a calendar reminder 48 hours before it ends. You’ll either be all-in or you’ll pivot without stress. - Build your own starter template
After course #1, extract the best parts (ESLint, TS config, testing, auth/fetch utils) into a personal template. This alone can cut setup time by 50% on the next project. - Use “learning guardrails”
- Strict TS settings (no implicit any)
- Lint errors treated as warnings at first, then fail CI later
- One feature per PR with a simple checklist to keep scope tight - Ask better questions, get faster answers
When you hit a wall, share a minimal repro (GitHub gist or small repo), error logs, and what you already tried. You’ll get useful replies much faster in course Q&A or forums. - Use AI thoughtfully
Great for deciphering errors or summarizing docs. Not great for writing whole components. You’ll learn faster by letting AI explain, then you implement.
Conclusion
I like platforms that help you ship, not just study. If you want modern frontend and TypeScript skills that transfer cleanly into crypto dashboards, analytics tools, and developer UIs, this is a strong pick. It won’t teach you Solidity or Rust in depth, but pair it with chain docs and you’ll move from “learning” to “launching” fast.
Set one clear goal, block 30–60 minutes a day, deploy early, and add a small stretch feature that touches real crypto APIs or wallets. That pattern compounds.
If you ship something you’re proud of, send me the link. I love showcasing smart builds on cryptolinks.com. Let’s get your project in front of the right eyes.

