How To Create Your Own Ethereum Review

How To Create Your Own Ethereum
steemit.com
How To Create Your Own Ethereum Token (ERC-20) in an Hour — Review of the Steemit Walkthrough + Everything You Need To Know (FAQ)
Ever thought, “Could I actually launch my own Ethereum token today… without a dev team?”
I went back to the wildly shared Steemit tutorial — “How to create your own Ethereum token in an hour — ERC20 verified” — and pressure-tested the approach in 2025. Some of it still rocks. Some of it will trip you up. So I wrote this update to show you what still works now, what to skip, and how to get a clean ERC‑20 live and verified on Etherscan without ugly surprises.
What usually goes wrong (and why “one-hour guides” waste hours)
I see the same landmines over and over when people follow old walkthroughs:
- Contract won’t verify on Etherscan: wrong compiler version or optimizer settings, missing constructor arguments, or the code wasn’t flattened properly.
- Token doesn’t show up in wallets: decimals mismatched, wrong contract address pasted, or the token wasn’t added to the wallet the right way.
- Gas shocks: deploying with inefficient settings or at peak times; some guides ignore how the optimizer slashes bytecode size and cost.
- Risky code: copy‑pasted contracts with hidden taxes, unlimited mint, or upgradable proxies you didn’t plan for — instant red flags for users.
- Outdated networks/tools: references to Ropsten/Rinkeby/Kovan (long gone) or old Solidity versions that break verification in 2025.
- Compliance anxiety: people worry about securities rules, claims like “renounced,” and whether their launch looks like a scam to explorers and scanners.
Seen this before?“Error! Invalid constructor arguments provided” — that’s the classic Etherscan mismatch. Fixable, but it burns hours if you don’t know the exact settings you used at deploy time.
Here’s my promise: a simple, updated plan that works in 2025
If you want a straightforward ERC‑20 that’s safe, standard, and easy to verify, I’ll keep it clean:
- What to copy, what to change: the minimal edits you actually need for name, symbol, and supply.
- Settings that save you time and ETH: correct Solidity version and optimizer config so verification is one-and-done.
- Modern testnets and process: practice on Sepolia or Holesky, then deploy with confidence.
- Verification that sticks: match compiler details, pass constructor args correctly, publish source, and earn the green check.
- Wallet visibility: make your token appear in MetaMask instantly and avoid “why can’t I see it?” DMs.
- Common traps to avoid: no sneaky transfer fees, no surprise owner powers you didn’t mean to ship.
Who this is for (and who it isn’t)
- For: creators, founders, and curious builders who want a standard ERC‑20 with clean, safe features and no funny business.
- Not for: complex tokenomics, reflections, rebasing, or advanced mechanics — you’ll get a solid foundation here, then you can go custom with a proper spec and review.
What you’ll learn — and what I tested for you
I recreated the “one‑hour token” flow using up‑to‑date tooling so you don’t have to debug on mainnet. Here’s what I actually ran through end‑to‑end:
- Templates that are trusted: OpenZeppelin ERC‑20 patterns that are widely used across the ecosystem.
- Zero-install workflow: the Remix IDE approach that gets you from template to deployment quickly.
- Realistic gas expectations: how optimizer settings and supply choices affect bytecode size and deployment cost.
- Bulletproof verification: matching the exact compiler and optimizer settings so Etherscan accepts your source on the first try.
- Ownership choices: when it actually makes sense to renounce, and when a simple timelock or multisig is smarter for credibility.
- Instant visibility: how to make sure holders can add your token to MetaMask in seconds and find it on explorers.
The original Steemit guide helped thousands get started, and that’s still true. In 2025, though, a few tweaks make the difference between a clean, verified ERC‑20 and a support nightmare. Want the simplest way to understand what you’re actually building — in plain English — before you press deploy?
ERC‑20 in plain English: what you’re actually building
Think of an ERC‑20 token as a shared scoreboard that every Ethereum wallet and exchange already knows how to read. It’s a simple rulebook (EIP‑20) for how balances, transfers, and approvals should behave. When you follow that rulebook, your token “just works” in places like MetaMask, Uniswap, and block explorers without custom integrations.
At a bare minimum, your token exposes a few predictable functions and events that apps listen for: totalSupply, balanceOf, transfer, approve, allowance, transferFrom plus Transfer and Approval events. That’s it. No magic, no trickery—just a standard interface the ecosystem trusts. As the Ethereum docs put it, ERC‑20 is the default fungible token standard most builders use.
Now, about that green checkmark: on Etherscan, “verified” means your published Solidity source code exactly matches the deployed bytecode—users can read your contract, diff it against common libraries, and feel safer interacting. Verification is not an audit. It’s a transparency step that unlocks trust and better UX on explorers (Etherscan docs).
“Simple scales, fancy fails.” Your first token should be boring on purpose—standard code, clear settings, and zero surprises.
What you can expect from a clean ERC‑20:
- Instant recognizability: wallets know how to display balances and decimals (commonly 18).
- Plug‑and‑play transfers: send/receive works out of the box; no custom wallet needed.
- Allowance flows: approve a spender (like a DEX) to move tokens on your behalf—core to swapping.
- Verifiable behavior: events and code are checkable by anyone once you verify the contract.
ERC‑20 vs NFTs and other standards
If you’re torn between standards, here’s the quick sniff test so you don’t pick the wrong tool.
- ERC‑20 (fungible): every unit is interchangeable like dollars or points. Perfect for utility tokens, community rewards, or governance units.
- ERC‑721 (NFT, non‑fungible): each token is unique—think art, tickets with individual IDs, or 1/1 items.
- ERC‑1155 (multi‑token): one contract can issue both fungible and non‑fungible types, great for games/collections with many item classes.
Use ERC‑20 when holders shouldn’t care which specific token they own—only the amount. If uniqueness matters (a specific ticket seat, a particular sword), that’s ERC‑721/1155 territory.
Common features you might want
You can ship an ERC‑20 “as is,” or layer in battle‑tested extensions from OpenZeppelin (docs). Choose carefully—each toggle changes risk and expectations.
- Mintable: lets an authorized account create new tokens.
Good for: gradual emissions, loyalty points.
Risk: infinite mint is a trust red flag. Mitigate with clear caps, time locks, or a plan to renounce minting when done. - Burnable: holders can destroy their tokens.
Good for: deflation, redeem/burn flows.
Risk: if burns are centralized or forced, users will question fairness. Keep it voluntary. - Pausable: owner can pause transfers in emergencies.
Good for: early-stage risk management.
Risk: pausing power equals control. Communicate who can pause and when. Many “fair launch” projects avoid it or remove it after stabilization. - Capped supply: hard ceiling on total minted tokens.
Good for: clear scarcity guarantees.
Risk: misconfigured caps lock you out of future needs. Set the cap with care.
Rule of thumb: if your goal is a “no funny business” token, stick to standard ERC‑20 with optional burn and a pre‑minted fixed supply. Keep privileges minimal and transparent.
Real‑world use cases
Here’s where an ERC‑20 shines, especially when you’re aiming to launch fast.
- Community points: reward early users, moderators, or contributors. Keep transfer rules standard to avoid “honeypot” accusations.
- Test tokens and staging: simulate flows on Sepolia/Holesky with an identical contract you’ll later deploy on mainnet. Great for demos and QA.
- Prototype utility: discount or access tokens for a beta feature, paywalls, or an event gate. Simple allowlists + standard transfers beat fancy mechanics in v1.
- Internal credits: teams track usage, partner rebates, or promotion budgets on‑chain. Easy reporting via block explorers.
- Hackathon/go‑to‑market pilots: ship a working token in hours, then iterate with audits and governance once there’s traction.
What’s not realistic in under an hour? Complex tax logic, rebasing, rebalance strategies, or bespoke bonding curves. Those require thorough testing and security review. Keep your first release clean, standard, and explainable.
Feeling that itch to build now? In the next section I’ll show you the exact tools, networks, and one setting most people miss that makes Etherscan verification painless. Ready to set up your wallet and get test ETH without risking a cent?
Setup and tools you need before writing a single line
I’ve seen more token launches stall in the “setup” stage than any other. Not because it’s hard, but because two or three tiny missteps snowball into broken verifications, missing tokens in wallets, and wasted ETH. Get your environment right, and the rest feels easy.
“Amateurs talk tactics; professionals talk logistics.”
Here’s the exact kit I use today, plus the settings that spare you those 2 a.m. headaches.
Wallet and network setup
If you’re new to Ethereum or just spinning up a clean workspace for deployment, do this first and keep it simple.
- Install MetaMask from the official site: metamask.io. Never paste a seed phrase anywhere but the MetaMask extension/app. For mainnet deployments, I prefer connecting a hardware wallet.
- Toggle test networks: Settings → Advanced → turn on Show test networks. You’ll see Sepolia and Holesky appear in the network selector.
- Fund with test ETH: grab a small amount from reputable faucets. If one rate-limits you, use another.
- Sepolia: Alchemy, QuickNode, Infura
- Holesky: Alchemy, QuickNode
- Create two accounts: one for testing and one for mainnet deployment. Label them clearly inside MetaMask. If you’ll use a hardware wallet for mainnet, connect it now so you don’t change accounts later and mismatch addresses.
- Bookmark explorers:sepolia.etherscan.io and holesky.etherscan.io for testnets, plus etherscan.io for mainnet. You’ll live here during verification.
Tip: if test networks don’t show up, you can also add them via Chainlist. Just make sure the RPC endpoints are healthy—flaky RPCs cause failed broadcasts that feel like “MetaMask bugs.”
Tools checklist
These are the only tabs I keep open when I create an ERC‑20 in an hour. Each has a clear job, and they all play nicely together.
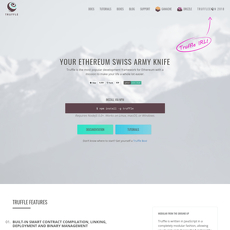
- Remix IDE: remix.ethereum.org. Browser-based Solidity editor, compiler, and deployer. I enable the Solidity Compiler, Deploy & Run, and the Etherscan – Contract Verification plugin.
- OpenZeppelin Contracts: docs.openzeppelin.com/contracts. Battle‑tested ERC‑20 implementations. I also keep the OpenZeppelin Wizard handy to prototype combinations like Burnable + Capped before committing.
- Etherscan (and testnet clones): search, verify, and share your contract. Mainnet Etherscan, plus Sepolia and Holesky. Their verification docs are the gold standard.
- Formatter: if you prefer local formatting, use prettier‑plugin‑solidity. In Remix, hit the built‑in Format so your source publishes cleanly on Etherscan.
- Gas tracker: Etherscan Gas Tracker. I check this before every mainnet transaction to avoid paying peak prices for a simple deploy.
How it all connects: write or assemble your ERC‑20 in Remix using OpenZeppelin building blocks, compile with the exact settings you’ll later claim on Etherscan, broadcast via MetaMask to a testnet first, then verify on the matching testnet explorer. Once the test flow is smooth, repeat on mainnet with the same settings. Zero guesswork.
Gas costs and time estimates
“How much is this going to cost me?” Here’s a realistic snapshot so you can budget both ETH and time.
- Testnets (Sepolia/Holesky): free, thanks to faucets. Expect 10–60 seconds per transaction depending on network load.
- Mainnet gas use (rough):
- Standard ERC‑20 (OpenZeppelin base): ~500k–900k gas
- + Burnable / Ownable: typically +10k–50k gas
- + Capped / Pausable: can push closer to ~1.0M–1.2M gas
- What that means in ETH: cost = gasUsed × gasPrice. Example: 800,000 gas × 20 gwei = 0.016 ETH. If ETH is $3,200, that’s about $51. At 50 gwei, the same deploy is ~0.04 ETH (~$128).
- Optimizer impact: turning the Solidity optimizer on (with 200 runs) is the norm. It can slightly increase deployment gas but reduces function call gas later. The key is consistency: use the exact same settings for compile and verification.
- Time plan (what I actually block off):
- Environment setup and faucets: 10–15 minutes
- Compile and Sepolia test deploy: 5 minutes
- Basic interactions (mint/transfer) on testnet: 5–10 minutes
- Verification on testnet: 3–5 minutes
- Mainnet deploy + verify: 10–15 minutes (faster off‑peak hours)
Pro tip: aim for off‑peak hours (check the Gas Tracker’s 7‑day chart). Saving 20–40% on gas is common, and for simple ERC‑20s that’s real money you can put toward liquidity or audits.
Naming, symbols, and decimals
This is the part people rush—and regret. Your token’s “face” lives in wallets and explorers forever. Be intentional.
- Name: human‑readable, can include spaces. Keep it short enough to render in wallet UIs without truncating. Example: Black Coffee Token.
- Symbol (ticker): 3–6 uppercase letters, ASCII only. Avoid lookalikes (O vs 0) and copied symbols from popular tokens.
- Good: BREW, COF, BLKCF
- Risky: ETH, USDT, or anything already crowded on Etherscan’s token list
There’s no global “ticker reservation,” so uniqueness is social. Pick one that won’t confuse holders.
- Decimals: 18 is the de facto standard. Many UIs assume it.
- Use 18 for general‑purpose tokens and DeFi compatibility.
- Use 6 if you want stablecoin‑style UX (fewer decimal places). Just know some tooling expects 18.
- Think in base units now: if you’re planning 1,000,000 tokens at 18 decimals, you’ll set supply as 1,000,000 × 10^18. If you choose 6 decimals, it’s 1,000,000 × 10^6. Once deployed, decimals and initial supply are permanent.
- Logo and metadata later: after deployment, you can submit your token icon and links via Etherscan’s token information update. You’ll also add the token address to your site and socials so wallets auto‑detect it.
One emotional note here: a clean name and honest symbol are small trust signals that add up. You’re asking people to hold a piece of your idea—make it easy to recognize and impossible to confuse.
You’ve got the wallet, test ETH, the right IDE, explorers, and a plan for fees and metadata. Ready for the fun part—turning a safe OpenZeppelin template into your token without tripping any landmines? In the next section, which exact contracts should you pick if you want a “no funny business” ERC‑20 that verifies on the first try?
From template to token: the cleanest ERC-20 path
You don’t need a 500-line smart contract to earn trust. You need a boring, standard ERC‑20 that wallets recognize, explorers verify instantly, and users can transfer without surprises. That’s what we’ll build here—clean, predictable, and friendly to both humans and scanners.
“Complexity is the enemy of security.” — Bruce Schneier
If you’ve ever worried about missing a tiny setting that breaks verification or makes your token look sketchy, this is where that stress ends. Here’s the exact template path I use to get live fast without planting any future landmines.
Choosing the right OpenZeppelin contract
OpenZeppelin Contracts are audited, widely adopted, and play nicely with Etherscan. Start from these and only add what you truly need:
- Fixed supply (most trusted “no funny business” setup)
Use ERC20 and pre-mint in the constructor to the deployer or a distribution wallet. No Ownable required if you don’t need admin functions. Clean, verifiable, no surprise minting later. - Burnable (optional, user-friendly)
Add ERC20Burnable so holders can burn their own tokens. This doesn’t add centralization risk. - Capped + controlled mint (only if you must expand later)
Use ERC20Capped + Ownable. Implement a mint function restricted to onlyOwner. Be clear in your README about who controls minting and why. If you want to upgrade trust, route ownership to a multisig or timelock. - Pausable (rarely needed for simple launches)
ERC20Pausable lets you halt transfers in emergencies. It’s useful for enterprise/governance setups, but for a public community token it can feel like a red flag. If you add it, explain the policy up front. - Avoid “taxes,” blacklists, and magic
Transfer fees, blacklists, and custom transfer rules are the fastest way to get flagged by scanners and scare off holders. Keep transfers standard if you want trust.
Why this path? OpenZeppelin’s patterns are battle-tested, and wallets/DEXes already expect them. That means fewer surprises when you hit “Deploy.”
Customizing name, symbol, supply
Your metadata should be obvious and consistent everywhere—explorers, wallets, and your docs. Do this right once and you won’t fight UX issues later.
- Name and symbol
Set them in the constructor. Keep the symbol 3–8 chars if you want it to look tidy in wallets. - Decimals
Default is 18, and that’s what most tooling expects. Only change decimals if you have a strong reason (e.g., fiat-like 6). If you do change it, make sure your mint math matches. - Supply math (don’t get tricked by decimals)
If you want 1,000,000 tokens at 18 decimals, mint: 1_000_000 * 10**18 units. Underscores keep big numbers readable and reduce mistakes (Solidity treats them as visual separators). - Where to mint
Pre-mint to your own EOA (your wallet) or a dedicated distribution wallet. Don’t mint to a contract you haven’t set up yet. Minting to the zero address burns by design—yes, it’s a thing people do by accident. - Pre-mint vs. mint later
- Pre-mint fixed supply = maximum simplicity, fastest trust
- Capped + mint later = flexibility, but you must communicate the policy and who holds the key
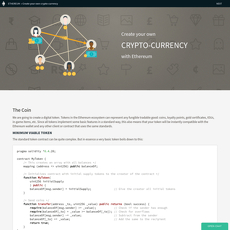
Minimal fixed-supply skeleton (conceptual structure)
SPDX-License-Identifier: MIT
pragma solidity ^0.8.20;
import "@openzeppelin/contracts/token/ERC20/ERC20.sol";
import "@openzeppelin/contracts/token/ERC20/extensions/ERC20Burnable.sol";
contract MyToken is ERC20, ERC20Burnable {
constructor() ERC20("My Token", "MYT") {
_mint(msg.sender, 1_000_000 * 10**decimals());
}
}
You’ll notice there’s no owner or pause logic above—this is the “vanilla and safe” style that scanners love and users understand.
SPDX, pragma, and compiler settings
This is the quiet part that saves you from verification pain later.
- SPDX license
Put a clear SPDX line at the top, like // SPDX-License-Identifier: MIT. Etherscan reads this to set the license automatically. - Solidity version
Match OpenZeppelin’s version. In 2025, ^0.8.20 pairs cleanly with OpenZeppelin Contracts 5.x. If you import OZ 5.x, compile with 0.8.20 in Remix. - Optimizer
Turn it on. I use 200 runs for tokens—it balances deployment size with transfer cost. If you expect extremely high transfer volume, you could consider a higher run count, but 200 is the industry-standard default. - Yul/IR setting
If you toggle “viaIR” or change EVM version, write it down. Etherscan verification needs the exact same settings later. - Consistency = verification win
The fastest way to avoid “why won’t it verify?” is to pin the compiler version and remember your optimizer settings. I literally write them in a comment block above the contract during testing.
Common mistakes I still see
- Uninitialized or forgotten ownership
If you add Ownable, decide who should own it on Day 1. Leaving your hot wallet as owner screams centralization risk. Either transfer ownership to a multisig/timelock or intentionally renounce after setup—and tell people which you chose and why. - Accidental infinite mint
A mint function without onlyOwner (or with a sloppy role) is a deal-breaker. If you promise “fixed supply,” don’t even include a mint function. If you promise a cap, use ERC20Capped so the cap is enforced by code. - Constructor argument mismatches
Etherscan verification fails constantly because the constructor params don’t match what was deployed. Keep a one-line record of the exact arguments (name, symbol, cap in base units) you used when deploying. - Decimals math mix-ups
Setting decimals to 6 but minting as if it’s 18 makes your supply look 10^12 off. Once deployed, you can’t change decimals in a standard ERC‑20 without redeploying. Triple-check before you hit “Deploy.” - Token not showing in wallets
Common culprits: wrong network selected, you minted to a different address, or you changed decimals in a nonstandard way. Verification helps wallets read name/symbol automatically—more on fixing this in the next section. - License mismatch or wrong compiler
// SPDX-License-Identifier: MIT in your file but “No License” on Etherscan = failed verification. Also, OZ 5.x + solc 0.8.20 is good; OZ 4.x code with 0.8.20 settings can compile but still cause headaches if you mix imports.
Here’s the mindset that keeps me calm when I ship: if a feature can be misunderstood or abused, I don’t ship it in v1. I ship the standard, I verify it, I earn trust. Then I consider smart, clearly documented upgrades.
Ready to see the exact workflow I use to test on a public testnet, push to mainnet, and get that sweet green check on Etherscan—without guesswork? Let’s press the buttons together next. Would it help if I shared the precise Remix and Etherscan settings I use line by line?
Test, deploy, verify: the step-by-step workflow
You’ve got your ERC‑20 ready to go. Now we keep it boring, safe, and fast — the way pros ship.
“Slow is smooth. Smooth is fast.” Measure twice, deploy once.
Dry run on a testnet
Before you touch mainnet, I always run the full script on Sepolia or Holesky. It costs nothing, and it catches the mistakes that wreck launch day energy.
- Open Remix: remix.ethereum.org. Load your ERC‑20 from OpenZeppelin templates (already covered earlier).
- Compiler match matters: Use the exact Solidity version you’ll use on mainnet. If you plan 0.8.24 with optimizer enabled and runs=200, set it here too. Consistency = painless verification later.
- Select network: In MetaMask, switch to Sepolia (or Holesky). Grab test ETH from a faucet like Alchemy’s Sepolia faucet.
- Deploy from Remix: Fill in constructor arguments cleanly:
- name: MyTestToken
- symbol: MTT
- initialSupply: remember 18 decimals — e.g., 1,000,000 tokens = 1,000,000 × 10^18
- Sanity checks right after deploy:
- Call totalSupply(). Does it match your math?
- Call decimals(). Did you intend 18?
- Check the deployer’s balanceOf(deployer). Is the premint there?
- Run a transfer() to another wallet you control and confirm on Sepolia Etherscan.
- If using mintable/burnable, test mint() and burn() with expected permissions.
That little green check on testnet isn’t just visual. It shows you the entire path works end-to-end — and reduces your mainnet clicks to muscle memory.
Mainnet deployment checklist
Mainnet is where forward momentum meets fees. I keep a one-screen checklist that I literally tick off before hitting “Confirm.” Steal it:
- Wallet funded: Have enough ETH for deployment plus a safety buffer. Contract creation can swing with gas. Check live rates via Etherscan Gas Tracker.
- EIP‑1559 gas strategy: Let your wallet suggest values, or use a reputable estimator (e.g., Blocknative). Avoid “lowest” during volatile periods; failed deploys waste time and attention.
- Constructor arguments: Triple-check:
- Name and symbol are spelled exactly as intended
- Initial supply matches your decimals math
- Owner/deployer is the wallet you mean to hold any privileges
- Compiler settings snapshot: Write these down in a text note:
- Solidity version (e.g., 0.8.24)
- Optimizer: enabled, runs=200 (or your chosen value)
- Any specific library/pragma details
- Press deploy in Remix: Confirm the transaction. Don’t switch networks or close Remix until it’s mined.
- Record the essentials:
- Contract address
- Deployment tx hash
- Block number and timestamp
- Exact constructor arguments used
Pro tip: keep a tiny README in your project folder with the above plus links to your testnet run. Future you will say thanks.
Etherscan verification that actually works
If users can’t read your source on Etherscan, trust evaporates. Verifying correctly the first time feels magic because everything else (wallets, explorers, even integrations) gets easier.
- Go to your contract page on Etherscan and click Contract → Verify and Publish.
- Choose “Solidity (Standard-JSON-Input)” if you compiled with multiple files in Remix. It’s the most reliable. You can also use the Remix plugin “Etherscan – Contract Verification.”
- Match settings 1:1 with your deploy:
- Compiler version: the exact one used
- Optimization: enabled/disabled + runs value
- License identifiers (SPDX) match your sources
- Constructor arguments: Paste them in the format Etherscan expects. If you’re unsure, grab the ABI from Remix and use Etherscan’s “ABI-encoded” helper in the form.
- Submit and wait a moment. If it fails, it’s almost always a compiler or optimizer mismatch, or the wrong constructor encoding.
- Optional bonus: Also verify via Sourcify (Remix supports this). Many tools auto-recognize Sourcify-verified contracts.
Once verified, your contract gets the full Read/Write tabs, ABI, and a public source link. That’s a visible trust signal users look for. Etherscan’s own help docs push this flow for a reason: clear, verifiable code equals fewer support headaches. Reference: Etherscan: Verify Contract Code.
See your token everywhere
Visibility is a feature. Make it effortless for holders to find and see your token correctly.
- Add to MetaMask (you and your early holders):
- Open MetaMask → Tokens → Import tokens
- Paste your contract address → symbol/decimals should auto-fill after verification
- Or trigger programmatically with wallet_watchAsset if you have a site
MetaMask guide: How to add a custom token
- Make the Etherscan page shine:
- Update logo and metadata via Etherscan’s token form: etherscan.io/tokenupdate
- Submit your logo to the Trust Wallet assets repo (many wallets/explorers pull from it)
- Share the right links:
- Mainnet contract URL on Etherscan
- Read/Write Contract tab for transparency
- Short note on decimals and symbol for wallet imports
- Quick self-check after visibility work:
- Your token shows the correct name/symbol/decimals in MetaMask
- Etherscan displays your source and ABI
- Transfers appear under the Token Transfers tab
Emotional truth: that green checkmark and a clean token page change how people feel about your project. It signals care, not chaos. And when attention is scarce, that’s everything.
Now that your token is verified and visible, how do you actually get it into real wallets, set up liquidity the smart way, and stack trust signals users notice in seconds? Keep going — the next section answers exactly that.
After launch: distribution, liquidity, and trust signals
Ship day is exciting, but the next 48 hours decide whether your token sticks or disappears. I keep three things front and center: get tokens into real hands without chaos, make trading safe and simple, and show trust signals so people don’t have to guess. Here’s exactly how I run that playbook.
Getting tokens into hands (safely)
Airdrops sound easy until bots eat your supply, your holders pay crazy gas, or your token gets flagged as spam. I prefer claim-based distribution and transparent vesting over mass-sending tokens.
- Use claim-based airdrops with a Merkle allowlist. Instead of blasting thousands of transfers, publish a Merkle root and let eligible wallets claim their allocation. It’s gas-efficient and sybil-resistant if your list is curated. OpenZeppelin’s MerkleProof makes this straightforward.
- Cap per-wallet and require a snapshot block. A per-wallet cap and a public snapshot block reduce last-minute gaming. Analytics firms like Nansen have shown that basic sybil filters dramatically improve distribution quality.
- Stream team/partner allocations. If you’re keeping any tokens, stream them. Tools like Sablier or OpenZeppelin’s VestingWallet set expectations and avoid “instant dump” fears.
- Avoid spammy transfer patterns. Wallets and explorers increasingly flag “dusting” and shotgun airdrops. Keep it clean: claim portal + simple UI + clear eligibility page beats mass sends every time.
- Don’t run a transfer tax without a reason. Transfer fees break a lot of tooling and put you on honeypot radars. If you must, keep it low, time-limited, and disclosed up front (with an on-chain end date).
Two playbooks I’ve seen work repeatedly:
- Community-first launch: 5–10% for an allowlisted claim (Merkle), 85–90% to liquidity, remainder streamed to a multisig for operations. Simple, fair, and easy to explain.
- Builder test token: 100% pre-minted to deployer, then claim-based sprinkling to early testers with a small cap. No team holdback needed—perfect for MVPs and grants.
Pro tip: Always publish a short “Distribution & Vesting” page with links to your Merkle root, claim contract, vesting schedules, and the exact percentage breakdown. Screenshots of the transactions help newcomers follow along.
Liquidity and trading
Trading shouldn’t feel like a trap. Before pairing on a DEX, I map out the liquidity plan and how I’ll prove it’s safe.
- Pick your venue intentionally. For a clean ERC-20, Uniswap works great. V2 is simple (LP tokens are lockable), V3 offers better capital efficiency but is trickier and typically doesn’t create lockable LP tokens in the same way. If your audience is casual, simplicity wins.
- Seed enough liquidity so price isn’t whipsawed. Undercapitalized pools cause 20–50% slippage on small buys. A balanced seed (e.g., WETH pairing) with a reasonable depth will prevent day-one regret from early buyers.
- Lock or burn LP—then link the proof. If you use V2-style LP tokens, lock them with a recognized locker like Team Finance or Unicrypt, or burn them. Share the on-chain transaction link everywhere. “Liquidity locked until 2027” is concrete; “We won’t rug” is not.
- Multisig the treasury. Put any remaining tokens or protocol fees into a Safe (Gnosis Safe) with multiple signers. Post the safe address so holders can watch movements in real time.
- Be explicit about ownership status. Meme communities often expect “ownership renounced.” Utility projects usually keep ownership but restrict powers with timelocks. Whatever you choose, say it up front and back it with links.
- Beware of taxes + DEX UX. Some interfaces display warnings or fail swaps on fee-on-transfer tokens. If your token isn’t 0% tax, test buys/sells on fresh wallets and document the exact flow and slippage to avoid panic.
Look at how PEPE won early trust: no presale, no taxes, LP burned, contract renounced. Whether you’re building a meme or a utility token, the principle is the same—remove scary levers or explain why they exist and when they’ll sunset.
Rugcheck hygiene and anti-honeypot tips
Assume everyone will run you through scanners before buying. Make sure you pass the obvious tests.
- Verify source and inherit from well-known libraries. Etherscan verification with visible imports from OpenZeppelin is a huge trust win. Humans and bots both look for it.
- No sneaky restrictions. If your contract includes blacklist, max-tx, or fee setters, document them publicly with exact parameters and a timeline for disabling. Better: don’t include them at all for a “no tricks” token.
- Run the public scanners yourself. Check Token Sniffer, GoPlus Security, and your DEXTools pair. If something flags red, fix or explain it before the crowd finds it.
- Do a live “can sell” test. Buy a tiny amount from a fresh wallet and sell it back on stream or in a screen recording. Honeypots die under daylight.
- Avoid fee-on-transfer mechanics if you can. Even a 1–2% tax triggers suspicion and breaks some integrations. If your design truly needs it, cap it and timebox it with an on-chain timelock so you can’t silently raise it later.
- Flatten the surprise surface. No proxy upgradability, no obscure hooks, no opaque owner powers. If it looks like a standard ERC-20 and acts like one, people relax.
“Trust is a faucet: slow to fill, fast to drain.” — an old crypto saying I’ve learned the hard way
Also, don’t underestimate social “rugs.” If your X/Telegram is closed, your docs are missing, and you won’t answer a basic “is LP locked?” question with a link, you’ll fail the sniff test no matter how clean the code is.
Communication and transparency
The fastest way to reduce support spam and build confidence is to publish a simple, verifiable brief. I post it within minutes of launch.
- One-page “Start Here.” Include token address, decimals, links to Etherscan code verification, LP lock/burn transaction, treasury multisig, and the DEX pair. If anything is time-limited (tax, pause, vesting cliff), list the exact block/timestamp.
- Readable distribution chart. A basic pie chart or a live Etherscan/Dune link beats a wall of text. “90% LP, 7% community claim, 3% operations (streamed)” is the kind of clarity people share.
- Public roadmap for powers. If you didn’t renounce ownership, explain what the owner can do, what they can’t, and when you’ll hand controls to a timelock or multisig. Dates, not vibes.
- Post the “How to trade” steps. Newcomers need a 5-line guide: add token to wallet, go to the DEX link, recommended slippage, verify you can sell, and where to ask questions. Pin it on X and in your Telegram/Discord.
- Open-source the claim portal. If you host a claim UI, publish the repo and tag the commit. Even a lightweight audit trail helps volunteers help you.
When I see a project share a clean Etherscan link, an LP lock proof, and a two-sentence token policy, I feel safe enough to test with my own wallet. When I don’t, I assume there’s a reason.
Checklist you can copy-paste into your launch notes:
- Contract verified on Etherscan (link)
- Token address and decimals listed
- DEX pair link and recommended slippage
- LP lock/burn transaction link + expiry date
- Treasury multisig (Safe) address and threshold
- Distribution breakdown + vesting links (Sablier/VestingWallet)
- Ownership status (renounced, multisig, or timelock) with link
- Public scanners passed (Token Sniffer/GoPlus) screenshots or links
- Claim portal repo + Merkle root link (if airdrop)
- Support channels and pinned “How to trade” guide
Launch day is emotional. People want to believe, but they don’t want to be hurt. Show receipts, keep your promises small and specific, and make every important claim verifiable on-chain.
Thinking about renouncing ownership versus using a timelock, or worried about the fine line between a community token and a security? That’s exactly what I’m about to unpack next—along with the security kit I actually trust and use. Ready to protect your holders and yourself?
Security, compliance, and the resource stack I trust
If you want your token to be taken seriously, ship it like someone who expects real users. That means building with guardrails. I’ll keep this tight, practical, and grounded in what’s actually burned teams in the past.
Security basics you should not skip
Use boring, proven code. Start with OpenZeppelin ERC-20 and avoid custom logic unless you absolutely need it. Most “clever” additions introduce risk and get flagged by rugcheck tools. In 2017, a single line in Parity’s wallet library froze hundreds of millions in ETH—battle-tested libraries are your insurance against that kind of footgun.
- Lock down privileges. If you keep mint/burn/pause, don’t leave them in a single EOA. Use a Gnosis Safe multisig for admin keys and a timelock (24–48h) for any function that can change supply or trading status. If you don’t need admin power, renounce ownership once you’re done. Ankr’s 2022 incident—where a compromised key minted trillions—exists because a single key could change core token logic.
- Deploy from a clean, hardened setup. Hardware wallet for final sign. Fresh browser profile. Bookmarked official URLs. No random extensions. Double-check RPC endpoints and addresses out loud. If your deployer wallet touches DEX airdrops or shady approvals, make a new one.
- Simulate everything. Run your mainnet deploy and first mints/transfers through a simulator (Tenderly, Blocknative, or a fork in Foundry) to confirm bytecode, constructor args, and gas behavior before paying real ETH.
- Use static analysis. Remix’s built-in static analysis plus a pass with Slither (if you’re local) will catch silly mistakes long before Etherscan does.
- Least privilege after launch. Revoke allowances you used for initial liquidity (use Revoke.cash). If you have a treasury, consider a vesting or timelocked Safe module so you can’t surprise your holders (or yourself).
- Stay “standard” if you claim fair launch. No transfer taxes, no hidden blacklists, no “onlyOwner transfers” toggles. Honeypot scanners will flag you, and that’s game over for trust.
Reality check: Chainalysis reported roughly $1.7B was stolen across crypto hacks in 2023—still massive, even after a big drop from 2022. Most retail-facing losses trace back to weak keys, unrestricted admin roles, and non-standard token code. Don’t be the example people cite next year.
- Quick pre-flight:
- OpenZeppelin ERC-20 with only the features you need
- Compiler/optimizer settings written down for verification
- Multisig + timelock for any privileged roles
- Testnet rehearsal of deploy + first actions
- Simulation of mainnet deploy
- Post-deploy verification on Etherscan and a public README
Pro tip: If you change anything after launch—fees, pause, mint, trading rules—publish a dated note explaining the change, who signed it, and the timelock window. Transparency beats FUD every time.
Legal and ethical guardrails
I’m not your lawyer, but I treat these as bright lines so I don’t wake up to a regulator’s letter or a community meltdown.
- Don’t promise profit. If you’re selling tokens and telling people it’ll go up because of your efforts, you’re checking boxes on the U.S. Howey Test. See the SEC’s actions on Telegram and Kik—fundraising via token sales with “expectation of profit” claims didn’t end well.
- If you raise, do it properly. A public token sale may trigger securities rules (registration or exemptions), KYC/AML, and sanctions screening. In the EU, MiCA is rolling out real obligations for issuers and service providers. “But we’re decentralized” won’t save you if you market and sell like an issuer.
- Say what the token is—and isn’t. If there’s no revenue share, no legal rights, and it’s experimental, say it clearly. Disclaimers don’t immunize you, but they set expectations and reduce misrepresentation risk.
- Be honest about “fair launch.” If you keep admin keys, use a tax, or control liquidity, it’s not “fair launch.” Call it what it is and share a plan: when you’ll renounce, how liquidity is locked, vesting terms, and any whitelists.
- Tax is real. Airdrops can be taxable. Token sales are usually income. Keep records from day one. Future-you will thank you.
One more ethical note: avoid “stealth” features that change behavior after a few blocks. Even if technically allowed, users will treat it as a honeypot the moment someone posts a screenshot. Reputations are fragile.
Helpful resources (quick mention)
- Step-by-step inspiration + gotchas: the original Steemit guide I reviewed, with updates you’ve read here.
- Safe building blocks: OpenZeppelin docs for ERC-20 patterns and role management.
- Ship confidently: Remix official docs for compile/deploy, and Etherscan’s verification help pages.
- Staying secure: Ethereum.org’s security pages for keys, contracts, and best practices.
I’ve collected everything in one place to save you tab-hunting: my go-to resource stack.
You’ve now got the guardrails most launches skip. Want the rapid-fire answers to the questions everyone DMs me—like “Should I renounce ownership?” and “How do I list on a DEX without getting sniped?”—that’s up next. Which one do you want me to tackle first?
Big FAQ and my final take
Quick answers to common questions (People Also Ask)
- What is an ERC‑20 token?
An ERC‑20 token is a fungible token that follows a standard set of functions (transfer, balanceOf, approve, etc.) so wallets, exchanges, and tools know how to handle it. Think “digital points” that work across the Ethereum ecosystem because they all speak the same language.
- How much does it cost to create one?
It depends on gas. Deployment uses roughly 1.1–1.7 million gas for a plain ERC‑20 with standard features. Cost = gas used × gas price × ETH price.
Example: 1.4M gas × 25 gwei × 1e‑9 ETH/gwei ≈ 0.035 ETH. If ETH were $3,000, that’s about $105. Your actual cost will vary with network conditions.
- Do I need to code?
You can ship with minimal coding by using OpenZeppelin templates in Remix. You still need to paste, name your token, set supply, and follow a few precise steps, but you’re not writing complex logic from scratch.
- How do I verify on Etherscan?
Open your contract page on Etherscan → Contract tab → Verify & Publish. Match the exact compiler version and optimizer settings you used in Remix, paste the source (or use multi-file input), and provide constructor arguments (encoded exactly as deployed). Etherscan’s guide helps: docs.etherscan.io/contract-verification.
- Testnet vs mainnet—what’s the difference?
Testnets (Sepolia/Holesky) are free practice networks using test ETH; perfect for dry runs. Mainnet is the real economy: costs real ETH and transactions are permanent. Always test on a testnet before you touch mainnet.
- How do I add my token to MetaMask?
In MetaMask, click “Import tokens” → paste your contract address → MetaMask usually autocompletes name/symbol/decimals if verified. If not, fill them in. You can also add a token via Etherscan’s “Add to Wallet” button on the contract page.
- Should I renounce ownership?
Renouncing can be a trust signal for “no-admin” tokens, but it’s irreversible. If you still need to mint, pause, or fix anything, don’t renounce yet. Consider a multisig or timelock for credibility without losing all control.
- How do I list on a DEX or CEX?
DEX: Use a protocol like Uniswap. Create a pool by pairing your token with ETH/USDC and add liquidity. Read Uniswap docs first—price and liquidity depth matter.
CEX: Centralized exchanges have listing processes, due diligence, and legal/compliance steps. Expect paperwork and timelines; start with their official forms and requirements.
- Can I change supply later?
Only if your contract includes mint/burn and you still hold the needed role. A fixed-supply ERC‑20 with no minting is immutable—no supply changes. If you renounce or never added minting, that’s final.
- What are the risks and legal concerns?
Smart contract bugs, admin key misuse, liquidity games, and regulators. Tokens can be treated as securities depending on jurisdiction and how they’re promoted/distributed. This isn’t legal advice—talk to counsel. Helpful starting points: Ethereum security and OpenZeppelin patterns.
Troubleshooting the sticky parts
- Verification fails on Etherscan
- Match compiler version exactly (e.g., 0.8.24 vs 0.8.20 is enough to fail).
- Match optimizer settings (on/off and runs count).
- Make sure constructor arguments are encoded exactly as deployed; if you passed “1e18” in Remix, that’s 1000000000000000000 on-chain.
- If you used imports, use “Multi-part files” verification or flatten consistently.
- Token doesn’t show in wallets
- Import the token manually using the contract address.
- Confirm you’re on the right network (mainnet vs testnet).
- Wait for finality; wallets sometimes cache metadata until verification completes.
- If name/symbol/decimals are wrong, that’s baked into the contract—see below.
- Wrong decimals or supply
- Decimals are not editable post‑deploy. If it’s wrong, the realistic fix is redeploy and migrate balances.
- Supply too high/low? If you have mint/burn privileges, adjust via those functions. If not, redeploy.
- Constructor args were wrong
- You can’t “patch” constructor params. Options: deploy a corrected contract, mint/burn if roles allow, or clearly communicate the mistake and next steps.
- Added to a DEX and price went haywire
- Thin liquidity amplifies volatility. Seed a deeper pool or use a bonding curve/vesting plan that matches your goals.
- Beware bots at launch—stage your liquidity and announcements.
- Renounced too early
- If you renounced and lost needed privileges, there’s no on-chain undo. Communicate transparently and consider a v2 contract with migration if the community agrees.
- “Honeypot?” flags
- Keep transfers standard—no hidden taxes, no blacklists. Use widely reviewed code (e.g., OpenZeppelin) and verify the contract so scanners read it correctly.
Pro tip: Screenshot your exact compiler version, optimizer settings, and constructor args before mainnet deploy. That one habit saves hours of verification pain.
My take and what I’d do next
The original Steemit walkthrough I reviewed still captures the spirit: you can get a token live fast. In 2025, the clean path is to stick with modern OpenZeppelin templates, test on Sepolia or Holesky, record your compiler settings, and verify on Etherscan the moment you deploy. If you plan to trade, prepare liquidity and communications first—trust is a feature, not an afterthought.
If I were launching today, I’d ship a standard ERC‑20 with burnable (no taxes, no gimmicks), test thoroughly on a testnet, verify instantly, publish a short README with contract links, and hold admin rights behind a multisig until I’m certain the parameters are right. Then I’d decide—based on the roadmap and community feedback—whether to timelock or renounce.
Want to keep going? Bookmark the essentials:
- OpenZeppelin Contracts
- Etherscan Verification Guide
- Remix IDE and Remix Docs
- Ethereum Security Basics
- Uniswap Docs for liquidity setup
Ship smart, verify everything, and communicate like your reputation depends on it—because it does.