How to buy Bitcoin World Wide Review
How to buy Bitcoin World Wide
www.buybitcoinworldwide.com
How to Buy Bitcoin Worldwide: BuyBitcoinWorldwide.com Review + Step‑by‑Step Guide (with FAQ)
Want to buy Bitcoin but not sure where to start, which exchange to trust, or how to keep fees low in your country?
You’re in the right place. I’m going to show you how to buy BTC anywhere in the world using BuyBitcoinWorldwide.com, compare the real costs before you click “buy,” avoid the traps that catch beginners, and get your coins safely into your own wallet.
The big benefit here is clarity. By the end, you’ll know which payment method makes sense for you, what fees to expect, which exchanges work in your region, and how to secure your Bitcoin like a pro—even if this is your first time.
Why buying Bitcoin feels harder than it should
Buying Bitcoin should be as simple as paying for coffee, but it isn’t. Here’s why people hesitate:
- Fee confusion: Is that an instant-buy spread, a trading fee, a deposit fee, a withdrawal fee, or the Bitcoin network fee? Sometimes it’s two or three of them at once.
- Country restrictions: An app your friend uses in the US might not work in your country, or it works—but with worse pricing or limits.
- ID/KYC rules: Some platforms let you buy small amounts with minimal verification. Others require full KYC before you can even get started.
- Payment methods vary: Bank transfer, card, PayPal, P2P—each has different speed, costs, and risk. Card is fast but pricey; bank is cheaper but slower.
- Scammy sites exist: I still see fake “support” pages and cloned exchange websites. One wrong click can cost you real money.
- Custody worries: Leaving coins on an exchange adds counterparty risk. After the 2022 exchange blowups (see Reuters coverage of FTX), more buyers want self‑custody—rightly so.
“I bought $1,000 of BTC but only received ~$980 after fees… then I paid another fee to withdraw.”
Sound familiar? Here’s what likely happened: you used an instant buy with a built‑in spread, plus a trading or service fee, and then an on‑chain network fee to move your BTC out. None of this is “wrong,” but it’s confusing if you don’t know what to expect.
Good news: you can reduce most of this with the right platform, method, and timing. In this guide, I’ll point you to tools that make comparing options simple and show you when to use bank transfer vs card, when to skip “instant buy,” and when Lightning makes sense for cheaper withdrawals.
What you’ll get from this guide
- A practical review of BuyBitcoinWorldwide.com so you can quickly find legit ways to buy BTC in your country.
- A simple workflow to shortlist the best exchanges by payment method, fees, speed, and limits—without spending hours researching.
- Fee expectations with real examples so you aren’t surprised by spreads, trading fees, or network costs.
- Quick conversion tools to answer “How much is $1,000 in BTC?” and “What’s 500 BTC in USD?” in seconds, using live rates.
- A clear path to self‑custody so your Bitcoin lives in your own wallet, not at someone else’s risk.
Who this is for
- First‑timers who want a clean, safe first buy without getting lost in fee charts.
- Returning buyers who are done overpaying and want a smarter, lower‑cost setup.
- Worldwide readers outside the US/EU who need local options that actually work—and want to move fast without sacrificing safety.
Ready to cut through the noise and pick a platform that fits your country and payment method? In the next section, I’ll show you exactly what BuyBitcoinWorldwide.com is and how to use it in under 60 seconds—want the shortcut?
What is BuyBitcoinWorldwide.com and why use it?
A quick overview
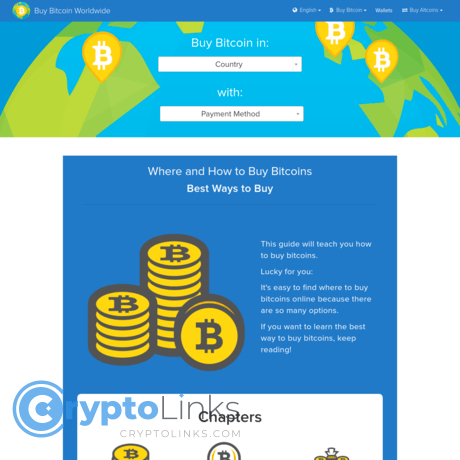
BuyBitcoinWorldwide.com is an independent comparison site that helps you quickly find legit places to buy Bitcoin based on your country and your payment method. It’s been around for years, it’s well known in the Bitcoin space, and it focuses on the details that actually matter: supported exchanges, typical fees, ID requirements, limits, and speed.
Think of it as a clean, Bitcoin-only “cheat sheet” that saves you hours of guessing. No trading charts, no noise—just practical answers to “Where can I buy BTC here, with my bank or card, and what will it roughly cost me?”
“Trust, but verify.”
That’s the spirit the site leans into: give you a vetted shortlist, explain the trade‑offs, and nudge you to double‑check the final quote before you hit buy.
How it works
The flow is simple and fast:
- Pick your country (for example, United States, United Kingdom, Germany, Brazil).
- Pick your payment method (bank transfer, card, PayPal, cash, P2P, local rails like SEPA, Faster Payments, or Pix).
- See compatible platforms with notes on fee expectations, verification needs (KYC), purchase limits, and estimated delivery speed.
It’s not an exchange. You won’t buy on the site itself. Instead, it points you to vetted platforms and explains what you might trade off: faster card buys with higher costs, or slower bank transfers with lower fees. You’ll also see reminders about security basics and why moving coins to your own wallet is the smart next move.
Real-world feel:
- US + Bank transfer (ACH): you’ll usually find options with lower fees but a 1–3 business day funding window. Worth it if you care about keeping costs down.
- EU + SEPA: often fast and inexpensive compared to cards, with clear KYC requirements and predictable limits.
- UK + Faster Payments: commonly near-instant deposits and competitive fees on reputable exchanges that support GBP.
- Brazil + Pix: platforms that accept Pix can settle quickly; you’ll still want to compare spreads vs. bank transfer equivalents.
- Card purchases: quickest way to get BTC in minutes, but watch for higher spreads and fees—listed notes typically warn you.
- P2P and cash: options exist, but the site’s guidance highlights the trust and safety considerations so you don’t rush into a risky trade.
Behavioral researchers talk about “choice overload.” When you see a focused list filtered to your country and payment rails, the anxiety drops and the right decision pops. That’s the value here.
Pros and cons at a glance
- Pros:
- Fast filters by country and method so you don’t waste time on platforms that won’t accept your bank or card.
- Fee transparency with plain-English notes about spreads, trading fees, and withdrawal costs.
- Beginner-friendly guides that explain ID checks, limits, and how long things usually take.
- Security reminders about wallets, 2FA, and self-custody so you start strong.
- Cons:
- Aggregated info: platforms change pricing and policies; you still need to confirm the final quote on the exchange.
- Referral links appear on some listings; disclosures are shown, but keep your critical thinking hat on.
- Not a replacement for due diligence: it’s a shortcut to a shortlist, not a blank check to skip your own checks.
Trust and accuracy signals
- Long track record: the site has been live for years, consistently updated, and referenced widely in Bitcoin circles.
- Clear disclosures: where there are referral relationships, it’s stated. That’s good hygiene for comparison sites.
- Straightforward writing: no hype—just practical explanations of fees, KYC, and delivery times.
- Bitcoin-first focus: less noise, fewer distractions, and guidance that’s aligned with “buy, secure, and hold.”
That said, I always cross-check a few things before buying:
- Open the exchange and look at the final out‑the‑door price (spread + fees) before you confirm.
- Check funding and withdrawal fees on the exchange’s fee page; card surcharges and fast withdrawals can add up.
- Scan recent user feedback for support delays or surprise limits, especially if you’re in a region with tighter rules.
Why use it? Because it cuts the friction. Instead of 10 tabs and guesswork, you get a focused shortlist matched to your country and payment method, plus the context to avoid rookie mistakes. That first confident buy starts with clarity.
Want to see the exact clicks I make to go from that shortlist to BTC in a wallet—without getting stung by hidden costs or slow transfers? Keep going…
Step‑by‑step: Buy Bitcoin in your country with confidence
Step 1: Start at BuyBitcoinWorldwide.com
I begin here every time because it trims the noise fast. Pick your country, select a payment method you actually have (bank transfer, card, PayPal, cash, or P2P), and let the site filter down the legit options.
My quick routine:
- Choose my country and preferred funding method.
- Shortlist 2–3 platforms that fit my needs: low fees, fast funding, and limits that won’t block me later.
- Open each in a new tab and note: KYC requirements, deposit/withdrawal rules, and whether they support Lightning withdrawals for small, cheap transfers.
Real‑world example: if I’m in the UK and want the cheapest path, I select “United Kingdom” + “Bank transfer (Faster Payments).” I’ll typically see solid options that allow quick GBP deposits with low trading fees. If I’m in Brazil, I might filter for PIX; in Mexico, SPEI bank transfers; in the EU, SEPA. If my country has banking limitations, I’ll switch the filter to P2P and look for non‑custodial choices.
“Not your keys, not your coins.” Buy where it’s convenient, but plan to hold in your own wallet.
Step 2: Compare what actually matters
Don’t get trapped by a pretty interface. What matters to your bottom line is the all‑in cost and how quickly your BTC lands where you want it.
My 60‑second comparison checklist:
- Total cost: Look at the final quote, not just the fee line. You’re paying spread + trading fee + deposit/withdrawal fees.
- Verification and limits: Light KYC might mean lower limits. Full KYC unlocks higher limits and smoother fiat withdrawals.
- Funding method: Bank transfers are usually cheaper than cards. P2P can help where banks block crypto, but learn the rules before you trade.
- Delivery time: Some platforms credit BTC instantly on card, others wait for bank settlement. If you need it now, check the ETA.
- Support reputation: Search “[exchange] withdrawal issues” on X/Reddit. A 2‑minute scan saves headaches.
Simple compare example:
- Platform A: Bank transfer free, trading fee around the low single‑digits in basis points to under 1%, withdrawals on‑chain for a network fee or via Lightning.
- Platform B: Instant card buy, higher fee and/or spread, but you get BTC right now.
If I’m stacking weekly, Platform A usually wins. If I need BTC in the next five minutes, I consider Platform B—but I know I’m paying for the speed.
Step 3: Create and verify your account
Once I’ve picked a platform, I sign up and get KYC done right away so limits don’t block me later. A smooth KYC pass often needs:
- Government ID, a clear selfie, and proof of address (utility bill or bank statement).
- Exact name match between your bank and exchange account.
- Good lighting and a steady camera—most failures are just blurry photos.
Funding tips I use:
- Bank transfer: Usually the lowest cost. Note reference codes and cut‑off times.
- Card: Fast, but pricier. Handy for small, urgent buys.
- P2P: Follow platform escrow rules, keep all chat on‑platform, and never send extra “fees” outside the order page.
I always start with a small first buy—think $20–$50—to learn the flow. Then I set a weekly or monthly amount. Dollar‑cost averaging (DCA) lowers stress and helps me stick to a plan, which is what really matters for long‑term results.
Step 4: Buy and withdraw to your own wallet
Time to act. Here’s how I keep it simple and safe:
- Place the order: If the platform has an order book, I use a limit order to control price. If it’s a “buy now” quote, I check the final amount received before confirming.
- Prepare my wallet: I open my Bitcoin wallet, generate a new receiving address, and double‑check the first and last few characters. If I’m sending a small amount, I consider Lightning; for larger amounts, I go on‑chain.
- Send a test: I withdraw a tiny test first. Once confirmed, I send the rest. Cheap insurance against typos.
- Fee awareness: For on‑chain, I check the recommended fee on a mempool explorer if the platform lets me choose. For Lightning, I expect pennies and near‑instant settlement.
Practical example: on a $300 buy, I’ll often test $5 to my wallet on Lightning, then move the remaining balance. For a $2,000 buy, I typically go on‑chain and set a reasonable fee based on current congestion. Either way, my BTC ends up under my keys.
Step 5: Store safely
Buying is the easy part; keeping it safe is the real game. Here’s how I handle it:
- Seed phrase: Write it down on paper, offline. No screenshots. No cloud notes. Store it in two separate safe places.
- 2FA: Enable an authenticator app (TOTP) on your exchange account and your email. Avoid SMS if possible.
- Hardware wallet: Once your stack grows, upgrade to a reputable hardware wallet. Do a test recovery so you know it works.
- Stay private: Never share your seed phrase. No legit support will ever ask for it.
If you’re feeling that mix of excitement and nerves, you’re in the sweet spot. Take it one step at a time, keep your costs sane, and stay in control of your keys.
One last thing before we move on: have you ever wondered why two apps quote you different “final amounts” for the same $1,000 buy? In the next part, I’ll break down spreads vs trading fees vs network fees with clear, real numbers—so you stop guessing and start saving. Ready to see where the hidden costs hide?
Fees explained: what you really pay (and how to pay less)
If you’ve ever bought Bitcoin and felt a little “off” about the final amount you received, you’re not alone. The price on the screen is one thing; what hits your wallet can be something else entirely. That gap is almost always fees—some visible, some sneaky.
“Fees are the tax you pay for rushing.”
I want you to keep more of what you buy. Here’s exactly where money leaks—and how to plug the holes.
The fee stack in plain English
- Spread: The hidden markup when you use “instant buy.” If BTC is $60,000 but your app sells at $60,600, that’s a 1% spread baked into the quote.
- Trading fee: The explicit commission on an exchange. On liquid spot markets, expect ~0.1%–0.6% depending on your volume and whether you’re a maker (limit) or taker (market).
- Deposit/withdrawal fees (fiat and crypto):
- Fiat deposits: Bank transfers are often $0–$5 or free. Cards can add 2%–4%+.
- Crypto withdrawals: Either a fixed BTC fee (e.g., 0.0001–0.0005 BTC) or a dynamic fee. Some platforms subsidize or waive this; others don’t.
- Network fee: The blockchain fee to send BTC on‑chain. This rises and falls with congestion and depends on the size of your transaction in vbytes. Lightning is usually cents or less.
If you’re comparing places to buy, BuyBitcoinWorldwide.com is great for a quick shortlist—then always confirm fee details on the exchange’s own page before you pull the trigger.
Example: “How much is a $1,000 Bitcoin transaction fee?”
It depends on the route you take. Here are realistic scenarios to set your expectations.
- Convenience app (instant buy)
- All‑in buy cost: Often about 0.5%–2% including spread and fee.
- Concrete benchmark: Historically, Cash App’s published tiers have shown around ~1.75% in the $200–$1,000 range and ~1.5% for $1,000–$2,000. If you bought $1,000 of BTC, you might net about $985–$992 before any withdrawal.
- Withdrawal: On‑chain network fee varies; Lightning is typically much cheaper.
- Exchange with bank transfer + limit order
- Deposit: Often free (or a small bank fee).
- Trade fee: Maker fee ~0.1%–0.3%. On $1,000, that’s $1–$3.
- Withdrawal:
- On‑chain: Based on mempool conditions. A typical transaction might be ~140 vbytes. At 20 sats/vB, that’s ~2,800 sats. If BTC is $60,000, that’s roughly $1.68. At 80 sats/vB, closer to $6.70.
- Lightning: Usually a few sats base fee + a tiny percent (commonly ~0.01%–0.3%). For $1,000, that’s often pennies.
Want to check current on‑chain fee pressure? Open mempool.space, look at the sats/vbyte range, and multiply by your estimated transaction size (many standard withdrawals are ~120–180 vbytes). It’s simple, powerful, and immediately shows if it’s a good time to withdraw—or if waiting an hour could cut your cost in half.
How to keep costs down
- Use bank transfers instead of cards when timing allows. Cards are fast, but speed carries a premium.
- Place limit (maker) orders on the exchange’s “pro/advanced” interface. Maker fees are often lower than taker fees.
- Avoid instant‑buy if the spread is chunky. Check the actual quote and the final “you will receive” amount.
- Withdraw with Lightning for small amounts or frequent moves; use on‑chain for larger, less frequent transfers to keep percentage cost tiny.
- Batch withdrawals: One on‑chain fee to move multiple buys is smarter than paying the network fee every time.
- Shop before you buy: Use BuyBitcoinWorldwide.com to compare providers in your country by method and fee style.
Hidden costs to watch
- Foreign exchange (FX) hits: If your card or bank isn’t in USD/EUR, your bank may skim 1%–3% for currency conversion—on top of the crypto app’s fees.
- Premium pricing: Some convenience apps bake in a larger spread but show a small “fee.” Compare the out‑the‑door total across two apps to see the difference.
- Card quirks: A few banks treat exchange buys as a cash advance, adding fees and interest. Nasty surprise—call your bank or use a bank transfer.
- Minimum withdrawal sizes: If the platform’s fixed BTC fee is high, tiny withdrawals are expensive in percentage terms. Accumulate first, then withdraw.
- Network mix‑ups: Sending to the wrong network (e.g., a look‑alike chain) can mean loss. Always match the Bitcoin network or Lightning if supported on both ends.
- Speed settings: Many wallets let you choose fee priority. Pick “economy” when mempool pressure is low to slash costs.
Bottom line: fees reward patience and planning. A quick check of spread, trading fee, and network conditions can turn a $20 mistake into a $2 non‑event.
Curious what $1,000 actually gets you in BTC right now, or how much 500 BTC is in USD at this second—and why two apps can show different answers? Keep going; I’ll show you the fastest way to get live numbers and compare the real, out‑the‑door total.
Quick conversions: “How much is $1,000 in BTC?” and “500 BTC in USD?”
Sometimes you don’t need a full buying strategy—you just want a straight answer: how many sats do I get for $1,000, or what’s 500 BTC worth right now? Here’s how I check it fast, without getting tricked by hidden spreads or stale quotes.
“Price is what you pay; value is what you get.” — Warren Buffett
Real‑time tools I actually trust
Use a live rate from a reputable source, then sanity‑check the final number on the platform where you’ll execute.
- Kraken BTC/USD price (live chart with order book depth context)
- Coinbase USD⇄BTC converter (quick, clean UI; shows quote)
- Bitstamp BTC/USD (transparent pricing on a long‑running exchange)
- BuyBitcoinWorldwide.com (jump to an exchange that supports your country, then check its live quote)
Tip: Aggregator sites and widgets often show a “mid‑market” price (no spread, no fees). Exchange “convert” pages show what you’ll actually get. That difference matters.
Fast examples and how I verify
Example workflow for 1,000 USD → BTC (illustration)
- Check a live BTC/USD price. Let’s say you see $63,200 as the current rate.
- Quick math: 1,000 ÷ 63,200 ≈ 0.01582 BTC before any fees or spread.
- Open your exchange’s converter (e.g., Coinbase/Kraken) and type $1,000. If the quote shows ~0.0157 BTC, the difference (~0.7% here) reflects spread/fees. If it’s much lower, you’re paying extra; compare another venue.
Example workflow for 500 BTC → USD (illustration)
- Using the same $63,200 reference: 500 × 63,200 = $31,600,000 (headline value).
- Reality check: Executing 500 BTC at market can move the price (slippage). For size like this, I’d request an OTC quote or use limit orders/TWAP. Your “realized” number might be lower than the mid price.
Always refresh your page right before you act. Prices can change in seconds—especially when the market wakes up.
Why numbers differ across apps
- Spread vs. mid: Mid‑market is the midpoint between bid and ask; your buy price is the ask (higher) and your sell price is the bid (lower).
- Platform fees: Some show a separate fee, others bake it into the quote. Only the “you pay / you receive” line tells the truth.
- Quote timing: A 5–10 second delay can matter on volatile days.
- Liquidity and size: Bigger orders can slip through the order book. Research from market data firms like Kaiko has shown that BTC liquidity fluctuates through the year—spreads widen and depth thins during stress—so large orders get worse fills than small ones.
- Currency FX: If your bank card isn’t in USD/EUR, your bank might sneak in an extra conversion fee.
For context, Bitwise’s well‑known analysis submitted to the SEC highlighted how reputable, liquid spot venues tend to have tight spreads during normal market conditions—yet around news events, spreads can widen and effective costs jump. Translation: a calm Tuesday morning quote is not the same as a CPI print minute.
A quick checklist before you trust any conversion
- Grab a neutral live price (Kraken/Bitstamp chart or a trusted index).
- Do the fast math yourself:
- USD → BTC: USD amount ÷ BTC/USD mid
- BTC → USD: BTC amount × BTC/USD mid
- Compare to your exchange’s “you receive” number. Note the gap—that’s spread + fees.
- Refresh the quote and confirm the expiry timer if shown.
- Screenshots are your friend if you track costs or need records for tax season.
Pro tips when you’re converting big numbers (like 500 BTC)
- OTC desks: Request a firm quote; they’ll source liquidity and reduce slippage.
- Slice the order: Use limit orders or a TWAP algorithm to average fills across time.
- Mind liquidity hours: Depth is usually better during overlapping US/EU trading hours.
I keep it simple: confirm a clean mid rate, compare to the execution quote, and know exactly what I’ll receive. No more guessing, no more “where did those sats go?” moments.
Ready for the next step—turning that number into a safe, stress‑free first buy you control? In the next part I’ll show you a beginner‑friendly plan to get started without overthinking. What’s a comfortable first amount for you: $100, $250, or $500?
Beginner path: the simplest way to buy and hold Bitcoin safely
Start small and set a plan
Here’s the beginner flow I’ve seen work again and again: take 30 minutes, open an account on a beginner‑friendly exchange that supports your country, complete verification, fund it, and make a tiny first buy. Think $100–$500 to get comfortable. If that still feels like a leap, start with $25—this is about building skill and confidence, not timing the market.
I’m a big fan of a simple dollar‑cost averaging schedule (for example, $50 each week). It’s boring on purpose. You remove guesswork, and it keeps you from panic‑buying or panic‑selling.
Why DCA? Research from Vanguard found that while lump‑sum investing wins more often in rising markets, DCA reduces the risk of regret and smooths the ride for new investors—exactly what most beginners need in a volatile asset like Bitcoin. If staying consistent helps you stick with your plan, that’s a win in my book. You can read their take here: Vanguard research on DCA and risk.
Quick starter plan:
- Open and verify an exchange account that works in your country.
- Fund via the lowest‑fee method available (bank transfer usually beats cards).
- Make a tiny first buy (even $25 is fine) to learn the flow.
- Set an automatic DCA (weekly or biweekly). You can pause anytime.
Move to self‑custody
Once you’ve bought, the next step is owning your keys. That means a wallet only you control.
Pick a wallet:
- Software (good for starters): BlueWallet, Sparrow, Electrum, Muun, Phoenix.
- Hardware (upgrade as your stack grows): Trezor, Ledger, Coldcard, Blockstream Jade, BitBox02. Buy only from official sites.
Your first withdrawal, step by step:
- Create a new receiving address in your wallet. Prefer bech32 addresses (starting with bc1…) for lower fees.
- Send a small test amount first (for example, $5–$20). If both your exchange and wallet support it, Lightning is cheap and fast for a tiny test. Otherwise, send on‑chain and pick a low‑fee window. You can check current network fees at mempool.space.
- Wait for confirmation, then move the rest.
Seed phrase basics:
- Write your 12/24‑word seed on paper. No screenshots, no cloud, no phone photos.
- Store two copies in separate safe spots. Consider a metal backup later.
- Never share your seed—anyone with it can take your coins. No support rep will ever ask for it.
If it’s not your keys, it’s not your coins.
Common mistakes to avoid
- Leaving large balances on exchanges. Exchanges are convenient, not a vault. Move to your own wallet once you’re ready.
- Sending on the wrong network. Bitcoin ≠ “BTC on other chains.” Avoid labels like “BEP‑20 BTC,” “TRC‑20 BTC,” or “Solana BTC.” Use Bitcoin on‑chain or Lightning only.
- Using SMS for 2FA. SIM swaps are real. Use an authenticator app (TOTP) like Aegis, Authy, or Google Authenticator. Consider adding a hardware key later (YubiKey).
- Saving your seed digitally. Email, notes apps, screenshots—please don’t. Paper or metal only, stored privately.
- Skipping a test withdrawal. Always test with a small amount before moving the full balance.
- Falling for phishing. Bookmark official sites, type URLs manually, and confirm addresses. If someone messages you first, assume it’s a scam.
For context, social‑engineering scams continue to cause individual losses across the industry. Chainalysis’ annual reports have repeatedly highlighted phishing and impersonation as persistent threats—stay skeptical and verify. See the Chainalysis Crypto Crime Report for trend data.
Worldwide notes that matter
- KYC and limits differ by country. Some regions require enhanced checks and extra documents. If your limits feel tight, finish verification early so you’re not stuck when you want to buy or withdraw.
- Pick the best local rails. In many countries, bank transfers have the lowest fees (EU: SEPA, UK: Faster Payments, BR: Pix, IN: UPI, etc.). Cards are fastest but usually cost more.
- P2P can be useful where banking is restrictive. If you use a P2P marketplace, keep all chat and settlement on‑platform, release escrow only after funds clear, and never agree to side deals. Start small to learn the flow.
- Keep simple records for taxes. Log date, amount, price, fees, and transaction IDs for buys/sells/withdrawals. Export CSVs from your exchange once a quarter. Tools like Koinly and CoinTracker can help, but a basic spreadsheet works too.
- Privacy tip: Use a fresh receiving address each time. Most modern wallets do this automatically.
10‑minute checklist:
- Create account and verify
- Fund via low‑fee method
- Buy a small amount
- Install a reputable wallet and back up your seed
- Test withdrawal, then move the rest
- Enable app‑based 2FA, save records, and set a DCA schedule
Want to know the real, out‑the‑door cost of a $1,000 Bitcoin purchase today—and how to check it before you click “Confirm”? I’ll break that down next, plus quick answers to the questions I get every week. Ready for the FAQ?
FAQ and final take
How much is a $1,000 Bitcoin transaction fee?
Short answer: it depends on two different fees—what your app/exchange charges and what the Bitcoin network charges.
1) App/Exchange fee
- Range you’ll see: roughly 0%–2% for a $1,000 buy, depending on platform and payment method (bank transfer is usually cheaper than card).
- Examples you can verify: check public fee pages:
- Kraken fee schedule (maker/taker trading fees, often well under 1% for spot)
- Coinbase fees (varies by region, method, and product)
- Rule of thumb: “instant buy” and card purchases tend to cost more than placing a limit order and funding by bank transfer.
2) Bitcoin network fee
- On‑chain: variable and market‑driven. You can check the live fee rate in sats/vB at mempool.space.
- Quick math example: if the current fee rate is 15 sats/vB and your withdrawal is ~140 vB, you’ll pay ~2,100 sats. At a BTC price of $60,000, that’s 0.000021 BTC ≈ $1.26. If the mempool is slammed, it can spike into the tens of dollars; if it’s quiet, it can be well under a dollar.
- Lightning: usually pennies or less for small amounts (think a few sats), but only if both your wallet and the exchange support it.
Simple checkpoint: Total cost = quoted buy price (including spread + trading fee) + any fiat fees + withdrawal fee (exchange + network). Always review the final confirmation screen.
One more gotcha: some platforms add a fixed withdrawal fee on top of the network fee; others pass the network fee through dynamically. Always peek at the “withdraw” screen before you buy so there are no surprises.
What’s the best way for a beginner to buy Bitcoin?
Keep it simple and safe:
- Pick a reputable exchange that supports your country and payment method. Use a comparison hub like BuyBitcoinWorldwide.com to shortlist options.
- Verify your account and fund it with a method that balances speed and cost (bank transfer is typically cheaper; cards are faster but pricier).
- Start with an amount you’re comfortable with—many people begin with $100–$500—and consider a recurring buy to reduce timing stress.
- Withdraw to your own wallet once you’re ready. Send a small test first, then the rest. Back up your seed phrase offline. Enable 2FA on your exchange account.
That’s the beginner path that avoids most headaches and keeps fees reasonable.
How much is $1,000 in Bitcoin right now? And how much is 500 BTC in USD?
These numbers change second by second. Use a live converter and refresh before you act:
- $1,000 → BTC: plug $1,000 into a live converter on a major exchange (e.g., Kraken’s price page) or a reputable aggregator. The result is your gross BTC before any app or network fees.
- 500 BTC → USD: multiply 500 by the live BTC/USD price on a trusted source.
Links worth bookmarking:
- Kraken BTC/USD live price
- CoinGecko Bitcoin price
- BuyBitcoinWorldwide.com (to find where to buy, by country and method)
Pro tip: different apps use different spreads and fees, so the “amount you receive” can vary from the headline price. Trust the final quote on the confirm screen—that is what matters.
Wrap‑up: my take and next steps
Here’s my bottom line. Use BuyBitcoinWorldwide.com to quickly see which platforms serve your country and payment method, then compare the out‑the‑door cost before you buy. Keep the fee stack in view, avoid paying extra for convenience if you don’t need to, and get comfortable with self‑custody at your own pace.
Want a simple action plan?
- Open the site, pick your country and payment method, shortlist 2–3 options.
- Check each platform’s fee page and withdrawal screen.
- Make a small first purchase, then withdraw to your wallet and confirm it arrived.
Ready to go? Head to BuyBitcoinWorldwide.com, compare, buy smart, and secure your coins. That’s how you stack without stress.
Nothing here is financial advice. Crypto involves risk—only spend what you can afford, and stay safe out there.

