Neutron Review
Neutron
neutron.org
If your website is on the scam list and you think that you are not a scammer, contact us. After you provide us with all the proof that you are in Crypto World with good intentions, we will delist you. Usually, you get in this category because you are hiding your team, you have a bad reputation(you are tricking, deceiving, scamming people), and you haven't got a written project whitepaper or is a shitty one....
Their Official site text:
Overview
What is Neutron and why is it needed?
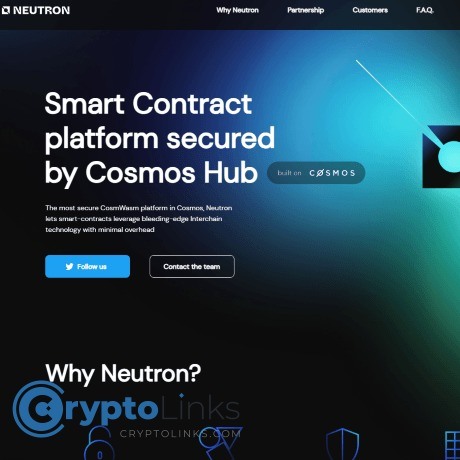
Neutron is a blockchain network that brings Smart Contracts into the Cosmos-family blockchains using CosmWasm. Neutron works with networks using the IBC protocol. Neutron security (block validation) is provided by the Cosmos Hub network using Interchain Security.
Cosmos SDK
Neutron is built using the Cosmos SDK framework. A generalized framework that simplifies the process of building secure blockchain applications on top of Tendermint BFT. It is based on two major principles: Modularity & capabilities-based security.
Interchain Security
Interchain Security is a technology which allows Neutron to be secured by the validator set of the Cosmos Hub and do not have another one separate validator set particularly for the Neutron blockchain.
Interchain Queries
Neutron is bringing customizable Interchain Queries to smart contract developers. Interchain Queries (aka ICQs) are an essential building block enabling devs to securely retrieve data from remote zones.
Interchain Transactions
Neutron is bringing interchain accounts (ICA) to CosmWasm smart-contracts. ICAs allow modules and smart contracts to execute and track transactions on foreign zones, without deploying additional code. With ICQs, they're the Interchain's secret DeFi sauce.
CosmWasm
CosmWasm is a smart contracting platform built for the Cosmos ecosystem.
F.A.Q.
Please refer to the F.A.Q. page!
F.A.Q.
Technical questions
I am a developer who builds on Neutron. How can I get in touch with the dev team?
There is two places to check out:
Neutron Builders Announcements (https://t.me/+Q6C_kb0xLaoxYzE1): this is the channel with official announcements;
Neutron Builders Chat (https://t.me/+b9f8m8iybLdhYjE9): this is a chat where smart contract developers can ask technical questions to the devs. Please note that non-technical questions and spam can result in an immediate ban;
Neutron Dev Blog (https://t.me/+GK5KVutIvQhhNmNi): a channel for various technical notes from the dev team.
Where is block explorer?
We encourage everyone to use the Mintscan explorer:
Mainnet (neutron-1): https://www.mintscan.io/neutron;
Testnet (pion-1): https://testnet.mintscan.io/neutron-testnet.
We also recommend to use this awesome smart contracts explorer by Celatone: it provides a great UI to upload, query and execute contracts.
Where can I get the public REST and RPC nodes?
You can check out the Cosmos Chain Registry:
Mainnet (neutron-1);
Testnet (pion-1).
We are always keeping our REST and RPC nodes running and available for everyone to use; if you experience any problems with the public nodes, feel free to report to the Neutron Technical Support group (see above).
What CosmWasm version is used?
We are using a patched 0.31.1 version of wasmd.
Overview
The main topic we want to cover here is how to build and run a Neutron node in a standalone way. If you need only a Neutron node to be running and plan no interactions with other chains or you have your own setup for running a sidechain and relaying applications, stick with the Neutron node sole running manual. This is the easiest way how to get a running Neutron node.
However, we assume that a ready-to-use multi-chain setup with relayers inbetween can also be handy for developers who want to deploy on Neutron. Therefore we desided to describe a guide how to run a Neutron node along with a Gaia node connected via a Hermes IBC Relayer and a Neutron ICQ Relayer. The Neutron's integration tests project is the base for this setup. If this is your case, stick with the Cosmopark running manual. This is likely your option if you're up to create a smart contract that will take advantage of Neutron cosmwasm SDK and its interchain queries and interchain transactions. This is a more advanced section than the basic sole Neutron node flow.
Neutron build from sources
This page contains information about building Neutron node from sources
Prerequisites
Neutron v1.0.1
Golang v1.20 (go releases and instructions).
Build and run
1. Make sure you have the required golang version
go version
The output should comply with the golang version mentioned in the Prerequisites section.
2. Clone Neutron core repository and cd into it
git clone -b v1.0.1 https://github.com/neutron-org/neutron.git
cd neutron
3. Build a Neutron node image
make install
Neutron standalone docker
This page contains information about building and running a Neutron node in a standalone way.
Prerequisites
Docker engine;
Golang v1.20 (go releases and instructions).
Build and run
1. Make sure you have the required golang version
go version
The output should comply with the golang version mentioned in the Prerequisites section.
2. Clone Neutron core repository and cd into it
git clone -b v1.0.1 https://github.com/neutron-org/neutron.git
cd neutron
3. Build a Neutron node image
make build-docker-image
4. Run a Neutron node as a docker container
make start-docker-container
A Neutron node is now running in the background. To see the app logs, run:
docker ps
And use the neutron-node container ID in the following command:
docker logs -f
To stop the node, run
make stop-docker-container
Usage
Ports
The Neutron node exposes several ports to be used by you and your applications:
1317:1317 — the REST server;
26657:26657 — the Tendermint RPC server;
26656:26656 — the Tendermint P2P server;
9090:8090 — the gRPC server.
Interaction with the node using neutrond
The Neutron node is available to be interacted with using neutrond command. The following command will install neutrond at your computer:
make install
It will build the neutrond based on the current version of the Neutron core and place the result binary to your GOBIN directory. Make sure GOBIN is defined and is a part of the PATH env variable. If you have any troubles at this step, try to shoot them by verifying you have the golang related env variables set properly.
Once installation is done, the neutrond is ready to be used:
neutrond query bank total
Making transactions
There are several accounts added at the genesis state that possess NTRN and are at your service. See the genesis init script to find out more details about it. The following command will list you all the preallocated addresses:
docker execneutrond keys list --keyring-backend test --home data/test-1/
We suggest you to add the accounts from the init script mentioned above to your local test keyring to make them useful directly from command line. To do so, copy a mnemonic from the script and use it in a keypair recovery procedure:
neutrond keys add--recover --keyring-backend test
> Enter your bip39 mnemonic
After that, you'll be able to make transactions on behalf of the account and fund your applications and smart contracts.
Cosmopark
This page contains information about building and running Neutron node interconnected with a Gaia node by a Hermes IBC Relayer and a Neutron ICQ Relayer. This is a more advanced section than the basic sole Neutron node flow which is based on the Neutron's integration tests setup.
Prerequisites
Docker engine;
Golang v1.20 (go releases and instructions).
Build and run
1. Make sure you have the required golang version:
go version
The output should comply with the golang version mentioned in the Prerequisites section.
2. Clone necessary repositories
You'll have to clone several repositories into a single parent folder. Choose a parent directory and make clonings from it. This is crucial to have all the repositories cloned and stored in the same parent folder.
Clone Neutron repositories
git clone https://github.com/neutron-org/neutron.git
git clone https://github.com/neutron-org/neutron-integration-tests.git
git clone https://github.com/neutron-org/neutron-query-relayer.git
Clone and prepare Gaia
We use the Gaia network as a target network for interchain operations. We use v9.0.3 for the tests.
git clone https://github.com/cosmos/gaia.git
cd gaia
git checkout v9.0.3
3. Build images
The commands from this section are available from the setup folder in the neutron-integration-tests project.
If it's the first time you're here, run
make build-all
If you have the images built and you want to rebuild one of them, the following commands which build each component separately are also available:
make build-gaia
make build-neutron
make build-hermes
make build-relayer
4. Download Neutron DAO contracts
Neutron has Neutron DAO contracts in genesis, so before running you need to download the latest version of contracts:
npx @neutron-org/get-artifacts neutron-dao -b main -d contracts
5. Run Cosmopark
The commands from this section are available from the setup folder in the neutron-integration-tests project.
make start-cosmopark
A Neutron node, a Gaia node, a Hermes instance and an ICQ Relayer instance are now running in the background. To see the apps logs, run:
docker ps
And use the container ID you want to observe logs of:
docker logs -f
Cumulative logs are available via running
docker-compose logs -f
To stop cosmopark, run
make stop-cosmopark
6. Usage
Neutron node
The Neutron node usage guidelines (exposed ports, CLI, prepared accounts) for Cosmopark are the same as for the sole run. Please refer to the corresponding section to see more details on it.
Hermes
For more information about Hermes, refer to the dedicated section and its configuration folder in the neutron-integraton-tests repo.
ICQ Relayer
For more information about ICQ Relayer, refer to the dedicated section and its configuration via docker-compose file in the integration-tests repo.
Gaia
The Gaia node running in the Cosmopark is configured via docker-compose file.
Localnet
This page describes how to run Neutron, Gaia, IBC and ICQ relayers locally, without Docker environment. Beware: you will have to clone all these repositories in the same parent directory, just like this:
.
├── neutron
├── gaia
└── neutron-query-relayer
Prerequisites
Go version 1.20 or newer
Rust toolchain v1.69 or newer
1. install Neutron
git clone https://github.com/neutron-org/neutron
cd neutron
make install
2. install Gaia
clone gaia: git clone -b v9.0.3 https://github.com/cosmos/gaia.git
cd gaia
for some reason, gaia v9.0.3 checks if you have go v1.18 installed, not newer, not older, however, it builds fine with go v1.20, so, before running make install, you will have to edit gaia's Makefile on line 110 like this:
-$(BUILD_TARGETS): check_version go.sum $(BUILDDIR)/
+$(BUILD_TARGETS): go.sum $(BUILDDIR)/
finally, run make install
3. install Hermes
cargo install ibc-relayer-cli --bin hermes --version 1.4.1 --locked
4. install Neutron Query Relayer
git clone https://github.com/neutron-org/neutron-query-relayer
cd neutron-query-relayer
make install
Start Localnet
go to neutron/ folder and run make init, this will start Neutron and Gaia chains
after make init completes, run make start-rly, this will start IBC relayer
go to neutron-query-relayer/ folder and run export $(grep -v '^#' .env.example.dev | xargs) && make dev, this will start ICQ relayer
Some wallets and RPC's you could use
Gaia chain's RPC is exposed at 0.0.0.0:16657, you can add and use mnemonic with some preallocated funds using
echo "banner spread envelope side kite person disagree path silver will brother under couch edit food venture squirrel civil budget number acquire point work mass" | gaiad keys add test --recover
You can also check your balance using
gaiad query bank balances "$(gaiad keys show test -a)" --node tcp://0.0.0.0:16657
Neutron chain's RPC is exposed at 0.0.0.0:26657, you can add and use mnemonic with some preallocated funds using
echo "veteran try aware erosion drink dance decade comic dawn museum release episode original list ability owner size tuition surface ceiling depth seminar capable only" | neutrond keys add test --recover
You can also check your balance using
neutrond query bank balances "$(neutrond keys show test -a)" --node tcp://0.0.0.0:26657
Neutron Launch Instructions
TL;DR
Prop 792 was accepted by the Cosmos Community. If Neutron's mainnet launches between the 8th and the 21st of May, it may become the Hub's first consumer chain. Since a Cosmos Hub upgrade was scheduled on the Hub on Monday the 8th, we strongly recommend validators to join a coordinated launch on Wednesday the 10th at 3pm UTC instead.
For launching consumer chains, validators have two main responsibilities:
Submit an AssignConsumerKey transaction on the Cosmos Hub
Run the consumer chain binary at the spawn time.
This guide informs validators about how to accomplish these goals.
The Steps
Initialize the Consumer Chain
Initialize your node on the consumer chain
Assign Consumer Key
In-depth instructions for this can be found here
Update the Genesis File
After the consumer chain state is generated, copy the updated genesis.json into the correct directory and start a node
Start the Consumer Chain Binary
Whenever 66.67% percent of the validator voting power is running the binary, the chain will start producing blocks.
Relevant Parameters
Soft_opt_out_threshold: 0.05 (e.g. 5% of the voting power)
The bottom 5% validators by voting power can decide whether or not they wish to opt-in to running a node on Neutron. They will earn rewards regardless of their decision.
Commit_timeout: 1000ms (leads to ~2.5s blocktime on Pion-1)
This increases blocktime speed on the network. See these docs for more information about the implications of this parameter.
Signed_blocks_window: 140,000 blocks (~4 days at 2.5s per block)
The signing window is decided by the Consumer chain via the signed-blocks-window parameter. Submitting fewer than the specified min-signed-window will result in your validator being jailed. Consumer chains will have a generous window. Submit an unjail tx on the provider to unjail your validator.
Validator Upgrade Instructions
The neutron proposal has been put on-chain. Cosmos Hub validators are obligated to run Consumer Chain nodes. This document provides step by step instructions about how to do that.
Pre-requisites
Here's what you need to know
Consumer chain launch & upgrade support for all consumer chains will be done from the Cosmos Hub discord validators verified channel. Gather in there at chain spawn time (after the ConsumerChainAddition proposal passes) and during upgrades.
If you need specialized support or have questions, you can check out the forum.
Announcements will be sent across multiple channels to alert you about upgrades. The best place to stay up to date is in the upgrades channel in discord.
There are three important parameters in every ConsumerAdditionProposal. They are:
spawn_time - the time after which the consumer chain must be started
genesis_hash - hash of the pre-ccv genesis.json; the file does not contain any validator info -> the information is available only after the proposal is passed and spawn_time is reached
binary_hash - hash of the consumer chain binary used to validate the software builds
The signed_blocks_window and related min_signed_per_window parameter for consumer chains, which determine the number of blocks you need to sign in a given window to avoid being jailed, will be determined on a consumer chain by consumer chain basis. Each consumer chain may have a different window. These parameters can be found by checking the chain’s genesis.json (example from neutron’s testnet).
If the chain is already running, the params can be checked by:
`$ neutrond q slashing params --home ~/.neutron
# example output
signed_blocks_window: 140000
min_signed_per_window: 0.050000000000000000
downtime_jail_duration: 600s
slash_fraction_double_sign: 0.050000000000000000
slash_fraction_downtime: 0.000100000000000000`
Here's what you need to do
Fill out the validator contact form if you haven't already
Join the Cosmos Hub discord and ping an admin to request to be added to the relevant channels
Read the rest of this document and ask on the forum if you have questions
Neutron Launch Instructions
1. Initialize the Consumer Chain
You can initialize the Consumer chain before the spawn time specified in the ConsumerChainAddition proposal. You should not attempt to start the chain binary (neutrond start) before the spawn time - you need the genesis.json file with the initial validator set populated. The final genesis.json will be provided by the consumer chain team.
You need to initialize the Consumer chain node before assigning a key. Initializing the node will provide you with a random private key (/config/priv_validator_key.json)
Node initialization procedure (example):
## 1. install neutrond.
$ git clone https://github.com/neutron-org/neutron
$ cd neutron
# switch to version to be used
# the version might change
# You should have go >1.20 installed in order to build binary
$ git checkout v1.0.1
$ make install
# after installing the neutrond tool is available; check the installation
$ neutrond version --long
name: neutron
server_name: neutrond
version: 1.0.1
commit: c236f1045f866c341ec26f5c409c04d201a19cde
....
## 2. initialize your node
$ neutrond init neutron-val --chain-id neutron-1
{"app_message":{"adminmodule":{"admins":[]},"auth"... }}}
#/config/priv_validator_key.json contains your new key
# show the validator key (needed for key assignment on provider)
$ neutrond tendermint show-validator
{"@type":"/cosmos.crypto.ed25519.PubKey","key":"qVifseOYMsfeKnzSHlkEb+0ZZeuZrVPJ7sqMZJHAbBc="}
2. Assign Consumer Key
Information about Key Assignment
You may notice that some consumer chains do not implement the x/staking module, which means there is no way to set up a validator in the conventional way on the consumer chain.
On the consumer chain, a validator's activity is identified by the private validator key used to sign blocks. There are two mutually exclusive methods for connecting activity on a consumer chain back to a provider.
Assigning a key to be used on the consumer chain is optional, but highly recommended.
Having different keys for all the chains helps minimize the impact of any of the keys being leaked.
In the examples below we will show how to use a consumer key created in the section above and how to reuse your provider key. We only need the public key information - the private key should never be exposed. Your setup may vary depending on your infrastructure and operational security.
Examples
Option One: Reuse your private validator key
Within the machine running the provider node, this key is found at
~/.gaia/config/priv_validator_key.json
Copy the contents of this file into a new file on the machine hosting the consumer chain, at
~/./config/priv_validator_key.json
Upon start, the consumer chain should begin signing blocks with the same validator key as present on the provider.
Option Two: Use key delegation
⚠️ If you did not use the key delegation feature before spawn time, do not use it until the chain is live, stable and receiving VSCPackets from the provider! ⚠️
If you do not wish to reuse the private validator key from your provider chain, an alternative method is to use multiple keys managed by the Key Assignment feature.
⚠️ Ensure that the priv_validator_key.json on the consumer node is different from the key that exists on the provider node.
⚠️ The AssignConsumerKey transaction can be sent to the provider chain before the consumer chain's spawn time. This ensures that the key to be used by that consumer chain is recorded as part of the state in the genesis file.
⚠️ The AssignConsumerKey transaction can also be sent after spawn time. In that case the genesis file will include your provider key. Your assigned consumer key will be active as soon as the provider informs the consumer about the key assignment.
# run this on the machine that you will use to run neutron
# the command gets the public key to use for neutron
$ neutrond tendermint show-validator
{"@type":"/cosmos.crypto.ed25519.PubKey","key":"qVifseOYMsfeKnzSHlkEb+0ZZeuZrVPJ7sqMZJHAbBc="}
# do this step on the provider machine
# you should have a key available on the provider that you can use to sign the key assignment transaction
$ NEUTRON_KEY='{"@type":"/cosmos.crypto.ed25519.PubKey","key":"qVifseOYMsfeKnzSHlkEb+0ZZeuZrVPJ7sqMZJHAbBc="}'
$ gaiad tx provider assign-consensus-key neutron-1 $NEUTRON_KEY --from--home --gas 900000 -y -o json
# confirm your key has been assigned
$ GAIA_VALCONSADDR=$(gaiad tendermint show-address --home ~/.gaia)
$ gaiad query provider validator-consumer-key neutron-1 $GAIA_VALCONSADDR
consumer_address: ""
Read more on Key Assignment.
3. At the spawn time, start the Consumer Chain Binary
Once the genesis state is initiated after the chain spawn time, the Neutron team will distribute the genesis.json file to validators. Copy this file into your neutron node home directory and start your node.
In this example we are simply using neutron’s start command. Your actual steps depend on the tooling you use (cosmovisor, systemd, kubectl, ansible etc.)
# Final genesis URL will be announced shortly after spawn time
$ wget
$ mv genesis.json ~/.neutrond/config
# start the binary
$ neutrond start
4. Verify that your validator is signing blocks in the consumer chain
You can compare the signatures on a recently-produced block with your validator's signature to confirm you are signing blocks with the assigned key
Parse your signature:
$ neutrond keys parse $(neutrond tendermint show-address)
Example output:
human: neutronvalcons
bytes: AE84D29EC8E3BBCF123B48C702DAA982EEC2830B
To grab only the byte string:
$ neutrond keys parse $(neutrond tendermint show-address) --output json | jq '.bytes'
# Query the latest block for your signature:
$ neutrond q block | jq '.block.last_commit.signatures' | grep
Remember – don't go to jail..
If you sign less than min_signed_per_window within the signed_blocks_window, your validator node will be jailed. If a jailing occurs, your validator will be jailed on both provider and all consumer chains. At present, you will not be slashed for downtime, though in the future this may change.
To get out of jail, submit an unjail tx on the provider chain:
$ gaiad tx slashing unjail --chain-id cosmoshub-4 --from=
Congratulations!
You now know how to start a consumer chain node. We look forward to running our network with you!
The Cosmos community is here to assist you and support you as the ATOM economic zone grows. Please don't hesitate to reach out on the forum or in the consumer chain support discord channel with any questions or concerns.
Attribution
Thanks to the teams at Interchain, Informal, and Hypha Worker Co-operative for their support preparing this documentation.
Overview
Governance.png
Being an Interchain Secured network, Neutron does not use standard Cosmos SDK governance module. Neutron governance is based on DAO DAO contracts, with some modifications. It consists of two parts:
The Neutron DAO,
Multiple subDAOs.
For privileged actions (e.g., changing network parameters and making software update proposals) Neutron uses the admin-module fork managed by the Informal team. This module allows to specify a list of admin addresses that are able to submit proposals that are automatically executed. Neutron DAO smart contract address is added as an admin during genesis, allowing the DAO to manage the network as it sees fit.
Neutron DAO
The Neutron DAO supports single-choice and multiple-choice proposals by registering the corresponding proposal contracts in the core contract, along with a special type of overrule proposals (see below). In the future, additional types of proposals might be introduced (e.g., gauges).
Each type of proposal can only be submitted through a dedicated pre-propose contract (separate pre-propose contracts for single-, multi-choice and overrule proposals exist), which manages deposits and makes sure that only DAO members can submit proposals.
Voting Power Registry
Instead of a single voting power module, Neutron DAO core contract interacts with the Voting Power Registry contract that keeps track of multiple Voting Vaults (see below).
Voting vaults
A voting vault is a smart contract that implements the DAO DAO voting module interface, namely, it is capable of:
Providing the total voting power at a given height,
Providing the voting power of an address at a given height.
The overall voting power of a given address is a sum of the voting powers that the address has in all of the registered voting vaults.
There are two types of Voting Vaults:
Real vaults,
Virtual vaults.
An example of a real vault is the Neutron Vault, which allows its users to directly bond and unbond NTRN tokens. ( This is done without locking them, i.e., you can bond and unbond tokens with this vault with no unbonding period.)
In most cases, however, a Voting Vault does not directly store user funds; in this sense, such voting vaults can be called "virtual" vaults.**. For example, the Lockdrop vault does not allow users to directly bond or unbond LP tokens; instead it implements a relatively complicated query to multiple contracts to determine the amount of NTRN tokens that correspond to a certain amount of LP tokens at a given height.
Note: The voting power is based exclusively on the amount of NTRN tokens, regardless of the type of the vault.
Below is the list of Voting Vaults that will be available at launch:
Neutron Vault;
Credits Vault (virtual) — keeps track of the NTRN tokens that are vested in the Credits contract. You can not add tokens or remove tokens from this vault directly;
Lockdrop Vault (virtual) — keeps track of the NTRN tokens that are locked in the Lockdrop contract. You can not add tokens or remove tokens from this vault directly;
LP Vesting Vault (virtual) — keeps track of the NTRN tokens that are vested in the LP Vesting contract. You can not add tokens or remove tokens from this vault directly;
Investors Vault (virtual) — keeps track of the NTRN tokens that are vested in the early backers vesting contract. You can not add tokens or remove tokens from this vault directly.
Overrule proposals
N.B.: you need to read the subDAOs design below to understand this section.
The Overrule proposal type has a low threshold (0.01 of the total voting power). It only allows to call the overrule_proposal() method of a subDAO proposal contract.
Re-voting should be disabled for such proposals (execute immediately after the threshold is reached).
subDAOs
The Neutron DAO creates subDAOs by executing Neutron DAO proposals that contain Instantiate messages for the subDAO contracts. At the launch time, only the Multisig-type subDAO will be available, which is similar to the Neutron DAO, but uses the cw4 voting module implementation for voting power (that’s where the multisig logic is implemented).
One important feature of the subDAOs is that their proposals can be overruled by the Neutron DAO within a specified timelock period.
Timelocks & Overrules
For more info on Overrules, check Overrules page.
Proposals approved by a subDAO are timelocked. During the timelock period, the Neutron DAO can overrule any proposal by creating a new Overrule proposal; this proposal has a lower threshold than the regular proposals, and is executed immediately after reaching the threshold.
The timelock mechanism is implemented as follows. When creating a proposal, the user sends a regular proposal message to the subDAO pre-propose contract. This contract wraps the messages to be executed in a TimelockProposal message that is defined by the Timelock contract. When the proposal passes, the subDAO core contract does not execute the original messages; instead, it sends them wrapped in a TimelockProposal message to the Timelock contract.
The Timelock contract has 3 handlers:
execute_timelock_proposal(proposal_id, msgs): timelocks the given proposal messages, (permissioned, only by subDAO core contract);
execute_execute_proposal(proposal_id): executes the proposal if the timelock period has passed (permissionless);
execute_overrule_proposal(proposal_id): overrules the proposal (permissioned, only by the Neutron DAO).
When a TimelockProposal message is processed by the Timelock contract, the submission time is recorded in the state. The Timelock contract has a parameter timelock_period that defines how much time needs to pass before the proposal can be executed.
Important notes
The wasmd-level admin of the Timelock contract is the Neutron DAO core contract;
The owner of the Timelock contract is the Neutron DAO core contract;
The Timelock contract is instantiated by the pre-propose contract;
The subDAO address is queried from the pre-propose module during instantiation.
Security subDAO
There is a special Security subDAO that can only execute pause() methods on the following contracts:
All other subDAOs;
Reserve contract;
Distribution contract;
The Security subDAO implements a modified version of the single-choice proposal that only allows to send pause() messages to smart contracts.

