BTCMiner Review

BTCMiner
en.bitcoin.it
BTCMiner Review 2025: The Real One from the Bitcoin Wiki (Not the “Cloud Mining” Trap)
Are you trying to figure out if BTCMiner is worth your time in 2025, and whether it’s legit, safe, and actually useful?
You’re not alone. I’ve seen the same confusion everywhere: one “BTCMiner” is a legit open‑source FPGA miner listed on the official Bitcoin Wiki. The other is a revolving door of “free cloud mining” sites using the same name to bait beginners. Let’s make sure you land on the right side of that split.
What’s tripping people up right now
Most folks stumble on BTCMiner and hit the same wall of questions:
- Which BTCMiner is real? Is it the open‑source FPGA software from the Bitcoin Wiki, or a random cloud dashboard promising daily payouts?
- Can it make money today? Can an old-school FPGA setup compete with modern SHA‑256 ASICs at current difficulty and power prices?
- How hard is it to install? What drivers, firmware, and boards do you actually need? Does it run on Windows or Linux? Both?
- Where do I get it safely? What’s the trusted download source, and how do I avoid shady binaries or look‑alike sites?
Short answer: the real BTCMiner is open-source and was built for specific USB‑FPGA boards. It’s a legit project, but you need to set expectations for 2025. If your goal is pure profit, we’ll talk about better options later. If your goal is learning, tinkering, and understanding how SHA‑256 mining works at a lower level, you’re in the right place.
Here’s what I’m going to show you
I’ll keep this practical and straight to the point. By the end of this guide, you’ll know:
- What BTCMiner actually is (the open-source FPGA miner referenced on the Bitcoin Wiki, not a cloud platform)
- Exactly who it’s for in 2025 and how to approach it without wasting time or money
- How to stay safe and avoid the common traps that keep draining people’s wallets
- What to expect in performance so you don’t chase unrealistic ROI
And yes, I’ll answer the “People Also Ask” questions you keep seeing on Google—clearly and without fluff.
Who should read this
- Hobbyists and learners who want to understand Bitcoin mining beyond plug‑and‑play ASICs
- Builders and educators who like working with FPGAs, firmware/bitstreams, and hands‑on hardware
- Curious beginners who found “BTCMiner” in search results and want the truth about safety and performance
- Nostalgia miners who enjoy classic gear and don’t expect it to beat modern ASICs
If your only metric is dollars out versus dollars in, that’s a different conversation—and I’ll point you to the right path for that later.
Quick heads-up about scams using the BTCMiner name
There are copycat “BTCMiner” sites and apps that promise free cloud mining, guaranteed daily payouts, or instant ROI if you “upgrade.” These are not the real BTCMiner. A few fast rules will save you from pain:
- Start at the source: The legit BTCMiner is documented on the official Bitcoin Wiki. If a site isn’t traceable from there or a credible open-source repository, walk away.
- No deposits required: Real mining software doesn’t ask you to deposit crypto to “activate” higher speeds. That’s a classic trap.
- Beware “proof of payout” galleries: Screenshots and Telegram testimonials are easily faked. Legit mining is about hardware, pools, and math—not promises.
- Guaranteed returns = guaranteed risk: The FBI’s Internet Crime Complaint Center has reported billions in annual losses to investment scams, with crypto-themed schemes prominent. If it sounds like a sure thing, it isn’t.
Reality check: The real BTCMiner is software for specific FPGA boards. It runs locally on your machine, connects to a mining pool, and submits shares. There’s no “cloud balance,” no daily payout button, and no VIP unlock.
If you’re nodding along but still wondering, “Okay, then what exactly is BTCMiner, and what can it actually do in 2025?”—you’re thinking like a pro. Next up, I’ll show you what BTCMiner is (and isn’t), straight from the official sources, so you can decide in minutes whether it’s worth your time. Ready to separate the real tool from the marketing noise?
BTCMiner at a glance: what it is and what it isn’t
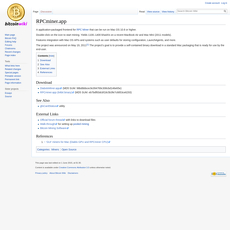
BTCMiner is the original open‑source FPGA Bitcoin miner you’ll find referenced on the official Bitcoin Wiki — a legit software+bitstream project that dates back to the pre‑ASIC era. It was built for USB‑FPGA boards, primarily from ZTEX, and it taught a generation of miners how SHA‑256 mining actually runs on configurable hardware.
It’s not a “cloud mining” app, not a one‑click earnings dashboard, and definitely not a promise of daily payouts. It’s code, bitstreams, and documentation that let you run SHA‑256 on supported FPGAs. If that sounds niche, that’s because it is. But it’s also why BTCMiner still matters: it’s a clean, inspectable way to learn real mining internals without mysteryware.
- What it is: Open‑source FPGA miner software with matching bitstreams for specific USB‑FPGA boards.
- What it isn’t: An ASIC miner, a GPU/CPU miner, or any form of cloud mining platform.
- Who actually uses it today: Hobbyists, educators, and curious builders who want to understand mining at the hardware level.
“If it sounds like free money, it’s bait.”
Back when FPGAs were a stepping stone between GPUs and ASICs, BTCMiner was a go‑to option. In 2025, it’s more of a hands‑on lab. You’ll still learn how nonce ranges are split, how errors are handled, how clock rates impact stability, and what “accepted shares” look like from the bare metal up.
The official Bitcoin Wiki reference
The sanity check is simple: BTCMiner is documented on the Bitcoin Wiki. That page is your primary source of truth and the best way to avoid fakes. Start here:
Official Bitcoin Wiki: BTCMiner
- What the wiki tells you: Project description, supported FPGA families, links to the original downloads/repos, and usage notes from the era it was actively maintained.
- Why it matters: The wiki acts as a community‑vetted pointer. If a site calling itself “BTCMiner” isn’t consistent with the wiki (or tries to sell you cloud contracts), you’re not looking at the real thing.
- How I verify: I check the edit history on the wiki page, follow the linked sources, and confirm that any binaries or bitstreams match the documented FPGA models. No wiki link? I walk away.
Tip: The genuine project historically points to ZTEX USB‑FPGA modules and provides bitstreams tailored to those chips. Anything claiming universal support across random USB devices is waving a red flag.
Open‑source and FPGA‑focused
BTCMiner is split in two pieces: host software on your PC and a bitstream that configures the FPGA. The bitstream is essentially the hardware “blueprint” that turns the FPGA into a SHA‑256 hashing machine. The host app handles USB communication, work dispatch, share submission, and sometimes smart features like dynamic frequency scaling based on error rates.
- FPGA angle: You’re not installing a miner on a GPU. You’re loading a custom hardware design into an FPGA and letting that fabric crunch SHA‑256.
- Bitstream reality: The right bitstream must match the exact FPGA model on your board. Wrong file, no hashing.
- Why it’s educational today: You get to see how clock speed, timing, and error correction affect real shares, not just hashrate numbers on a screen.
Real‑world example: On supported ZTEX boards, BTCMiner can manage multiple FPGAs over USB, set clock rates conservatively to reduce stale shares, and report stability so you can balance speed and correctness. It’s the kind of transparency you rarely get from glossy “mining apps.”
Context matters here. The shift from GPUs → FPGAs → ASICs is documented across academic and industry sources (for macro context, the Cambridge Centre for Alternative Finance has chronicled mining’s industrialization over time). BTCMiner sits squarely in that FPGA chapter — a piece of Bitcoin history you can still boot up and learn from.
Not a modern ASIC miner or cloud platform
BTCMiner won’t turn an old FPGA board into a competitive rig against 2025 ASICs. And it doesn’t exist as a website that mines “for you.” Scammers know the name is trusted and slap it on dashboards that promise instant payouts. Don’t fall for it.
- Clear signs you’re seeing a fake:
- “Free cloud mining” or guaranteed daily returns.
- Wallet connect pop‑ups asking for seed phrases or private keys.
- No link back to the Bitcoin Wiki BTCMiner page.
- Stock photos, fake testimonials, and pressure timers (“Offer ends in 10 minutes”).
- What the real project looks like:
- Source code and bitstreams for specific FPGA models.
- Plain documentation, not sales copy.
- Instructions about USB drivers, bitstream loading, and pool setup.
The emotional test is often the best one: if a page makes you feel like you’re missing out on easy money unless you click “Deposit,” it’s not BTCMiner — it’s a trap.
So what exactly does BTCMiner support, and what kind of system do you need to power and connect those FPGA boards without headaches? I’ll map out the hardware it was built for, the OS expectations, and the practical requirements next — want the short list before you consider buying anything second‑hand?
Supported hardware and system requirements
I get a lot of messages from readers who find BTCMiner, plug in an old FPGA board, and wonder why nothing shows up—or worse, why the board overheats and shuts down. Let’s make this painless. Here’s exactly what BTCMiner expects on the hardware and OS side, plus the practical stuff no one tells you until you burn a power jack.
Compatible FPGA boards
BTCMiner was built for specific USB‑FPGA boards, historically from ZTEX. You’ll see these names come up again and again because the original project targeted them with ready bitstreams:
- ZTEX USB‑FPGA Module 1.15y / 1.15x families (Xilinx Spartan‑6). These are the classic boards people used for early Bitcoin FPGA mining.
- Some 1.15 variants (e.g., 1.15d) exist but often carry smaller devices and slower bitstreams. Expect lower hashrate if supported at all.
Before buying anything second‑hand, verify exact model compatibility and available bitstreams using sources linked from the official Bitcoin Wiki entry for BTCMiner: https://en.bitcoin.it/wiki/BTCMiner. Cross‑check:
- Board revision silkscreen (e.g., “USB‑FPGA 1.15y”).
- FPGA part (e.g., Spartan‑6 LX150 vs. smaller devices).
- USB VID/PID the host software expects.
- Bitstream availability in the repo or official mirrors for your exact board.
Availability in 2025 is hit‑or‑miss. Most of these boards are discontinued and only pop up on eBay or local marketplaces. Buy smart:
- Ask for clear photos of the DC jack, voltage regulators, and FPGA area. Burn marks or lifted pads are a red flag.
- Confirm external power accessories (if required) are included and not a sketchy adapter job.
- Request a quick video of the board enumerating over USB on Windows or Linux. It saves you headaches.
One more thing people forget: BTCMiner speaks to these boards in a very particular way. If the USB ID, EEPROM content, or board revision doesn’t match what the software expects, it won’t “just work” without custom changes.
Operating system and drivers
BTCMiner runs well on Windows and Linux, with a lightweight USB stack in the middle. Here’s what I recommend for stability:
- Windows 10/11
- Use Zadig to install the WinUSB driver for your ZTEX/USB‑FPGA device. Select the correct device then click “Replace Driver.”
- Verify in Device Manager that the board appears under “Universal Serial Bus devices” with WinUSB.
- Run as a normal user; no admin needed once the driver is set.
- Linux (Ubuntu/Debian/Arch, x86_64)
- Install libusb‑1.0 and basic build tooling if you’re compiling.
- Create a udev rule to grant non‑root access (match the board’s VID/PID), then udevadm control --reload-rules and replug the device.
- Check with lsusb that the device enumerates. If it only works as root, your udev rule is off.
- macOS
- Not typically a first‑class target for these USB boards. If you try, expect extra driver work and fewer community breadcrumbs.
Keep it simple: 64‑bit OS, current updates, and don’t mix USB filter drivers or “USB accelerator” software. If in doubt, start fresh on Linux—USB behavior is predictable there.
Power, cooling, and connectivity
This is where most setups fall apart. BTCMiner itself is lightweight; your bottlenecks are power integrity and thermals.
- Power
- Plan for roughly 20–40 W per board (varies by model and clock). Always leave 30% headroom on your PSU.
- Most boards expect a regulated 12 V DC supply via barrel jack or screw terminal, center‑positive.
- Do not rely on USB power. That’s asking for instability and hot connectors.
- Use a watt meter at the wall so you can spot unhealthy draws or failing regulators early.
- Cooling
- Stick small heatsinks on the FPGA and key regulators; aim a quiet 80/120 mm fan across the board.
- Keep case temperatures under ~70°C. Above that, error rates climb and clocks get finicky.
- USB
- Short, high‑quality USB 2.0 cables. Avoid daisy‑chaining hubs.
- Use a powered hub from a known brand. I keep it to 4–6 boards per hub per root controller for sanity.
- If Windows starts dropping devices under load, try another port that’s on a different USB controller.
- Network
- Bandwidth needs are tiny (well under 100 KB/s), but uptime is everything.
- Wired Ethernet beats flaky Wi‑Fi. If you must use Wi‑Fi, lock your channel and keep the rig within line of sight.
“Stable power and clean USB equal stable shares.”
It sounds obvious, but three quarters of “my hashrate keeps dropping” emails I get are actually cooling or USB issues hiding in plain sight.
Pool requirements
BTCMiner needs a standard SHA‑256 stratum pool. Get your pool account set up first, then create at least one worker. The fields you’ll want on a sticky note before you start the software:
- Stratum URL: stratum+tcp://pool.example.com:3333 or stratum+ssl://pool.example.com:443
- Username: yourlogin.worker1 (format differs by pool)
- Password: x (or the one you set—many pools ignore it but still require a value)
- Optional: region endpoint (us/eu/asia), fixed difficulty if your pool doesn’t use vardiff, and reconnect/backoff flags
Some pools have retired old protocols like getwork—stick with stratum. Turn on 2FA for your pool account, and use a unique password. It takes seconds to do and saves you pain later.
Got your board, drivers, power, cooling, USB, and pool credentials lined up? Perfect. Want me to show you exactly where to click, what to flash, and how to see your first accepted share in minutes—without tripping on shady downloads? Keep going; I’ll walk you through it step by step next.
Step-by-step setup: from download to your first share
I’ve set this up enough times to know where people get stuck. Follow this exact flow and you’ll go from “where do I even click?” to seeing your first accepted share without guessing or downloading something shady.
“Trust, but verify—especially in mining.”
Get the software from trusted sources
There are real projects and there are impostors. The real BTCMiner I’m talking about is the open‑source FPGA miner referenced on the official Bitcoin Wiki. Start there, not from a random YouTube description or a “cloud” dashboard.
- Go to the official Bitcoin Wiki entry: https://en.bitcoin.it/wiki/BTCMiner
- Follow the repository or download link from that page only.
- Prefer source code over mystery binaries. If binaries are provided by the official repo, great—verify them.
Verify your download (do not skip):
- On Windows (PowerShell):
Get-FileHash .\btcminer.zip -Algorithm SHA256 - On Linux/macOS:
sha256sum btcminer.zip - Compare the hash to the checksum/signature published by the project. If they publish a signature, use GPG to verify it.
If you’re building from source (recommended when possible):
- Install Java (OpenJDK 8–17 usually works): Adoptium
- Install libusb (Linux) or a WinUSB driver (Windows). Details below.
- You don’t need to compile the FPGA bitstream yourself—official releases typically include the .bit files for supported ZTEX boards. Building bitstreams from scratch requires Xilinx ISE and isn’t worth it unless you’re doing research.
Flashing/using the FPGA bitstream
BTCMiner was built for specific ZTEX USB‑FPGA boards. The miner will usually load the right bitstream into your board over USB at runtime; you don’t “flash” it permanently like a BIOS.
1) Plug in and make sure your system sees the board
- Linux:
lsusbshould show a ZTEX device. If not, try a different USB port/cable and ensure the board is powered. - Windows: check Device Manager for a ZTEX/USB FPGA entry. If it’s unknown, install WinUSB via Zadig (select the device, choose WinUSB, click Install).
- Mac: not commonly used for this—stick to Linux/Windows for fewer headaches.
2) Install drivers/permissions
- Linux: install
libusband add the providedudevrules if the repo includes them, thensudo udevadm control --reload-rules && sudo udevadm trigger. Unplug/replug the board. - Windows: WinUSB via Zadig is usually enough. Close any software that might auto‑claim the device.
3) Load the bitstream
- Most official BTCMiner builds auto‑load the matching .bit for your board when you start the miner. You’ll see log lines like “device found” and “loading bitstream.”
- If a tool/script is provided to pre‑load the bitstream, run it once and confirm success before mining.
Sanity checks that mean you’re good:
- The program lists your board model (for example, something like “ZTEX 1.15x/1.15y detected”).
- You see a “bitstream loaded” message and no USB errors.
- Frequency/PLL tuning messages appear without throwing “HW error” lines immediately.
Configure your pool and start mining
You’ll need a pool that supports SHA‑256 (Bitcoin) and your worker credentials. If your pool only supports Stratum (almost all do), and your BTCMiner build expects getwork, run a Stratum proxy locally. Many builds support Stratum natively—check your README.
Have this ready:
- Pool URL: something like
stratum+tcp://pool.example.com:3333(find this in your pool’s help docs) - Worker username:
username.worker1 - Worker password: often just
xor the one you set
If a Stratum proxy is needed (depends on your BTCMiner version):
- Run a lightweight proxy on the same machine. Your pool likely has a guide—example docs: Stratum protocol basics.
- Point BTCMiner at
http://127.0.0.1:8332(proxy’s getwork endpoint) while the proxy talks Stratum to the pool.
Start the miner (examples vary—check your repo’s syntax):
- With native Stratum: pass pool URL, user, and password as arguments or via config file.
- With a proxy: point BTCMiner to the local getwork URL and keep the proxy pointed at your pool’s Stratum endpoint.
What success looks like:
- Log shows your board(s) and a non‑zero hashrate
- Lines like
acceptedorshare acceptedstart to appear - Very few
staleorrejectedshares (a few stales are normal)
Sample console feel (yours will look slightly different):
[INFO] Found ZTEX 1.15y (USB: Bus 001 Device 005)
[INFO] Loading bitstream: ztex_1_15y_sha256.bit
[INFO] Tuning frequency… target 200 MHz
[POOL] Connected stratum+tcp://pool.example.com:3333
[SHARE] Accepted (36 ms) diff 256/256
[RATE] 180 MH/s (avg 1m)
Verify, monitor, and log
This is where most people either get confident or quietly pull the plug. Don’t skip these checks:
- Hashrate: confirm the board’s reported rate is stable. Sudden drops usually mean frequency too high or USB/power hiccups.
- Accepted vs. rejected shares: rejections under a few percent are fine. If you see a flood of stales, your network latency or proxy setup might be off.
- Temperatures: many ZTEX boards expose a sensor; if not, use an IR thermometer or pay attention to VRM heat. Add a fan if it’s hot to the touch.
- Power and USB: unstable or under‑powered boards cause cryptic USB resets. Use a known‑good PSU and short, high‑quality USB cables.
- Logging: keep a log so you can compare changes:
- Linux:
./run_btcminer.sh 2>&1 | tee -a miner.log - Windows (CMD):
btcminer.exe >> miner.log 2>&1
- Linux:
Common fixes if things go sideways:
- No device found: wrong driver, missing udev rules, bad cable/port, or insufficient power.
- “Bitstream load” errors: wrong .bit for your board model—double‑check you picked the matching one from the official package.
- Tons of HW errors: back off frequency/tuning, improve cooling, or try a different USB port.
- High stale rate: ensure Stratum is configured correctly, reduce network hops, try a closer pool server.
That’s the clean path to get your first accepted share on the screen. The next question everyone asks right after that first “accepted” pops up is simple: how fast can this really go—and does it pay for the power it eats in 2025? I’ll show you the numbers next.
Performance and profitability in 2025: the honest take
I’ve tested, I’ve watched the numbers, and I’ve had plenty of emails from readers hoping an old FPGA board and BTCMiner might still pull its weight in 2025. Here’s the straight story: it’s a fantastic learning tool, but not a money printer. Bitcoin mining has become an efficiency game, and FPGAs simply aren’t built to compete with modern SHA‑256 ASICs.
“The market doesn’t reward nostalgia; it rewards efficiency.”
Hashrate reality check
Let’s anchor expectations with real ranges:
- Typical FPGA boards BTCMiner was used with: historical ZTEX USB‑FPGA boards (e.g., Spartan‑6 LX150 variants). Expect roughly 150–250 MH/s per FPGA with optimized bitstreams. Multi‑FPGA boards could reach low single‑digit GH/s in total.
- Modern ASICs in 2025: think 100–200+ TH/s at high efficiency. For example, Bitmain’s S21 series lists ~200 TH/s class units, and industry databases like Hashrate Index’s rig database show plenty in that range.
That gap is not small—it’s astronomical:
- 200 MH/s vs 200 TH/s is a 1,000,000× difference in raw hashrate.
- Energy efficiency is just as lopsided. A typical FPGA miner might land around 25,000–75,000 J/TH (example: 10–15 W at ~0.0002 TH/s), while current ASICs cluster near 15–25 J/TH per manufacturer specs and field tests. That’s a thousands‑to‑one gap in cost per terahash.
What this means in practice:
- Shares come slowly. At ~200 MH/s, if a pool sets vardiff near 128–1024, you might see an accepted share every ~45 minutes to 6 hours. It’s normal to watch logs for long stretches with no “Accepted” lines.
- Payout thresholds are a wall. With such tiny contributions, many pools’ minimum payouts (e.g., 0.0001 BTC) can be effectively unreachable in any reasonable timeframe.
For broader context on mining power and the industrial scale of the network, check the Cambridge Bitcoin Electricity Consumption Index. It’s a reminder of how competitive and capital‑intensive Bitcoin mining has become.
Electricity and ROI math
Use this quick back‑of‑the‑napkin approach to keep things honest:
- Power cost per day = (Watts ÷ 1000) × 24 × your kWh rate
- Relative revenue = (Your TH/s ÷ ASIC TH/s) × ASIC daily revenue (before power)
Example you can swap numbers into:
- Assume a single FPGA at 0.0002 TH/s (~200 MH/s) using 12 W.
- Power cost/day at $0.12/kWh ≈ (12 ÷ 1000) × 24 × $0.12 = $0.035.
- Relative revenue: if a 200 TH/s ASIC makes $X/day before power, then the FPGA makes $X × 0.0002 ÷ 200 = $X × 0.000001 per day. If $X were $5, that’s $0.000005/day—five micro‑cents—before power.
Even at very cheap electricity, that’s deeply negative. And that’s before you consider pool fees, stale shares, or downtime. It’s okay to feel a little disappointed—just don’t let that feeling push you into desperate hardware buys or shady “cloud” promises masquerading under the same name.
When BTCMiner still makes sense
There’s a real and satisfying use case here—just not a profitable one:
- Hands‑on learning: Understand SHA‑256 mining at the hardware/firmware level, play with bitstreams, and watch how stratum, shares, and difficulty adjustments behave.
- Teaching and demos: Low‑power rigs make great classroom or lab setups. It’s quiet, safer, and visual enough to keep people engaged.
- Prototyping ideas: Explore instrumentation, USB bandwidth behavior, logging, or custom monitoring without risking expensive ASICs.
- Nostalgia projects: If you’ve got legacy boards in a drawer, it’s a fun weekend. You’ll learn more in a day of tinkering than a week of reading.
In short: treat it like a lab project, not a business plan.
Better options if your goal is profit
- Modern SHA‑256 ASICs: If you can source hardware, power, and cooling at competitive rates, ASICs are the only realistic path for Bitcoin mining income today. Research real‑world efficiency and uptime using resources like Hashrate Index and verify specs with trusted vendors.
- Hosting instead of home mining: Professional hosting can offer cheaper electricity and better uptime, but read contracts carefully and insist on transparent monitoring.
- Just buy BTC: If your goal is exposure to Bitcoin rather than mining’s technical journey, DCA into BTC can beat the risk and complexity of hardware.
All that said, performance is only half the story. The other half is staying safe: knowing which “BTCMiner” links are legitimate, avoiding fake dashboards that promise daily payouts, and keeping your wallet and system locked down. Want a quick checklist for spotting the fakes and protecting your setup before you download anything?
Safety, security, and legitimacy
Let’s keep this simple: miners should print hashes, not drain wallets. I’ve seen too many readers message me after losing money to fake “BTCMiner” sites or shady downloads. Here’s how I keep myself safe and how you can do the same—no fluff, just the moves that actually matter.
“If it sounds like free money, it’s probably buying you—your data, your coins, or your time.”
Open‑source trust—but verify
Open source is a great start, not a guarantee. Anyone can rename a repo and slip in junk. I always verify the lineage before I run anything near my machines.
- Start at the source: use the official Bitcoin Wiki reference for BTCMiner: https://en.bitcoin.it/wiki/BTCMiner. Don’t Google “download BTCMiner” and click the first ad—typosquats love that.
- Check the project’s history: look for a consistent commit history, real maintainers, and issues that aren’t all “When lambo?” If the repo was created last week but claims a decade of history, that’s a red flag.
- Prefer building from source: binaries are convenient; source is safer. Use a clean environment (a spare laptop, VM, or container) and standard toolchains. If release signatures are offered, verify them.
- Verify hashes: compare SHA‑256 checksums posted by the maintainer with what you compute locally. Never trust a download and its checksum from the same sketchy mirror.
- Run with minimal privilege: no admin/root unless absolutely required. Mining doesn’t need system‑wide hooks, browser extensions, or wallet permissions.
- Segment your risk: keep mining on a separate user profile or dedicated box. The fewer apps on that system, the smaller the attack surface.
Why I’m strict: supply‑chain attacks happen. Security reports from multiple vendors have shown that modified miners and “optimizer” builds often include clipboard hijackers or backdoors. It takes a minute to verify and hours to recover from a compromise.
How to spot fake “BTCMiner” websites
Scammers love familiar names. They’ll borrow the BTCMiner brand to sell “cloud mining” dashboards that only mine your patience. Here’s what I avoid instantly:
- Guaranteed returns: “0.01 BTC daily” or “ROI in 7 days” is fantasy. Real mining has variance, fees, and changing difficulty.
- Deposit to unlock withdrawals: any site that asks you to “activate” earnings with a deposit is running the oldest trick in the book.
- No code, only dashboards: the legit BTCMiner is software you run on specific hardware. If there’s no source code and only a web panel, it’s not the same thing.
- Over‑the‑top testimonials: stock photos, recycled comments, or “Top Trust Score 4.9/5” badges that don’t link to real reviews.
- Weird domains and copycats: look for doubles like btcminer‑free, btcminerr, or .top/.xyz domains with mismatched company info.
- Wallet/seed prompts: no miner needs your seed phrase—ever. Anyone asking for it is trying to empty your wallet.
- Browser extensions or APKs: “boost hashrate” plugins and sideloaded mobile apps are a common malware delivery route.
Scam context: research firms keep reporting billions lost to crypto scams annually. Tactics shift—“cloud mining” is a constant. If you’re seeing slick dashboards with counters ticking up before you’ve configured anything, close the tab.
Wallet and system hygiene
I treat mining gear like a workshop: loud, isolated, and never where I keep valuables. A few habits go a long way.
- Separate your money from your miner: use a hardware wallet for funds; never store seeds/private keys on the mining machine.
- Unique credentials: create a fresh email for pool accounts, use unique passwords with a manager, and rotate worker passwords occasionally.
- 2FA or bust: enable TOTP 2FA on pools and exchanges. Microsoft has reported that MFA blocks the vast majority of automated account‑takeovers—use it.
- Withdrawal locks: on exchanges/pools that support it, whitelist addresses and enable 24–48h withdrawal lock after address changes.
- Network hygiene: put the miner on a guest VLAN/Wi‑Fi or a separate subnet. Restrict inbound ports; monitor unusual outbound connections.
- Keep it clean: update OS and drivers, disable AutoRun for USB, and don’t browse random sites from your mining box.
- Principle of least privilege: run the miner as a standard user, not admin. If a tool insists on elevated rights, question why.
- Logs and alerts: watch miner logs for stratum disconnects, hashrate dips, or sudden config changes you didn’t make.
Quick 60‑second preflight I use before running any miner:
- Got the link from the Bitcoin Wiki or the project’s long‑standing repo? Check.
- Checksum or signature verified? Check.
- Running on a separate user/machine with no wallets or personal files? Check.
- Pool account has TOTP 2FA and withdrawal protections enabled? Check.
- No extensions, “boosters,” or mystery optimizers installed? Check.
If you take one thing from this section, let it be this: a miner should only ever ask for pool credentials (worker name/pass) and connection details—nothing more. The moment it asks for your seed, browser extension access, or a “small deposit,” you’re not mining, you’re being mined.
Curious which tools are safer bets in 2025—both for learning and for actual results? I’ll show you what I use and why next. Want a short list with pros and cons so you don’t waste another weekend testing dead ends?
Alternatives and adjacent tools worth knowing
“Pick the tool that fits your goal, not the one that fits a nostalgia itch.”
I love tinkering as much as the next miner, but 2025 rewards clarity. If you want to learn, there are smarter playgrounds. If you want to earn, there are proven stacks. Here’s what I recommend based on what actually works right now.
Modern Bitcoin mining stack
If your goal is results, ASICs plus good software is the gold standard. FPGAs simply can’t compete with the efficiency and hashrate of today’s rigs.
- ASIC hardware worth knowing
- Bitmain Antminer S19 Pro: ~110 TH/s at ~29–32 J/TH.
- Bitmain Antminer S21: up to ~200 TH/s at ~17–19 J/TH (model dependent).
- MicroBT Whatsminer M50/M60 series: ~110–186 TH/s; top bins reach ~17–20 J/TH.
Efficiency matters. Industry dashboards like Hashrate Index track J/TH, pricing, and miner firmware support so you’re not guessing. For a macro view on power footprint, bookmark the Cambridge Bitcoin Electricity Consumption Index (CBECI).
- Firmware that actually helps
- Braiins OS+ (autotuning, telemetry, Stratum V2 support via proxy).
- LuxOS by Luxor (efficiency tuning and pool integrations).
- VNish (popular with home miners for flexible profiles).
Autotuning squeezes extra efficiency per chip. On tight margins, dropping even 1–2 J/TH adds up.
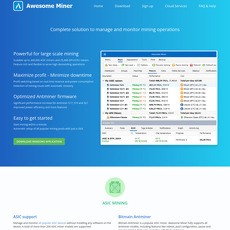
- Monitoring and fleet control
- Foreman for orchestration and alerts.
- Awesome Miner if you prefer a Windows console feel.
- Minerstat for ASIC fleets and mixed setups.
- Pools and protocols
- Reputable pools: Braiins Pool, F2Pool, ViaBTC, Foundry USA, AntPool.
- Know your payout method (PPS, FPPS, PPLNS) and fees; that changes your daily cash flow.
- Stratum V2 is the direction of travel: encrypted transport, fewer stale shares, and optional job negotiation. Start here: stratumprotocol.org.
- Quiet home-lab pathways
- USB stick miners (e.g., GekkoScience types): a few hundred GH/s at single-digit watts. Great for learning pool configs without tripping your breaker.
- Bitaxe-style open-source single-chip miners: hobby-friendly, web UI, and real Stratum behavior on a budget—perfect for seeing the full pipeline without a 240V circuit.
- “Space-heater” mining: underclock an older S9 or use purpose-built heaters like Heatbit. You’re buying heat anyway; might as well get some sats back.
I’ve found these setups to be far more predictable than resurrecting legacy FPGA flows. When I want to test new pools or firmware, a single quiet device and a Stratum proxy tells me more in one evening than weeks spent chasing antique boards.
Educational hardware projects
If your heart is in learning, there are cleaner labs than mining Bitcoin on FPGAs in 2025. Here’s where I point curious builders:
- Open-source ASIC learning rigs
- Single‑chip miners (Bitaxe-style) teach you clocks, thermals, Stratum handshakes, and tuning—all with a friendly web interface and low risk.
- SHA‑256 cores on FPGA
- Use a well-reviewed RTL core (e.g., secworks/sha256) to learn pipelines and timing.
- Simulate with Verilator, wrap a simple Python Stratum client, and print your own “accepted share” logs. Educational and fun.
- Experiment with open toolchains (Lattice iCE40 via Yosys + nextpnr) to learn modern FPGA workflows without vendor lock‑in.
- Protocol spelunking
- Sniff Stratum traffic with Wireshark, compare v1 vs v2, and watch how extranonce and difficulty are negotiated live.
- Run a tiny dev setup: Bitcoin Core in regtest, a Stratum proxy, and a toy miner. You’ll actually understand every moving part instead of treating it like a black box.
There’s a special kind of thrill in watching your own core compute midstate chunks correctly. It’s not about the payout—it’s about knowing exactly why a share is accepted.
Mining different algorithms
Not every hash is SHA‑256. If you want to explore beyond Bitcoin, here’s the practical lay of the land in 2025:
- GPU‑friendly coins
- Ergo (Autolykos2), Ravencoin (KawPoW), Flux (ZelHash): still mined with GPUs, but power draw is real. Optimize with undervolt/underclock and memory tweaks. Track viability on WhatToMine or Minerstat.
- Kaspa (kHeavyHash): once a GPU darling, now has ASICs on market. Always check current profitability and hashrate growth before committing.
- CPU mining
- Monero (RandomX): CPU‑friendly by design. Great for learning; profitability varies heavily with electricity rates and hardware.
- FPGA targets
- Certain niche algos occasionally favor FPGAs, but bitstreams are often closed, licensed, or time‑limited. Windows of profitability can be short. Treat FPGA mining outside Bitcoin as an experiment, not a business plan.
- General cautions
- Networks change. An “ASIC‑resistant” coin can attract ASICs overnight and torch your ROI.
- Always sanity‑check: pool liquidity, exchange support, payout schemes, and your exact kWh rate. A few cents per kWh can make or break it.
- Tooling helps: Afterburner/nvidia‑smi for tuning, pool dashboards for stale share tracking, and spreadsheet models for fee and orphan assumptions.
I’ve chased plenty of shiny new algos that looked great on paper… until a difficulty spike or a surprise hardware release hit. Keep your rigs flexible, keep your expectations realistic, and keep your spreadsheets honest.
Want quick, straight answers to the questions people ask me about BTCMiner—legitimacy, safety, and whether it can make money in 2025? I’ve got the no‑BS FAQ waiting next.
FAQ: BTCMiner — People also ask
Is BTCMiner legit?
Yes — the real BTCMiner is an open‑source FPGA Bitcoin miner that’s listed on the official Bitcoin Wiki. You can confirm it here: Bitcoin Wiki: BTCMiner. It’s software for specific FPGA boards, not a “cloud mining” website.
Where people get burned is by look‑alike sites using the same name to sell “free cloud mining” or guaranteed daily payouts. The legit project:
- Has open code and technical docs
- Doesn’t ask you to deposit BTC to unlock withdrawals
- Doesn’t promise fixed returns
- Mentions specific FPGA boards and bitstreams
Quick sniff test: if a “BTCMiner” asks for an upfront deposit, shows a glossy ROI calculator with guaranteed daily BTC, or gives you “1 TH/s free,” it’s a fake.
Can BTCMiner make money in 2025?
Realistically, no for almost everyone. Here’s why:
- Old FPGA boards typically do tens to a few hundred MH/s per device.
- Modern Bitcoin ASICs (e.g., current‑gen Bitmain/MicroBT) push 100–200+ TH/s at industry‑leading efficiency.
That’s a million‑to‑one gap: 200 MH/s vs 200 TH/s (200,000,000 MH/s). Even if an ASIC earned $3/day in your conditions, your FPGA at 200 MH/s would gross roughly ~$0.000003/day before power — and power isn’t free.
Even a tiny 10–20 W FPGA board costs a few cents a day to run in most regions, so you’re deeply negative. Treat BTCMiner as a learning tool, not an earner.
What hardware does BTCMiner support?
Historically, BTCMiner targeted specific ZTEX USB‑FPGA modules (notably Spartan‑6 based 1.15x/1.15y era boards) using matching firmware/bitstreams. Availability is limited today and second‑hand prices can be unpredictable.
Before you buy anything used, always check the official docs and bitstreams linked from the Bitcoin Wiki page to make sure your exact board revision is supported. If a listing doesn’t clearly state the model/revision, assume it’s not compatible until proven otherwise.
Does BTCMiner work with GPUs or CPUs?
No. BTCMiner focuses on specific FPGA boards. If you want to mine Bitcoin with general hardware, GPUs/CPUs aren’t practical or supported. For other algorithms on GPUs, you’d use different miners — just remember that profitability changes fast and is often slim after fees and power.
How do I set up BTCMiner?
I keep it simple:
- Grab the software from sources referenced on the official Bitcoin Wiki.
- Install the required USB drivers for your OS.
- Load the correct FPGA bitstream for your exact board model.
- Enter your pool Stratum URL, worker name, and password (or token).
- Start the miner and watch for “accepted” shares.
What success looks like:
• The board is detected without errors
• Hashrate reads in the expected MH/s range
• Logs show lines like accepted (stale/rejects should be minimal)
• Temperature stays in safe limits with your cooling
Is BTCMiner safe to run?
Yes, if you stick to trusted sources and basic security hygiene:
- Only download from the repo/pages linked by the Bitcoin Wiki, and verify checksums when provided.
- Avoid random “precompiled” binaries from forums, social media, or YouTube descriptions.
- Use unique pool credentials; enable 2FA on pools and exchanges.
- Keep your mining box separate from your main workstation if possible.
The biggest risk isn’t the software — it’s fakes using the BTCMiner name to push wallet‑draining “cloud” dashboards.
What are good alternatives if I want profit?
If your goal is earnings rather than tinkering:
- Look at modern SHA‑256 ASICs from reputable vendors (Bitmain, MicroBT), and do the math on J/TH, kWh price, hosting, and pool fees.
- Consider reputable mining pools with transparent stats and good support.
- Or skip hardware risk and fees entirely and just buy BTC on a regulated exchange if you only want exposure.
I’ll never tell you what to buy — but I’ll always tell you when the numbers don’t add up.
One last thing: want a simple action plan that won’t waste your time or money? In the next section I’ll show you exactly how I’d approach this today — whether you’re curious to learn or focused on profit. Ready for a blunt checklist?
Final thoughts, next steps, and how I’d approach this today
Who BTCMiner is actually for
If you love cracking open the hood to see how mining really works, BTCMiner is your kind of project. It fits three groups perfectly:
- Hobbyists/tinkerers: You enjoy wiring up hardware, flashing bitstreams, and watching logs scroll. You’re okay with spending a weekend learning rather than earning.
- Educators/students: You want a hands-on way to show hashing, pools, shares, and USB‑FPGA workflows without spending on modern ASICs.
- Protocol-curious builders: You’re exploring Stratum, share difficulty, and miner telemetry to guide your own tools or research.
If your goal is pure profit, this isn’t it. ASICs dominate SHA‑256. That’s not an opinion; it’s what the global hashrate and difficulty trends show. For context, check live network charts and difficulty data on sources like Blockchain.com or mempool.space.
Quick reality check: An older FPGA board typically hashes in the tens-to-hundreds of MH/s while modern ASICs operate in the tens-to-hundreds of TH/s. That’s a million‑to‑one gap in practical terms.
Simple action plan if you’re curious
Want to try it safely and learn something useful without wasting money? Here’s a clean, low-risk path:
- Start at the source: Open the official page on the Bitcoin Wiki: BTCMiner (Bitcoin Wiki). Bookmark it. Only follow links referenced there.
- Confirm hardware first: Check the exact FPGA board models and bitstream support before buying anything second‑hand. If you can’t source supported boards at a sensible price, stop and treat this as a research read, not a purchase.
- Keep security tight: Prefer compiling from source. Verify checksums/signatures. Avoid binaries from random forums or video descriptions. Use a dedicated machine or user profile to keep your main system clean.
- Pick a reputable pool with vardiff: You want to see accepted shares quickly at low difficulty so you can validate that your setup works. Have your stratum URL and worker credentials ready.
- Run a timed test: 30–60 minutes is enough to validate hashrate and share submissions. Log to file, and keep an eye on temps and USB stability. If anything looks off (USB resets, rising temps, zero accepted shares), stop and fix before continuing.
- Measure power and cost: Use a smart plug or watt meter. Even a small 25–50 W draw adds up. Example: 50 W × 24 h = 1.2 kWh/day. At $0.15/kWh, that’s ~$0.18/day in electricity. Revenue from such low hashrate will be negligible. For broader context on energy costs, the Cambridge Bitcoin Electricity Consumption Index is a solid reference.
- Treat it like a lab: Document your config, firmware versions, pool settings, and share logs. The goal is to understand the pipeline, not chase a payout.
If you finish this experiment and decide you actually want income, shift your research to modern ASICs, hosting options, and pool fee structures. Industry research hubs like Hashrate Index Research can help you stress test ROI assumptions with current market data.
Conclusion and next steps
BTCMiner is a legit, niche piece of Bitcoin history that still teaches you a lot. It’s great for learning, testing, and appreciating how far mining has come. It will not pay your power bill, and that’s okay if education is the goal.
If you want to keep going:
- Education path: Stick with the Bitcoin Wiki link, confirm hardware, run a short test, and archive your results. Try different pool difficulties and log behavior under load.
- Profit path: Research current-gen SHA‑256 ASICs, compare efficiency (J/TH), and sanity‑check revenue vs. your power rate and hosting. Or skip hardware headaches and just accumulate BTC directly if your aim is exposure.
I’ll keep testing tools and sharing what actually works here on Cryptolinks News. If you’ve run BTCMiner recently—or found a board still humming along—share your results. Real‑world numbers help everyone stay grounded and avoid costly mistakes.