How to Participate in Crypto Airdrops Safely
Ever looked at a headline like “$10,000 airdrop” and wondered, “Is this actually safe—or am I one click away from a wallet drainer?” Good. That question is the difference between keeping your tokens and becoming another “I got wrecked” story.
My goal here is simple: help you collect real airdrops safely, skip the scams, and save time by focusing on what actually works. I’ve reviewed hundreds of crypto tools and campaigns on Cryptolinks.com, and I’ve seen the same patterns repeat: the winners use a clean setup and a checklist; the losers rush, sign blind, and trust the wrong link.
By the time you’re done with this playbook, you’ll know how to avoid the traps, claim like a pro, and answer the biggest “People Also Ask” questions: Are airdrops safe? Do I need to pay gas? How do I claim? Why didn’t I get it?
What actually goes wrong (and why it keeps happening)
Let’s call out the pain upfront, because if you’ve been around long enough, you’ve probably seen at least one of these:
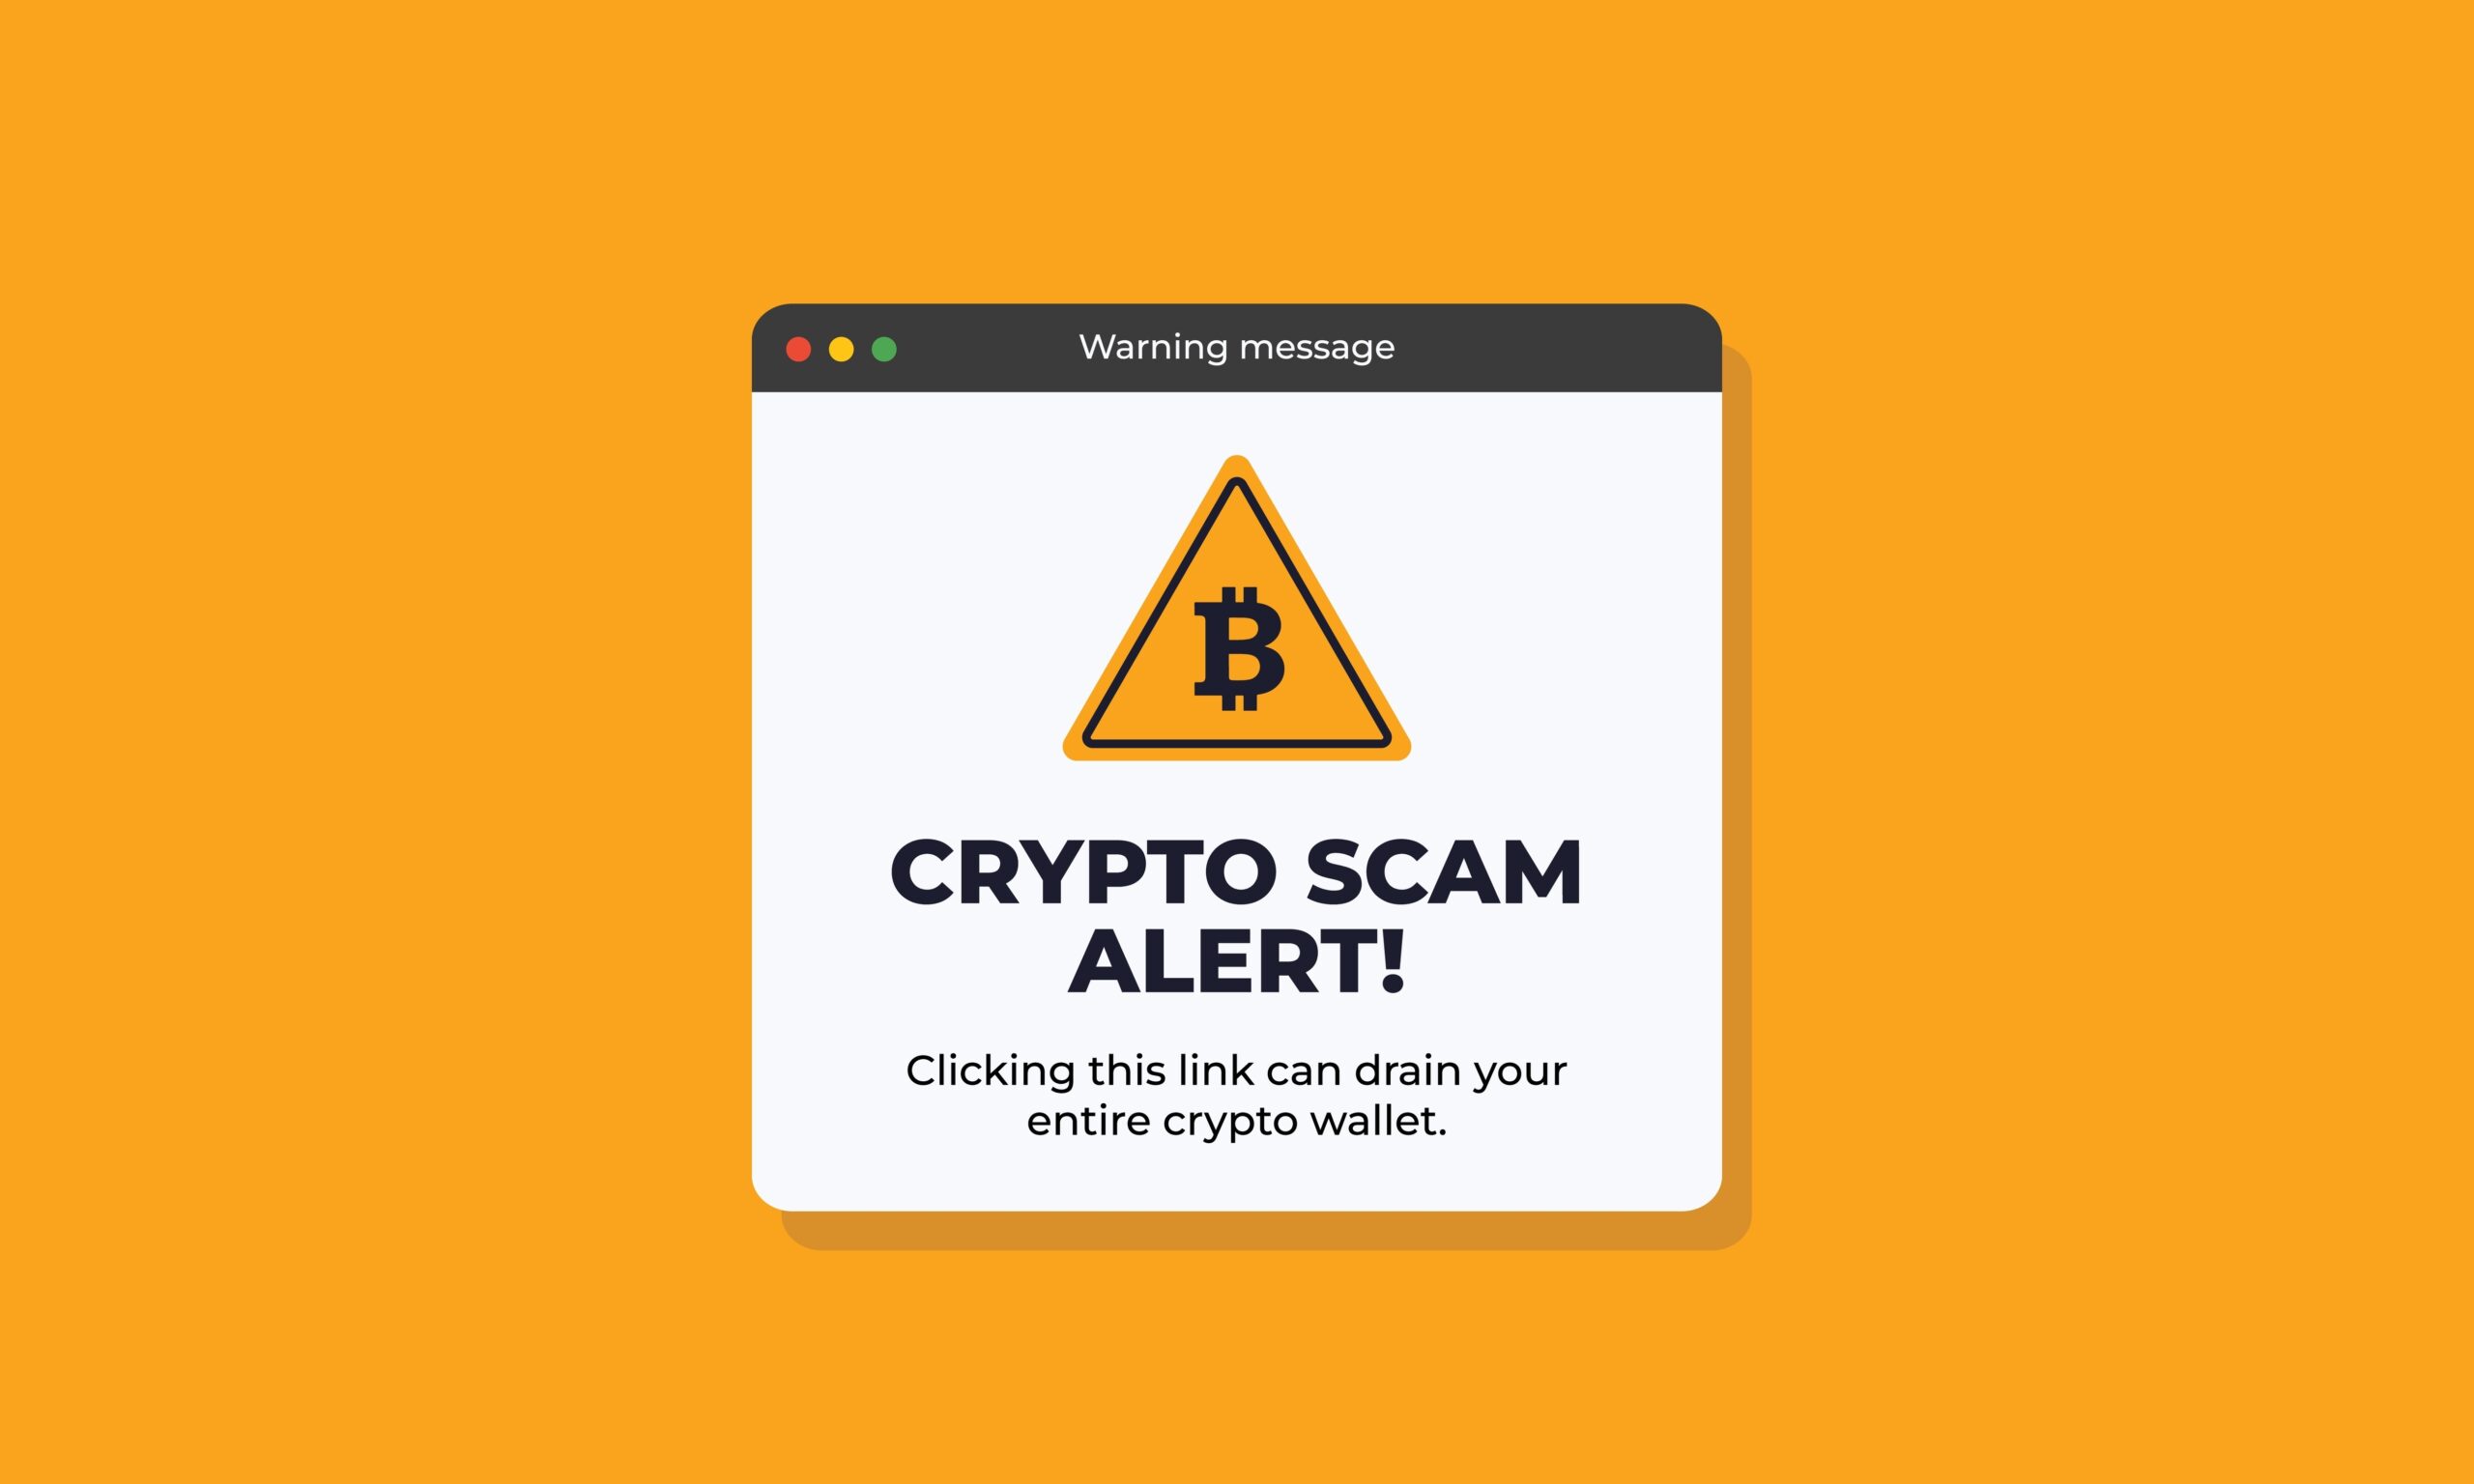
- Wallet drainers and fake claim sites: Phishing kits keep evolving, but the playbook is the same—typosquatted domains, perfect UI clones, and “Connect to claim now” buttons that slip in malicious approvals. Independent security trackers have shown scams consistently rank among the top crypto losses each year, with wallet-drainer tactics steadily rising.
- Careless approvals and blind signatures: One click on “SetApprovalForAll” for NFTs or an unlimited ERC‑20 allowance is all it takes to let a malicious contract move your assets. Permit signatures (EIP‑2612) and “Sign-In With Ethereum” messages can also be abused when you don’t read what you’re signing.
- Missing the drop entirely: People don’t use the product early enough, or they copy-paste “farming” across too many wallets and get filtered by anti‑sybil systems. Real example: major L2 and DeFi drops have publicly excluded copycat behavior and clustered wallets; plenty of users learned that the hard way.
- Gas drains your upside: Chasing every campaign on Ethereum mainnet during peak times can turn a “free” claim into a net loss. If you’ve watched the Etherscan gas tracker during big claim days, you know exactly what I mean.
- Tax surprises: In many countries, airdrops are taxed as income at receipt. If you don’t record USD value and timestamps when claiming, April (or your local tax season) becomes chaos.
Reality check: Security firms and analytics groups (see CertiK and Chainalysis) continue to report hundreds of millions in annual losses to scams and phishing. Airdrop claim pages are prime targets because they concentrate eager users and fresh tokens.
All of this is preventable with a little structure. No heroics. Just a tight setup and a repeatable process.
What you’ll get from this playbook
I’ll keep it practical and no-nonsense. Here’s what I’ll hand you:
- A safe wallet setup that separates long-term funds from airdrop activity (think vault + burner).
- Fast scam filters so you can spot red flags in seconds, not hours.
- A pre-claim checklist to confirm the link, the contract, the chain, and your eligibility.
- A clean claiming flow that minimizes approvals and bad signatures.
- Post-claim hygiene so your wallet doesn’t become a ticking time bomb.
- Eligibility tips without sybil risk so you look like a real user, not a farm bot.
- Clear next steps if you didn’t receive tokens (and how to verify why).
Who this is for
- Curious but cautious: You want in on airdrops, but you don’t want to get drained or install ten shady extensions.
- Once burned, twice careful: You’ve clicked a fake link before or signed something you regret, and you want guardrails.
- Active and time-poor: You’re already in the game and just want the fastest, safest way to claim and move on.
Quick note on trust and responsibility
- I will never ask for your seed phrase. No legit claim needs it—ever.
- I’ll point to official links and standard tools. If a source isn’t official or widely vetted, treat it as guilty until proven safe.
- This isn’t financial or tax advice. It’s the process I use after years of testing, reviewing, and learning from real airdrops and real mistakes.
If you’ve ever wondered “Are airdrops actually free?” or “How do snapshots decide who gets paid?” you’ll want to keep going—next up, I’ll break down what airdrops really are, how teams choose who qualifies, and when gas-free claims are legit versus a screaming red flag. Ready to stop guessing and start claiming smart?
Airdrops 101: What they are and how they work

Here’s the short version: airdrops are how teams give tokens to early users and contributors so the network isn’t owned by insiders alone. Some are life-changing, some are tiny, and a few are traps. Knowing the types and timelines keeps you from wasting clicks or getting rugged.
“Free tokens aren’t free of risk. Your time, your keys, your onchain reputation—that’s what you’re really putting on the line.”
What is a crypto airdrop?
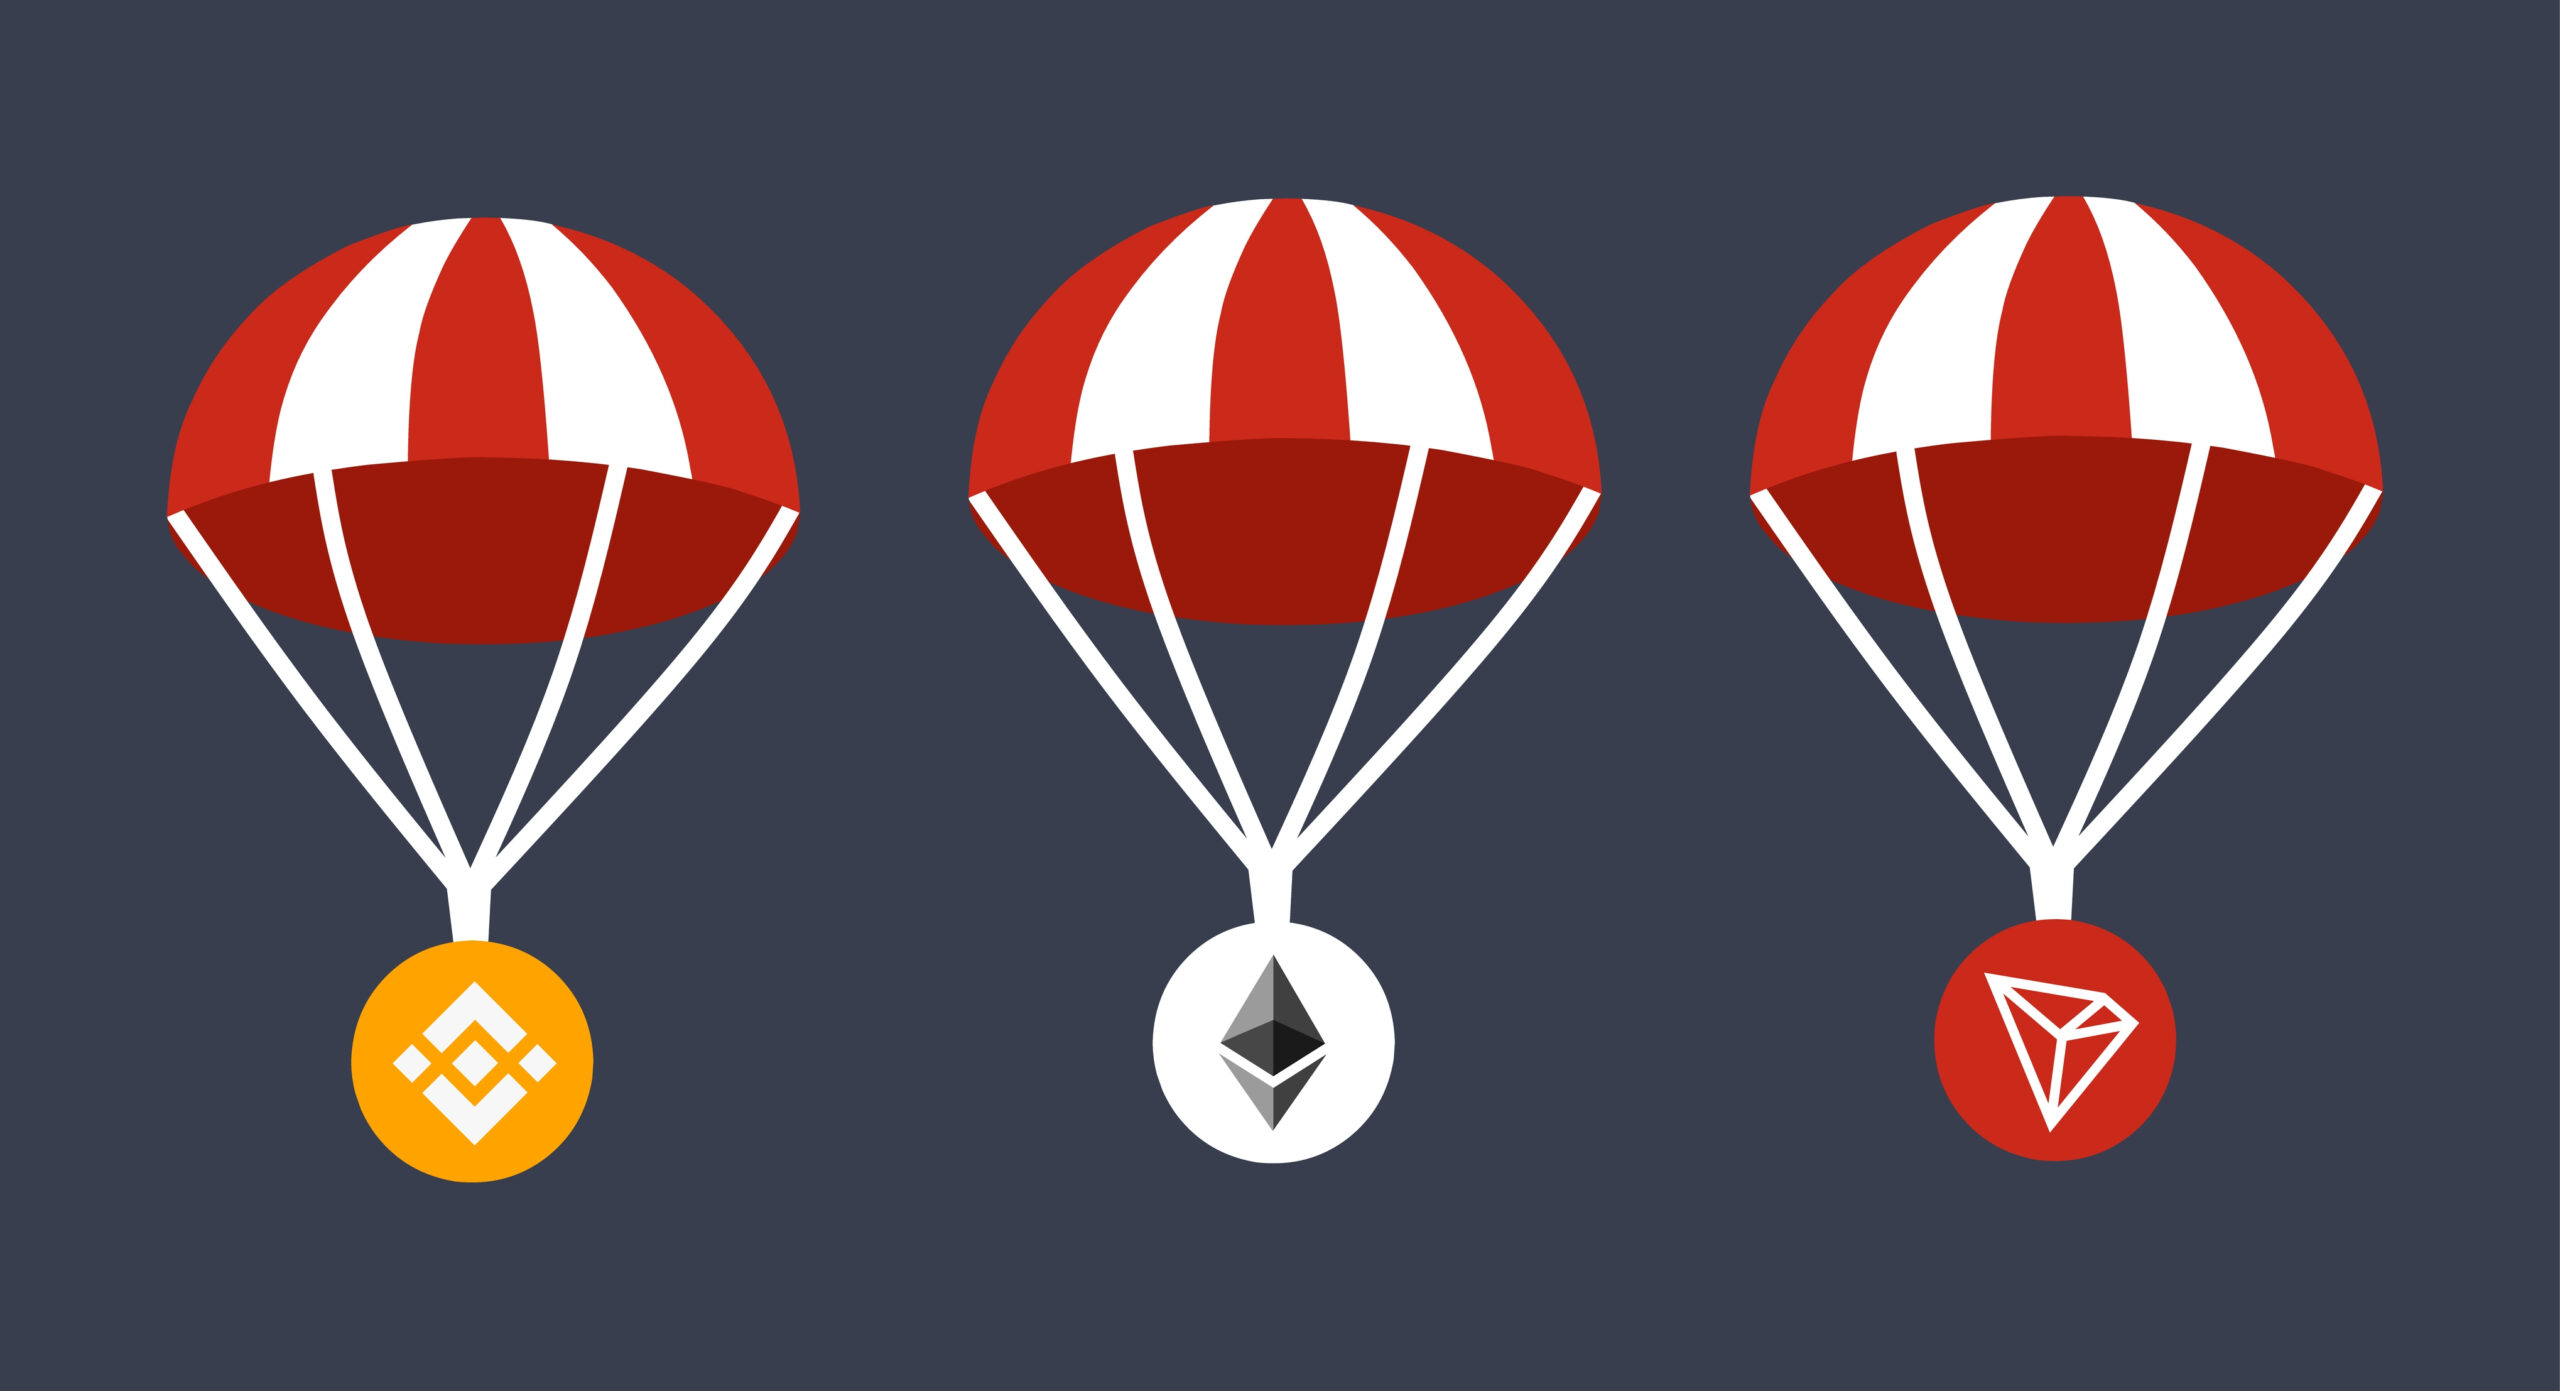
Think of an airdrop as a thank-you package (sometimes huge) sent to wallets that helped a project grow. It can be based on past usage, specific tasks, testing, or referrals. Real-world examples:
- Retroactive airdrops (rewarding past usage)
- Uniswap (UNI): in 2020, anyone who used Uniswap before a snapshot got 400 UNI. No quests, just proof you were early.
- ENS: 2021 drop to .eth name holders, with voting power that encouraged delegation and governance.
- Arbitrum (ARB) and Optimism (OP): rewarded bridges, transactions, and governance actions on their L2s.
- Starknet (STRK) and zkSync (ZK): 2024 distributions to real users and builders, with sybil filters to curb bot farms.
- Task-based campaigns (do X, get Y)
- Blur: trading and listing activity produced “care packages” users could open later.
- Galxe/Zealy quests: follow, join, mint, and onchain tasks used to signal engagement; rewards vary and aren’t always guaranteed.
- Testnet and contributor rewards (builders first)
- Celestia (TIA): “Genesis Drop” favored developers, rollup builders, and early community contributors.
- EigenLayer (EIGEN): distribution to restakers and contributors in “seasons,” showing how long-term participation can matter.
- Referral-driven distributions (bring friends, earn more)
- Some campaigns let you earn multipliers via invite links or leaderboards. This can work, but it’s also where spam and fake users creep in—projects often claw back rewards if they smell sybil activity.
There’s no single formula. Each project decides what “real use” looks like: swapping, bridging, staking, voting, LPing—or building something on top of their stack.
How do airdrops choose who gets tokens?
Eligibility isn’t random. Most teams use a mix of onchain signals and basic anti-bot logic. What I’ve seen again and again:
- Onchain usage: number of transactions, distinct days active, cross-app activity in the ecosystem.
- Volume/fees paid: meaningful usage, not just dust. Some weight higher-fee or higher-liquidity actions more.
- Time-weighted behavior: sustained activity across weeks or months beats a one-day sprint right before rumors.
- Holding or LP positions: providing liquidity, staking, or locking tokens shows commitment.
- Governance participation: voting, delegating, or proposing—ENS and Optimism both rewarded this.
- Allowlists: testnet roles, developer badges, or verified community programs.
- Sybil screens: many teams filter patterns like copy-paste wallets, fresh CEX-funded addresses that do the same actions in the same order, or mass-bridging in one block. Hop Protocol even ran a public sybil bounty to crowdsource fraud detection.
Important: some projects publish their scoring rubric; most don’t. They’ll share examples (“used at least X times”) but keep exact thresholds private to reduce gaming.
Timelines, snapshots, and vesting
Timing is everything. Here’s how the mechanics usually play out:
- Snapshots: a block-height or timestamp where they “freeze” who qualifies and how much. Anything you do after the snapshot doesn’t count for that round. For example, Arbitrum used activity up to specific dates before the 2023 announcement, and zkSync’s 2024 drop used historical usage well before the reveal.
- “Too-late” claims: you hear about a rumored airdrop, rush in, and… the snapshot already happened days or weeks ago. That’s normal. Teams do this to prevent last-minute wash activity.
- Claim windows vs auto-drops:
- Claim windows (most common): you visit an official page and claim within a set period (weeks or months). ARB, OP, ENS, STRK, and ZK used some version of this.
- Auto-drops (less common): tokens are sent directly to wallets, often seen in some Cosmos ecosystems for stakers. It’s convenient, but not the norm because it can waste tokens on abandoned wallets.
- Vesting and lockups: core contributors and investors often have multi-year locks. User airdrops are typically liquid at claim, but not always. Some programs use linear vesting or delayed unlocks for certain buckets. Always check the tokenomics post—teams like Uniswap, Optimism, Starknet, and Celestia published breakdowns on their official blogs.
Pro tip: if a project says “Season 1,” expect more rounds. Optimism reserved a significant chunk for future airdrops and experiments with governance—being consistently active can pay more than one-off farming.
Are airdrops free or do I pay gas?
The token is free; the transaction is not. Most claims cost network gas on the chain where the claim contract lives:
- Ethereum mainnet: often a few dollars to $20+ depending on congestion.
- Layer 2s (Arbitrum, Optimism, zkSync, Base, Starknet): usually cents to a couple of dollars.
- Cosmos/Solana: generally cheap, but you still need a tiny amount of the native coin.
When “no gas” might be okay:
- Auto-drops: you just wake up and tokens are in your wallet—no action required.
- Sponsored claims: some teams cover gas via a relayer/meta-tx. It’s legitimate if it’s on the official domain and publicly announced.
When “no gas” is a red flag:
- Random sites asking for a “gasless” signature with broad permissions (permit/approval) on your valuable tokens.
- “Connect and claim instantly” pages sent via DMs with no mention on the project’s website or official socials.
Remember the LayerZero ZRO “Proof-of-Donation” case in 2024? It wasn’t a standard free claim—you needed to donate to a public good alongside gas. Not good or bad by itself, just different mechanics. Always read the fine print on the official announcement.
Here’s the emotional truth: real airdrops reward real users. If you act like a human—curious, early, consistent—you’ll often outrun the bot swarms and the last-minute gold rush. The next thing I’ll show you is the simple wallet setup I use so a single risky signature can’t nuke my savings. Want the exact “vault + burner” plan that keeps me calm on every claim?
Safety foundation: Your wallet setup for airdrops

Every airdrop season, I see the same story: someone rushes a claim link, signs one careless approval, and wakes up to an empty wallet. It’s a gut punch. The fix isn’t complicated—it’s a layered setup that makes one mistake survivable.
“Trust is a strategy; verification is a habit.”
Vault vs burner wallet
I keep two worlds separate: a cold, hardware-protected vault for anything I’m not willing to lose, and a hot burner wallet for quests, testnets, and new claim sites.
- Vault (cold, hardware-backed): Your long-term funds, blue-chip NFTs, and stablecoins stay here. It rarely connects to new dApps.
- Burner (hot, disposable): Used for airdrop tasks, sign-ins, and unknown contracts. If it gets compromised, your vault is untouched.
Real story: A friend rushed into a “claim now” link during a hyped L2 drop. One approval later, their hot wallet was drained. Their vault? Safe—because it never touched that site. That separation is everything.
- Generate your burner from scratch. Don’t reuse an old address with years of baggage.
- Fund it with only what you need for claiming and gas. Keep it lean.
- Label wallets clearly in your manager (e.g., “ETH Burner L2,” “Vault—Do Not Connect”).
Hardware wallet best practices
Hardware isn’t magic; it’s only as safe as your habits. I’ve used Ledger, Trezor, and air‑gapped options like Keystone. Here’s what consistently keeps people out of trouble:
- Verify on the device screen. Always confirm the address and amount on your hardware, not just the browser pop-up.
- Never type your seed phrase anywhere online. No claim, no “support,” no upgrade needs it. If a site asks, it’s a scam.
- Use your own cables and ports. Avoid random USB hubs/cables. Power-only cables for charging are even better.
- Enable a passphrase (advanced users). A hidden wallet adds a layer beyond the 24 words if someone ever sees your seed.
- Keep firmware official. Update only through the vendor’s app. Bookmark the real URLs.
Why be strict? Reports from groups like Chainalysis and ScamSniffer show wallet drainers are a booming “as-a-service” business. They prey on speed and complacency, not code exploits.
Smart signing habits
Most drains come from signatures you didn’t fully read. I slow down and do two checks before I click confirm: what am I approving, and how much access am I giving?
- “SetApprovalForAll” = high risk. This grants a contract power over all your tokens/NFTs of a type. If you must approve, do it with your burner and revoke later.
- Unlimited ERC‑20 allowances are not mandatory. When possible, set the exact amount. Many UIs allow toggling off “infinite approval.”
- Permit signatures (EIP‑2612 / Permit2) can be long‑lived. They don’t cost gas but grant spending rights. Set short expirations when supported. Learn more: Permit2 overview.
- Typed data vs blind signing. Prefer EIP‑712 typed messages that are human‑readable. Avoid raw
eth_signor messages you can’t interpret. - Be cautious with “Sign-In With Ethereum.” It’s usually safe, but scammers piggyback confusing messages. Read the domain and statement.
- Simulate first. Tools like Rabby (built-in simulation) or Tenderly Simulator help preview what a transaction will do.
Quick gut-check: if the message is unreadable, the domain is unfamiliar, or the contract is brand new, I step back. Real airdrops won’t force you to sign in a hurry.
Chain separation and limits
Different networks, different exposure. I keep separate burners by chain and control how much they can spend.
- One burner per major chain. Example: one for Ethereum mainnet, one for Arbitrum, one for Base. Label each in your wallet.
- Use small top-ups. Keep just enough ETH/gas token for the claim and a couple retries. Refill as needed.
- Cap approvals. If a dApp supports spend limits or expiry (Permit2), use them. Set 30 minutes to 24 hours, not “forever.”
- Rotate burners. After heavy quest seasons or suspicious interactions, move assets out, revoke approvals, and retire that address.
- Stick to official RPCs and bridges. Add networks via Chainlist and bridge using the project’s official bridge when required.
Example: I keep a Base-specific burner with tiny ETH for gas. If a fake claiming contract tries to drain via approval, there’s very little to take—and I can nuke that wallet and move on.
Revoke approvals regularly
Approvals are “set it and forget it” for scammers. I treat revoking like brushing my teeth—quick, routine, and non‑negotiable.
- After every claim/quest: Revoke spending on the token you touched.
- Monthly cleanup: Calendar a 10‑minute session to clear old allowances on all chains you use.
- Trusted tools:
- revoke. cash — supports multiple chains, simple UI.
- Etherscan Token Approvals — official explorer for Ethereum; use BaseScan/Arbiscan equivalents.
- DeBank — good overview of approvals across tokens and protocols.
- Don’t forget NFTs. Revoke SetApprovalForAll on collections you no longer trade.
Pro tip: screenshot your approvals before and after big claim rounds. If something goes weird later, you’ll know exactly what changed.
Emotional guardrail: if a site pushes an “urgent claim” that requires broad approvals, I pause. Airdrops that matter leave a reasonable window. And as multiple industry reports keep showing, the fastest clickers are often the fastest losers.
Now that your setup won’t sink the ship, here’s the next puzzle: how do you tell a legit airdrop from a polished fake in under a minute? In the next section, I’ll show you the exact sources I check first, the domain/contract cross‑checks I do, and the quickest red flags that save your stack. Ready to stress‑test your links?
Finding legit airdrops (and dodging fakes)

I treat every airdrop like a street crossing: look left, look right, look left again. If I can’t trace the claim link straight from the project’s own channels, I don’t touch it. Simple rule, big results.
“Trust is a feeling; verification is a habit.”
Where I look first
When a new airdrop pops up in my feed, I start here and work outward. If two or more of these don’t confirm the same claim link, I wait.
- Official website and docs: Look for a claim page linked from the project’s root domain and docs, not a random microsite. Example: uniswap.org linked to its claim subdomain during the UNI drop.
- Project blog/newsroom: Most legit teams post a dated announcement on their own blog (Mirror, Medium, or self-hosted) that links the claim URL.
- GitHub: Many teams publish the distributor contract or merkle list repo. Check the org, not a look‑alike. Example: github.com/Uniswap.
- X (Twitter) and Discord: Cross-check posts from the project’s handle and its core contributors. Avoid any “claim now!” links posted only in replies or random channels.
- Known trackers (for discovery, not final links):DeFiLlama Airdrops, Airdrops.io, and Earnifi. I still verify links against official channels before clicking.
Quick gut-check: if the only place promoting the claim link is a brand-new X account with zero mutuals and a countdown timer gif… I’m out.
How can I tell if an airdrop is legitimate?
I use a “three-point match.” I want the domain, handles, and contract address to confirm each other.
- Domain consistency: The claim should live on the project’s root domain or a clear subdomain (e.g., claim.project.com). Typos, odd TLDs, or hyphenated clones are a no.
- Handle cross-posting: The official X handle links to the claim. The website’s footer links back to the same handle. Discord announcements match those links. It should be a closed loop.
- Contract address match: The exact distributor/claim contract is listed in docs or the announcement, and it matches the address on the explorer (Etherscan, Arbiscan, Snowtrace, etc.).
Two quick examples that show what “legit” looks like:
- Uniswap (UNI): The claim lived on a subdomain of uniswap.org, linked from the official blog and @Uniswap. The distributor used a standard Merkle pattern and the contract was verified on Etherscan.
- Arbitrum (ARB): The claim link appeared on the foundation’s official domain and was cross-posted by @arbitrum and its blog. Contract addresses were shared publicly and matched on Arbiscan.
Why I’m strict: fraud around airdrops is huge. ScamSniffer reported wallet drainer phishing took $295M+ in 2023 alone, with hundreds of thousands of victims, and the trend continued into 2024. Source: ScamSniffer. Chainalysis’ 2024 Crypto Crime Report echoes the rise of social-engineering driven theft. Fast clicks fund these numbers.
Common red flags
- Brand-new socials: A “project support” account created this week pushing an urgent claim link.
- Typos and off-brand domains:unìswap.org (accent), arbitrum-foundatlon.com (L instead of i), or claim-project-airdrop.net.
- “Urgent claim” DMs: Real teams don’t DM claim links. Neither do legit mods. Public announcement or nothing.
- Connect gates and fake captchas: “Connect wallet to see if you’re eligible” on a site that isn’t linked anywhere official.
- Seed phrase prompts: No claim needs your seed. Ever. If a site asks, it’s a crime scene.
- Mobile-only QR claims: QR pages that force you into a one-tap mobile signature are often drainers.
- Weird asks: Airdrops shouldn’t require you to approve spending of your ETH/USDT/NFTs. Claims transfer tokens to you, not the other way around.
If something feels off, it probably is. I’d rather be late to a real claim than first into a drainer.
Verify smart contracts before touching them
When I find the contract, I run this quick inspection on the explorer:
- Age and deployer history: Click the “Creator” address on Etherscan/Arbiscan. Have they deployed the project’s other contracts? Is this contract older than a few minutes? Freshly minted contracts from random EOAs are risky.
- Verified source code: Look for “Contract Source Code Verified.” If it’s a proxy, check both the proxy and implementation. Unknown proxy admins are a red flag.
- Functions that make sense: Common distributor patterns include claim(index, account, amount, merkleProof). You shouldn’t see calls that require setApprovalForAll on your NFTs or unlimited ERC-20 approvals to some unknown spender just to claim.
- Audits and repos: Scan docs and the project blog for audit links (Trail of Bits, OpenZeppelin, etc.) or a GitHub repo that references the distributor. No paper trail? I wait.
- Comments and labels: Explorer comments aren’t gospel, but if multiple reputable accounts label the contract and it matches official posts, that’s a plus.
- Time pressure check: Real airdrops rarely expire in 10 minutes. If the site screams “ends in 00:09,” that’s theater, not security.
One more mental model I love: if a claim requires me to approve anything I already own (ETH, stablecoins, blue-chip NFTs), I stop. Airdrops send tokens to you; they shouldn’t need permission to move your existing assets.
Measure twice, click once. Next up, want my exact step-by-step flow for confirming eligibility, simulating the transaction, and claiming without sweating every signature?
The safe claiming flow: Step-by-step
Claiming should feel boring. Boring is safe. Anytime I feel rushed, hyped, or confused, I stop and reset. “Slow is smooth, smooth is fast.”
“The airdrop isn’t going anywhere, but your funds can.”
Pre-claim checklist
Before I touch a claim page, I run through this every single time. It takes two minutes and saves hours of regret.
- Confirm the official link: I open the project’s website or docs, then click through to the claim page from there. I cross-check their X handle and Discord announcement channel. If the claim link is different across channels, I wait.
- Check eligibility on a trusted checker: Only via the project’s own checker or a well-known aggregator they’ve confirmed publicly. If I have to connect first to find out, I switch to my burner and proceed with caution.
- Simulate the transaction: I paste the claim contract and my address into a simulator before I connect any wallet:
- Etherscan’s Transaction Simulator (on supported chains)
- Tenderly Simulation (read-only, no wallet needed) – I look for what functions will be called and which tokens are touched
- Rabby Wallet’s built-in simulation warning (handy for surprises)
- Top up gas on the right chain: I make sure my burner has enough native gas token where the claim happens (ETH on mainnet or L2, OP on Optimism, ARB on Arbitrum, MATIC on Polygon, BNB on BNB Chain, etc.). If bridging, I only use official bridges (examples: bridge.arbitrum.io, app.optimism.io/bridge, bridge.base.org).
- Harden the environment: Dedicated browser profile, only the wallet extension I need, pop-ups blocked, and no mystery extensions. I also make sure auto-approve is off in my wallet.
- Have a plan for the tokens: Will I send them to my vault, swap a portion, or leave on the burner for a bit? Deciding before the claim keeps me from making rushed moves.
Why simulation matters: approval-based theft is still rampant. Security teams like ScamSniffer estimated that “drainer kits” helped steal tens of millions in 2023–2024 (examples: MS Drainer, Inferno Drainer). The usual pattern starts with a sneaky approval. If my sim shows an unexpected approve() or setApprovalForAll touching a valuable token/NFT, I walk away.
During the claim
This is where most mistakes happen. I keep it tight and methodical:
- Connect the burner only: Never my vault. If a site rejects my burner and insists on a full-permission connect, I leave.
- Read the domain and the request: I confirm the domain in my wallet’s signature window matches the site I’m on. No signing blind messages for “session” or “promo” without a clear reason.
- Watch the function names:
- Normal: claim(), claimAirdrop(), claim(address to, bytes32[] proof, uint256 amount)
- Suspicious: setApprovalForAll() (NFTs), approve(spender, uint256) for a token I already value, or a blanket permit/permit2 that looks unlimited
- Edit approvals down: If the UI asks for spend permission, I click Edit Permission and set a minimal amount (just above the claim/swap need). Unlimited allowances are how people get drained while they sleep.
- Confirm the receiving address: If I’m sending tokens out right after claiming, I verify the vault address on my hardware screen before signing. Clipboard malware is real.
- Mind gas and nonces: On busy days I set a sensible max fee. If an earlier stuck transaction is blocking me, I replace it with a higher-fee “speed up” rather than spamming new ones.
Real-world example: Big, legitimate claims like UNI (2020), ARB (2023), and OP (2022–2024 waves) asked users to call simple claim functions on official contracts. None required seed phrases. Several high-profile drainer campaigns in 2023–2024 spoofed those flows but hid an approval call under the hood. That one click cost millions. Reading the function call is the single best habit I keep.
After the claim
Clean exits are part of the win. I do this while the page is still open:
- Revoke approvals I don’t need: I open Revoke.cash or Etherscan’s Token Approvals and remove allowances I granted during the claim. It’s quick, cheap on L2s, and prevents future snooping by malicious contracts.
- Move tokens to my vault (if holding): I send to my hardware-protected vault and verify the address on-screen. If I plan to swap a portion, I do that first from the burner, then move the rest.
- Label the transaction and save details: I tag the claim in a portfolio tracker (Zerion, DeBank, Rotki) and save the claim link, snapshot date, and transaction hash in my notes. It’s clutch for tax time and support tickets.
- Take a screenshot of the confirmation: Especially if the claim portal won’t be up forever.
Do I need to pay gas and on which chain?
Almost always yes. The token is free; the transaction isn’t. Here’s how I keep it efficient:
- Chain check: I confirm the claim chain on the official docs or portal. Recent claims often happen on L2s (Arbitrum, Optimism, Base) to keep gas low. Some still run on Ethereum mainnet.
- Gas prep: If I need to bridge, I stick to official bridges or those endorsed by the project. I move a little extra native token for safety (failed claims because of “dust-level gas” are common).
- Timing: If gas on mainnet is insane, I wait for a quieter window (early weekend UTC can help). Claims don’t usually vanish in an hour.
Tip: If a “gasless” claim appears on a random site, that’s a red flag. Gasless can be legit when the project pays relayers or it’s on a testnet, but they’ll say so clearly on official channels.
Why didn’t my claim go through?
If something fails, I check these in order:
- Wrong chain: My wallet may be on the wrong network. I switch to the chain shown on the claim page and try again.
- RPC hiccup: Public RPCs get rate-limited. I switch RPC, try a different reputable RPC, or wait a minute.
- Not eligible or snapshot mismatch: The contract reads from a Merkle root or allowlist. If my address isn’t there, no UI trick will force it. I double-check the official checker.
- Expired window: Some claims close after a set date or block. If it’s over, it’s over.
- Dust gas or stuck nonce: I was short on native gas or had an earlier pending tx. I add more gas or replace the pending txn with a higher fee.
- Contract paused or errored: I look up the contract on the explorer. If I see a lot of recent failed claims or a paused flag, it’s not on me—wait for an official update.
Quick triage tools: a transaction simulator to preview failure reasons, the block explorer for real-time error messages, and the project’s status/announcement channel for known issues. If I need help, I ask publicly in the official server—never in DMs.
One last thing. The “During the claim” moment is exactly when scammers try to pounce—fake pop-ups, cloned domains, “urgent support” DMs. Want to see the patterns they repeat and the single screen I never click through without reading line-by-line? Let’s look at the tricks they use next and how to spot them in seconds.
Avoiding the top airdrop scams

Most “I got drained” stories sound the same: a rushed click, a slick fake page, one blind signature. That’s it. The good news? These scams follow patterns. Once you’ve seen them, you can spot them in seconds and keep your stack safe.
“If it feels urgent, it’s engineered.”
ScamSniffer tracked hundreds of millions lost to wallet-drainer phishing in the last couple of years, with toolkits like Inferno Drainer and Pink Drainer automating the hustle for scammers. They thrive on panic and repetition. Here’s how I cut through their tricks.
Fake airdrop tokens in your wallet
One day you open your wallet and there they are: mystery tokens with “CLAIM” in the name or a “note” pointing to a website. That’s bait. Interacting with these usually routes you to a phishing site that asks for approvals or signatures that hand over your assets.
- Don’t touch spam tokens. Don’t try to swap, bridge, “burn,” or “unlock” them. Hide them in your wallet UI and move on.
- Never visit URLs printed in token names/notes. Token metadata can say anything; that text isn’t proof of legitimacy.
- If you suspect you ever approved something sketchy, head to an approval tool and clean house: Revoke.cash, Etherscan Token Approvals, Rabby’s revoke.
Real-world pattern: After high-profile airdrops (think ARB, LayerZero, zkSync), scammers flood wallets with fake “claim now” tokens. The tokens are harmless until you follow their link.
Seed phrase traps
I’ll keep this short because it’s the whole game:
“No legitimate airdrop will ever ask for your seed phrase.”
- Never type your seed into a website. Not for “claim verification.” Not for “wallet upgrade.” Not to “restore view.”
- Your seed belongs offline, written on paper or etched in metal. If any screen besides your official wallet onboarding asks for it, that’s theft.
- Ignore “Ledger/Trezor support” pages telling you to import your seed to fix a bug or enable airdrops. That’s a classic lure.
Reality check: The moment a seed is typed into a web form, the wallet is gone. Scammers don’t need to drain immediately; they can quietly wait and empty funds later.
Approval/permit drainers
This is the sneaky one. A site can’t move your tokens unless you allow it. Drainers push you to grant dangerous permissions with normal-looking prompts.
- Watch for these red flags in signatures:
- setApprovalForAll for NFTs or LP positions
- Unlimited ERC-20 allowances for stablecoins or majors
- permit/permit2 (EIP-2612/Permit2) that authorizes spending without a standard onchain approval
- Use spend limits. If your wallet offers a “spend limit,” set it to the minimum needed, not “unlimited.”
- Read the spender address. If you don’t recognize the contract (and can’t find it on the project’s docs), cancel.
- Simulate first. Run the claim through a simulator before signing: Tenderly, Safe simulator, or your wallet’s built-in simulation.
- Revoke right after claiming. Even legit claims can leave open allowances. Clean them the same day.
Real-world pattern: Fake “LayerZero” and “Starknet” claim pages prompted permit-based signatures that silently approved spenders. Victims saw nothing move… until their USDT vanished hours later. That’s how permit2 phishers operate.
Social engineering and DMs
Scammers don’t need your code; they need your trust. They’ll pose as support, community mods, or even founders with deepfake video and voice.
- Assume all DMs are hostile. Real teams rarely initiate private support. Ask in public channels only, where others can sanity-check.
- Never screen-share your wallet. I’ve seen “support” agents ask to “help you claim” on a Zoom. That’s a one-way ticket to zero.
- Beware of verified-looking handles. X accounts get hijacked; Discord webhooks get abused. If a post links to a claim, verify the domain against the project’s official website, not just their social post.
- Urgency is a tell. “First 10 minutes only!” is how they bypass your judgment. Legit claims have reasonable windows.
Real-world pattern: Compromised Discords push a “quick claim” link. Victims connect wallets, sign a “harmless” message, then get funneled to an approval screen. It feels like a standard flow because the scam is designed to mirror it.
Browser and mobile hygiene
Even good habits can fail if your browsing environment is messy. Keep your claim surface small and predictable.
- Use a dedicated browser profile for Web3 with only essential extensions. Extra plugins enlarge your attack surface.
- Block pop-ups and malicious scripts. Install a reputable content blocker like uBlock Origin and keep it updated.
- Turn off auto-open links from messaging apps. Copy-paste domains manually and check for typos or weird characters (punycode lookalikes).
- Be careful with QR “claim” pages. Scanning a QR to connect is fine, but don’t sign anything you don’t understand. Check the domain on your wallet’s connection screen before approving.
- Update your OS and wallet regularly. Patches close holes scammers rely on.
- Keep a “clean phone” policy. Don’t install random wallets, scanners, or APKs just to claim. If it’s not from the official site, it doesn’t touch your device.
Real-world pattern: Mobile QR scams route you to a convincing “WalletConnect” screen that’s actually a phishing domain. Victims approve a connection, then sign a permit—game over.
Quick gut-check I use before any claim:
- Do I fully recognize the domain and contract?
- Is this signature granting spend/approval or just proving I own the wallet?
- Is there any artificial countdown trying to push me through?
- Can I confirm the claim page from the project’s official site, not social?
One more thing. You can be safe and still miss out if you look like a bot to airdrop teams. Ready to look unmistakably human onchain—and avoid sybil flags while boosting your odds?
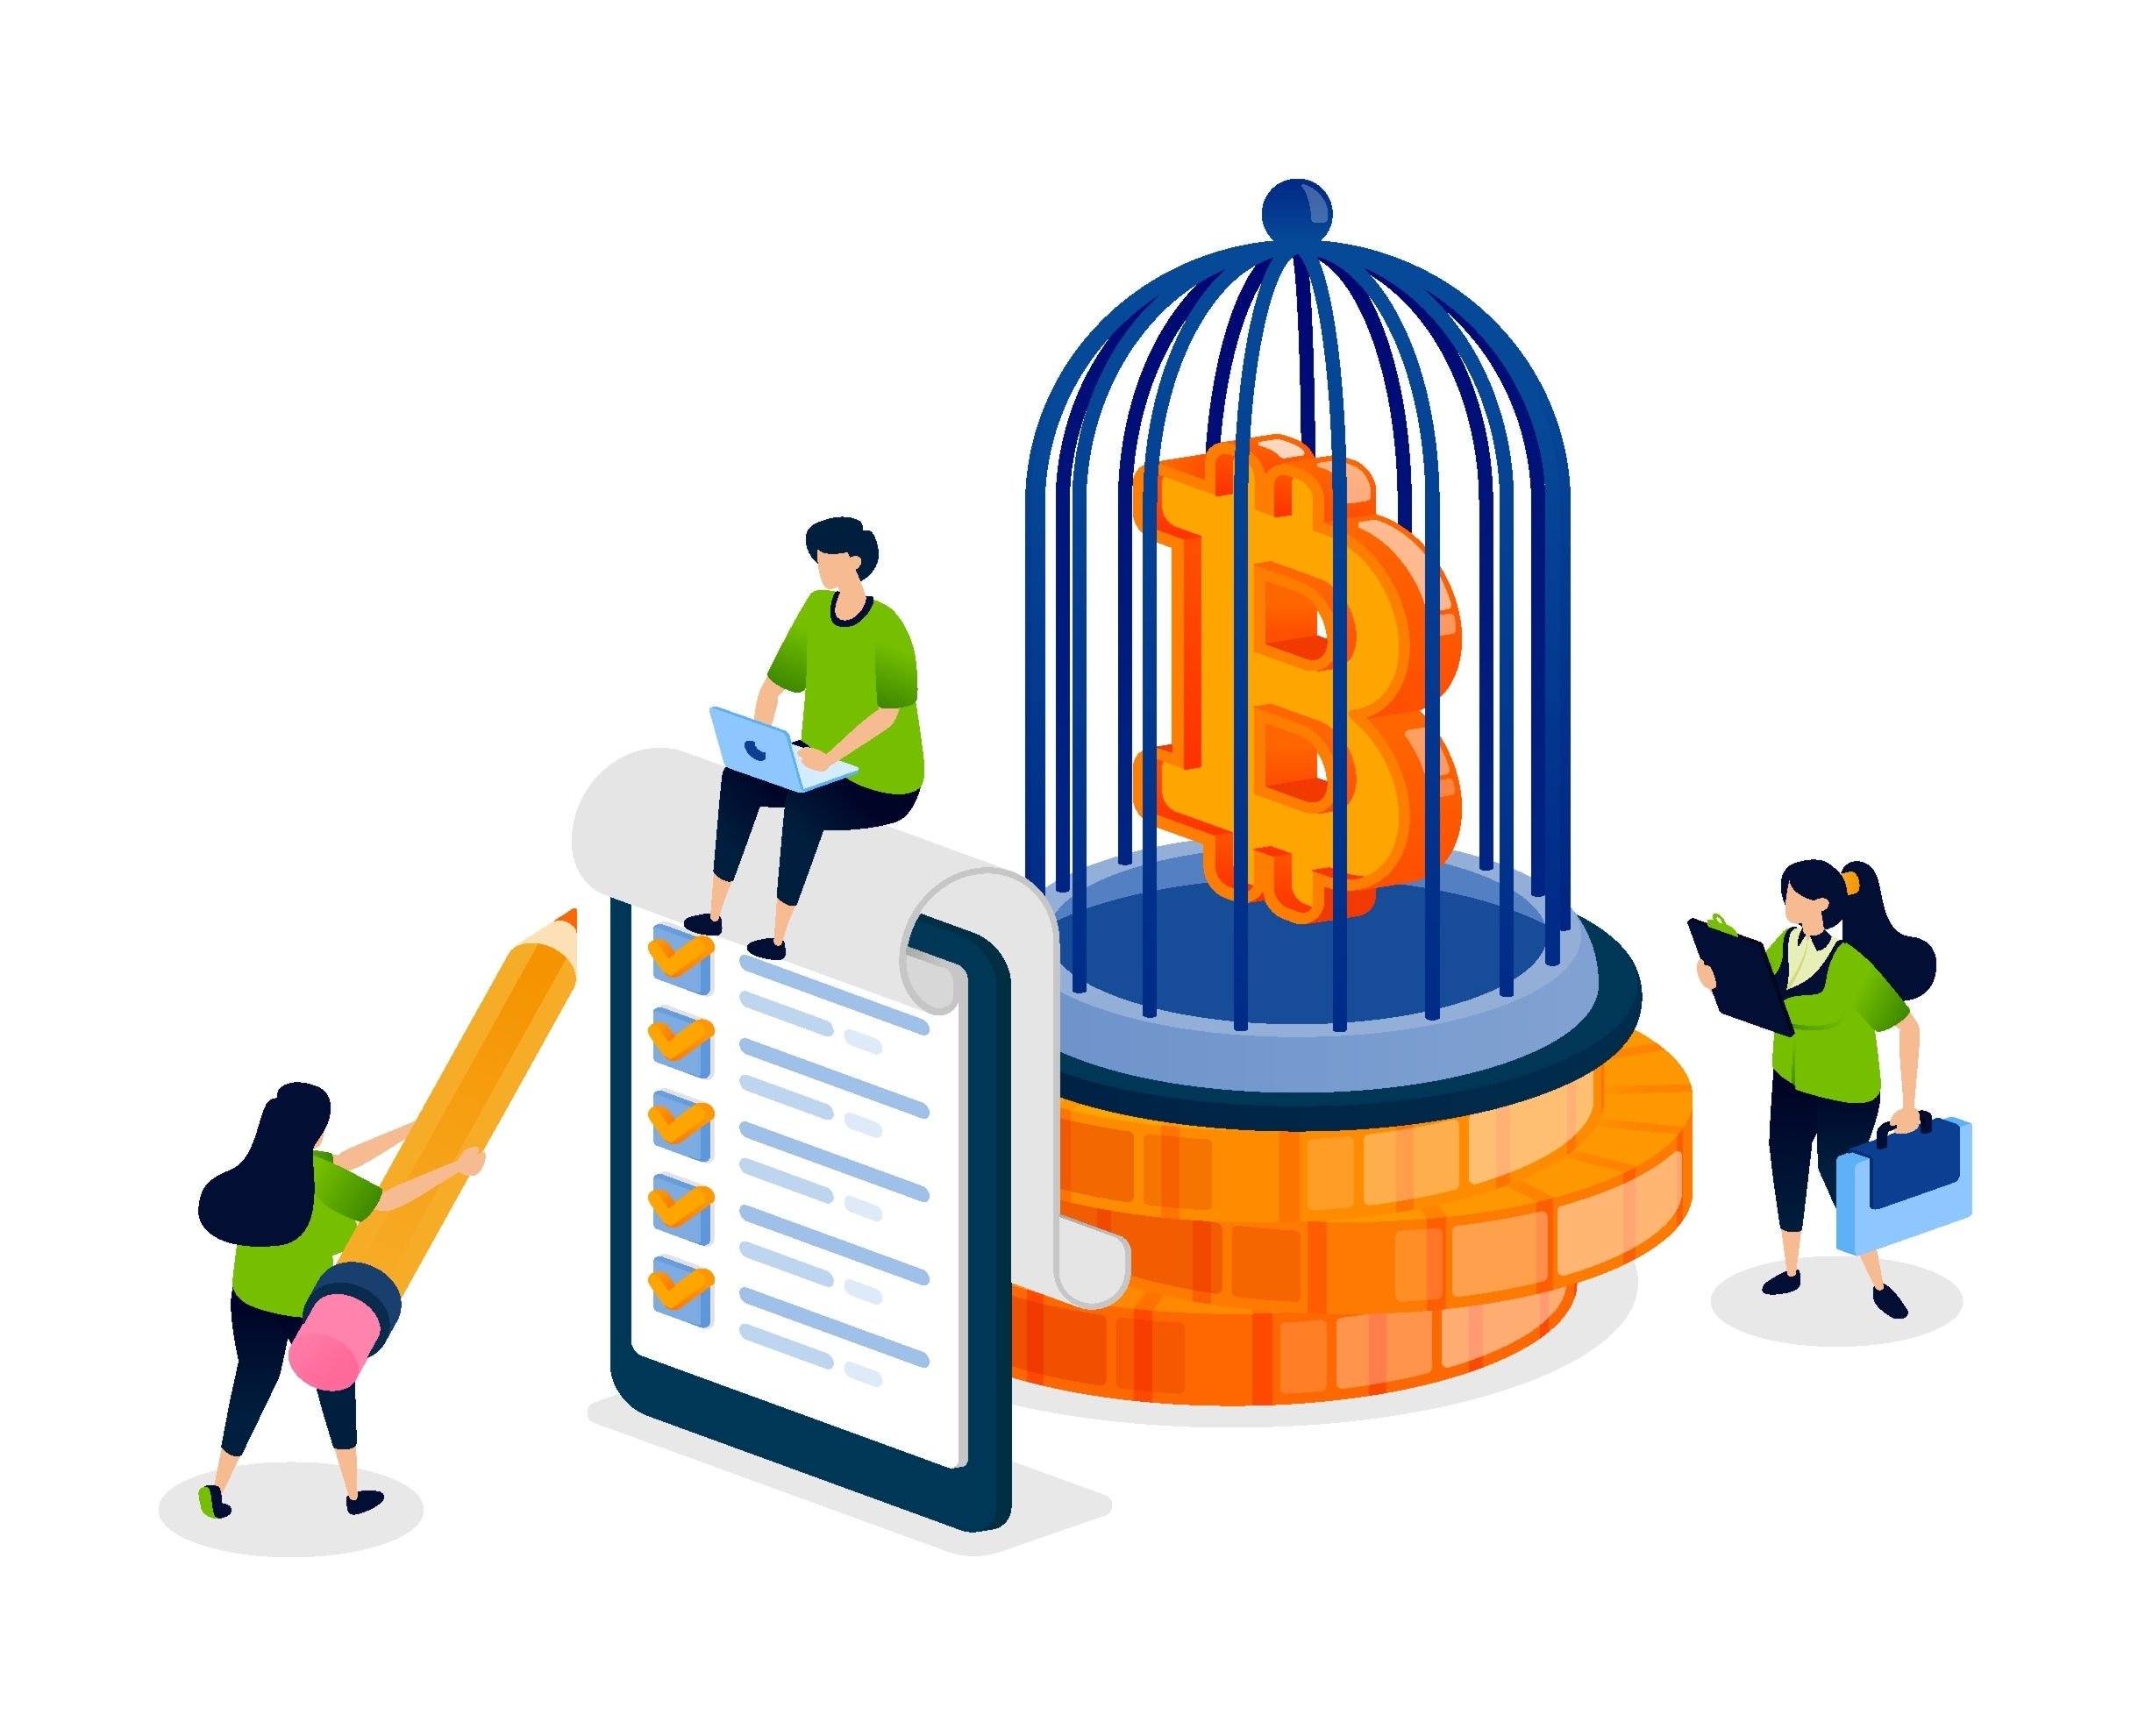
Maximizing eligibility without getting flagged as a sybil
I’ve watched a lot of people “farm” their way straight into the ban list while quieter users walked away with bigger allocations. The pattern is consistent across the biggest drops: projects want to reward genuine, time-weighted usage — not checklist farming. If you look like a real user, you usually win.
“Airdrops reward users, not bots. Be the user.”
How to increase chances of getting an airdrop
Here’s the play that keeps paying off across real examples like Uniswap, Arbitrum, Optimism, Celestia, and Starknet:
- Be early, but also be consistent. Many projects weight activity over time. A handful of sessions across weeks/months beats one manic weekend of clicks.
- Do the core actions the product cares about. On a DEX: swap, LP, maybe vote. On an L2: bridge in, transact, try native apps. On a restaking/LSD app: stake, delegate, claim/re-stake.
- Hold or use positions, don’t churn. Time-in-position is a common signal. Flash in-and-out behavior screams “farm.”
- Touch governance where it exists. Projects like Uniswap and Optimism have awarded governance participation. A single thoughtful vote or forum post can outweigh 10 mindless transactions.
- Provide real feedback in public. Report bugs, submit PRs, or share helpful threads. Celestia’s Genesis Drop rewarded real contributors (devs, researchers, community builders) — that pattern is spreading.
When in doubt, ask: “If I were the team, does this look like someone who cares about my product or someone rushing a quest?” Your chain history tells that story.
Should I use multiple wallets?
Short answer: you can, but it often backfires. Many projects actively filter sybils using clustering and behavior heuristics. If your wallets look copy-pasted, assume you’re flagged.
- One strong, consistent wallet usually beats a fleet of thin wallets. It looks like a person, not a farm.
- If you must manage multiple for legit reasons (e.g., testing, family members), keep behavior clearly distinct: different interaction patterns, different timing, and a natural use rhythm. Avoid mirrored activity bursts.
- Don’t try to “evade” filters. Projects have gotten good at spotting clusters — shared funding sources, synchronized actions, same bridges at the same block ranges, templated transaction sizes. Hop, Optimism, Arbitrum, and Starknet all ran sybil screens and removed or reduced allocations for suspicious clusters (see their linked posts above).
Think signal, not spam. You’re building a reputation onchain, and protocols are reading it.
Onchain footprint that looks real
A few simple habits set you apart from farms:
- Stagger activity over time. Spread interactions over weeks. Avoid “one-day wonders.”
- Vary amounts and cadence. Real users don’t always swap exactly 0.1 ETH, then 0.1 ETH, then 0.1 ETH.
- Use the ecosystem, not just the homepage. On an L2, interact with multiple native apps — a DEX, a lending market, a bridge, a name service. On a DEX, try LP, a limit order, a governance vote.
- Bridge in, don’t just farm faucet tokens. Fresh value in + real fees paid often reads as commitment.
- Return later. Come back after upgrades, vote cycles, or product launches. Time-weighted loyalty is a strong signal in many allocations.
Remember: sybil filters look for rinse-repeat patterns and identical graphs of interactions. Organic behavior naturally breaks those patterns.
Gas and budget strategy
The point isn’t to “do everything.” It’s to pick a few high-conviction targets and show up like a real user without bleeding fees.
- Choose 3–5 projects you actually care about. L2s, core infrastructure, or apps with strong PMF and active governance — these tend to reward early community members.
- Set a simple budget per project. Track gas + fees. Airdrops are “free” tokens, not free transactions.
- Prefer L2s for routine activity. You’ll get more signal per dollar of gas, and many airdrops happen on L2s or reward cross-rollup usage.
- Log actions. Note dates, tx hashes, and what you did. It helps you pace activity and later verify eligibility.
Pro tip: if you can’t explain in one sentence why a protocol matters, don’t farm it. You won’t keep up the cadence, and your footprint will look thin.
KYC and regional limits
Some distributions set KYC or regional rules. It’s better to decide your boundary upfront than to scramble later.
- Read the FAQ before you commit time. If KYC is required and you’re not comfortable, skip early.
- Only upload documents through official links. No exceptions. If the domain isn’t the project’s verified site, walk away.
- Respect regional restrictions. Don’t risk accounts over terms you don’t agree with. There will be other opportunities.
- If appeals are offered (e.g., for false sybil flags), follow the official process and provide context. Keep your records handy.
“I’ll figure it out later” is how people lose both time and tokens. Alignment beats friction.
One last thing before we move on: what if you did everything right and still didn’t receive the drop — or you got it and now you’re unsure whether to sell, hold, or stake? And how do taxes fit into all this? Let’s sort that next…
Tracking, taxes, and your exit plan
Claiming is only half the game. The wins stick when you track what happened, make smart decisions on when to sell or stake, and keep your records clean for tax season. Here’s exactly how I handle it after every worthwhile drop.
Where’s my airdrop? I didn’t receive it
Before you panic, run through this quick triage. Nine times out of ten, the answer is in one of these steps:
- Check the snapshot details. Find the official announcement and confirm the snapshot date and time. If you interacted after the snapshot, you won’t be included for that round.
- Use the project’s eligibility checker. Most serious launches publish a checker tied to their site. If it’s not on their domain or docs, assume it’s fake.
- Open a block explorer. Paste your address into the right chain’s explorer (Etherscan, Arbiscan, Basescan, etc.). Look for the claim transaction or airdrop distribution contract interactions. No trace? You probably didn’t claim yet or weren’t eligible.
- Confirm the chain. Some airdrops are on L2s or appchains. If you’re on the wrong network, it will look like “nothing arrived.” Switch RPC and check again.
- Watch the claim window. Several projects use strict claim periods. If it expired, your allocation may have reverted to a treasury or DAO pool. It’s brutal, but it happens.
- Look for reason codes. Some teams post disqualification reasons (sybil heuristics, minimum activity thresholds). If your wallet looks farmy, you might be flagged.
- Ask in public, never in DMs. If you still can’t tell, ask in the project’s public channel. DMs = scammers. Public channels = searchable, verifiable answers.
Pro tip: Save the snapshot URL, claim page, and a quick explorer link to your address in one note. Future you will thank you when you’re reconciling later.
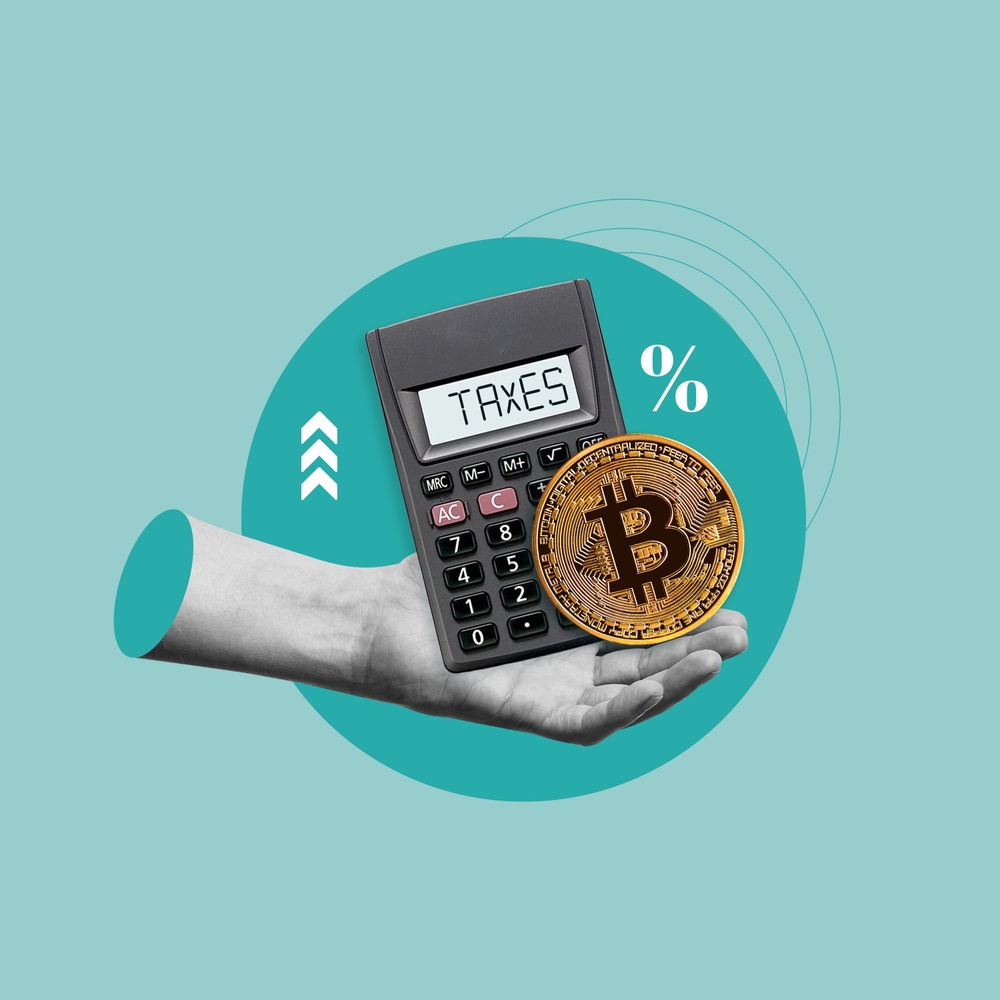
Are airdrops taxable?
Often yes, but it depends on where you live and what you did to get them. Here’s the no-stress way I handle it without turning tax time into a scavenger hunt:
- Capture the value on receipt. When the tokens hit your wallet (or when you could control them, depending on the jurisdiction), record the timestamp, token amount, price in USD, and a link to the transaction. Screenshot the market price source (CoinGecko/CMC) for consistency.
- Label the transaction type. I tag it as “airdrop income” in my tracker so I can separate it from swaps and transfers. If I had to complete tasks, I still tag it as airdrop unless it’s clearly compensation.
- Use consistent pricing sources. If the token is illiquid at receipt, note that and use the first reliable price you can defend. Consistency beats cherry-picking.
- Know your local rules. As a starter:
- IRS (US) has guidance touching airdrops; many US tax pros treat them as ordinary income at fair market value on receipt, then capital gains/losses on sale.
- HMRC (UK) generally treats tokens received without paying market value as taxable; specifics depend on whether you did something to earn them.
- ATO (Australia) treats many receipts as ordinary income; later disposals are CGT events.
- Keep raw evidence. Store CSV exports from explorers, tax tools, or your wallet, plus screenshots. Audits love paper trails.
I keep this short rule in my notes: record on receipt, reconcile at sale. It’s simple, and it matches how most jurisdictions think about income vs. capital gains.
Sell, hold, or stake?
Decisions feel easy when the chart is up only and impossible when it’s bleeding. I avoid that rollercoaster by setting rules before I claim:
- Partial take-profit. I often sell 25–50% on claim to cover gas and time. The rest I treat as a “free position.” Behavioral finance research (e.g., Shefrin & Statman’s work on the disposition effect) shows pre-commitment helps reduce regret and bias-driven decisions.
- Time-based plan. For the remainder, I set a time window (30–180 days) to reassess, not react. Calendar reminders beat impulsive Twitter-driven trades.
- Liquidity first. I always check DEX depth and slippage on a reputable aggregator before hitting sell. If liquidity is thin, I split orders, use limit orders where supported, or wait for market hours with better depth.
- Understand vesting/locks. If tokens vest or have cliff unlocks, I expect volatility near those dates. I set alerts for the unlock calendar.
- Staking only if risk-adjusted. Staking or delegating adds smart contract or validator risk. I compare the net yield to the token’s typical volatility. If the APY doesn’t compensate for the extra risk or lock-up, I pass.
- Mind the taxes on disposal. Selling triggers a taxable event in many places. If I’m already in the red on taxes from income-at-receipt, harvesting losses on other assets later can help balance the books—check your local rules.
My simple rule: If the thesis is community ownership, I keep a slice. If the thesis is “cash incentive to try us,” I take more off the table sooner.
Post-claim hygiene
Clean ops = fewer headaches later. Right after a claim, I do four things without thinking:
- Revoke approvals. Claims often require approvals you don’t need afterward. I head to a trusted revoker and wipe anything related to the claim contracts.
- Move to my vault (if holding). If I’m keeping tokens, I move them from my burner to my vault address. I confirm the receiving address on the hardware screen and label the transfer.
- Label everything. I tag the claim, transfers, and sales with clear notes (project name, reason, link to announcement). Future me appreciates neat breadcrumbs when tax season hits.
- Archive the proof. I save the announcement link, snapshot post, claim page URL, and a PDF of any eligibility result. I also export a CSV of the claim transaction from the explorer and toss it into my “Airdrops” folder.
That’s the whole loop: verify, record, execute, archive. It takes five extra minutes and saves hours of detective work later.
Quick question for you: want a one-page checklist you can keep open while claiming—plus the exact tools I keep in my “safe-mode” browser? You’ll get it in the next section, and it’ll shave real time off every claim you make.
Quick checklists and a safe-toolkit you’ll actually use
Here’s the no-fluff reference I keep open when I’m claiming. It’s short on theory, long on “do this now” steps. Bookmark it and keep it next to your wallet.
Pre-claim checklist (at a glance)
- Confirm the official link
- Match the domain on the project’s website, X bio, and docs. If the website is project.org, the claim should live on the same domain or a clearly linked subdomain.
- Check that the X handle is the verified one; scroll back to the original announcement, not a repost.
- Open the site on desktop first. Mobile-only “QR claim” pages are often traps.
- Eligibility, snapshot, and window
- Run the official eligibility checker (if any). If there isn’t one, wait for it to be posted from official channels.
- Note the claim window. If it’s closed or not started, anything telling you to “claim now” is suspect.
- Wallet and chain setup
- Use a burner wallet for the claim. Keep your vault out of sight.
- Switch to the correct chain and top up gas. If you need gas on an L2, use the official bridge:
- Arbitrum Bridge
- Optimism Bridge
- Base Bridge
- Add RPCs safely with Chainlist (verify chain IDs)
- Simulate before you sign
- Use a wallet with built-in simulation (e.g., Rabby) or run it via Tenderly Simulator.
- Look for unexpected calls like setApprovalForAll, permit, or unlimited spend approvals for stablecoins you didn’t intend to touch.
- Signatures sanity-check
- Read the human-readable summary. If your wallet can’t show it clearly, switch to one that can or paste the calldata into a simulator.
- Cap any allowance to what you actually need (or zero if it’s a pure claim). Avoid “unlimited” whenever possible.
- Phishing checks
- Run the URL through a phishing guard extension like ScamSniffer or Wallet Guard.
- On the block explorer, verify the contract is verified, not freshly deployed by a random EOA, and ideally referenced in the project’s docs.
Why it matters: Approval-phishing drainers stole hundreds of millions from users in 2023–2024, according to ScamSniffer’s annual report and industry risk updates. Most losses started with a single reckless signature.
Post-claim cleanup
- Revoke approvals
- Immediately review and revoke on:
- Revoke.cash
- Etherscan Token Approvals (and equivalents on L2 explorers)
- DeBank (Approvals tab)
- Target the claim contract and any token spenders you don’t recognize.
- Immediately review and revoke on:
- Move what matters
- Transfer valuable tokens to your vault. Confirm the receiving address on your hardware screen before sending.
- If you’re keeping some in the burner for future tasks, set a small daily limit and label it clearly.
- Log the essentials
- Date/time, chain, contract link, tx hash, tokens received, USD value at receipt.
- Paste links: official announcement, docs page, and snapshot/eligibility post for future reference.
- Tools that make this painless: a simple Google Sheet, Rotki (self-hosted), or Koinly for tax tagging.
- Unclutter your surface
- Disconnect stale WalletConnect sessions. Remove app/site permissions you won’t use again.
- Mute or leave noisy quest servers. Fewer distractions, fewer mistakes.
- Rotate if needed
- If the claim required odd approvals or you felt uneasy, retire that burner and spin a new one.
Handy tools and habits
- Explorers (bookmark the right ones)
- Etherscan, Arbiscan, Optimistic Etherscan, BaseScan, PolygonScan, BscScan, and Blockscout for many smaller chains.
- Use the “Comments” and “Contract Creator” tabs to spot community warnings and sketchy deployers.
- Approvals and simulation
- Revoke.cash, Etherscan Approvals, DeBank for fast cleanup.
- Tenderly for deep simulations; wallets like Rabby and MetaMask (with security alerts) show risky calls before you sign.
- Security add-ons
- ScamSniffer, Wallet Guard for phishing detection.
- Hardened browser profile: Brave or Firefox, separate profile for Web3, minimal extensions, uBlock Origin for pop-up junk.
- Hardware and backups
- Buy only from official sites: Ledger, Trezor. Verify device authenticity on arrival.
- Never type your seed into a website or “support” chat. Ever.
- Bridges and RPC sanity
- Use official bridges listed above. Avoid random “gas top-up” sites.
- Add RPCs from Chainlist and pin the verified ones.
- Record-keeping and taxes
- Tag airdrop receipts the day you claim. Note USD value at that block time using the explorer price widget or a price oracle.
- Export CSVs quarterly instead of panicking in April.
Mini-win example: I once caught a fake “claim” because the transaction preview showed an approval for USDC I didn’t need. Simulation flagged it in red; I closed the tab, checked the handle, and realized the link came from an impostor account created that week. One minute of simulation saved a wallet.
Wrap-up and next steps
Airdrops can be great, but only if safety is step one, not an afterthought. Run the pre-claim list, keep your burner clean, revoke aggressively, and log what happens. That’s the boring routine that protects your upside.
If you found this useful, bookmark it, share it with a friend who’s claiming today, and come back before your next one. I’ll keep posting fresh examples and safer workflows on https://cryptolinks.com/news/. Claim smart, keep your keys, and make it home with the bag.